Port Melbourne Sandridge Unrestored Maps and Photos
Step back in time with our collection of raw historic pieces, each one a potential candidate for digital restoration, printing, and framing. Should you find something captivating for your home, simply place the custom order through our Custom Order Product with our online store. Just copy the title below the desired item, and the listed prices already include the restoration fee. For further inquiries and customisation options, don't hesitate to reach out to us via our Contact form.
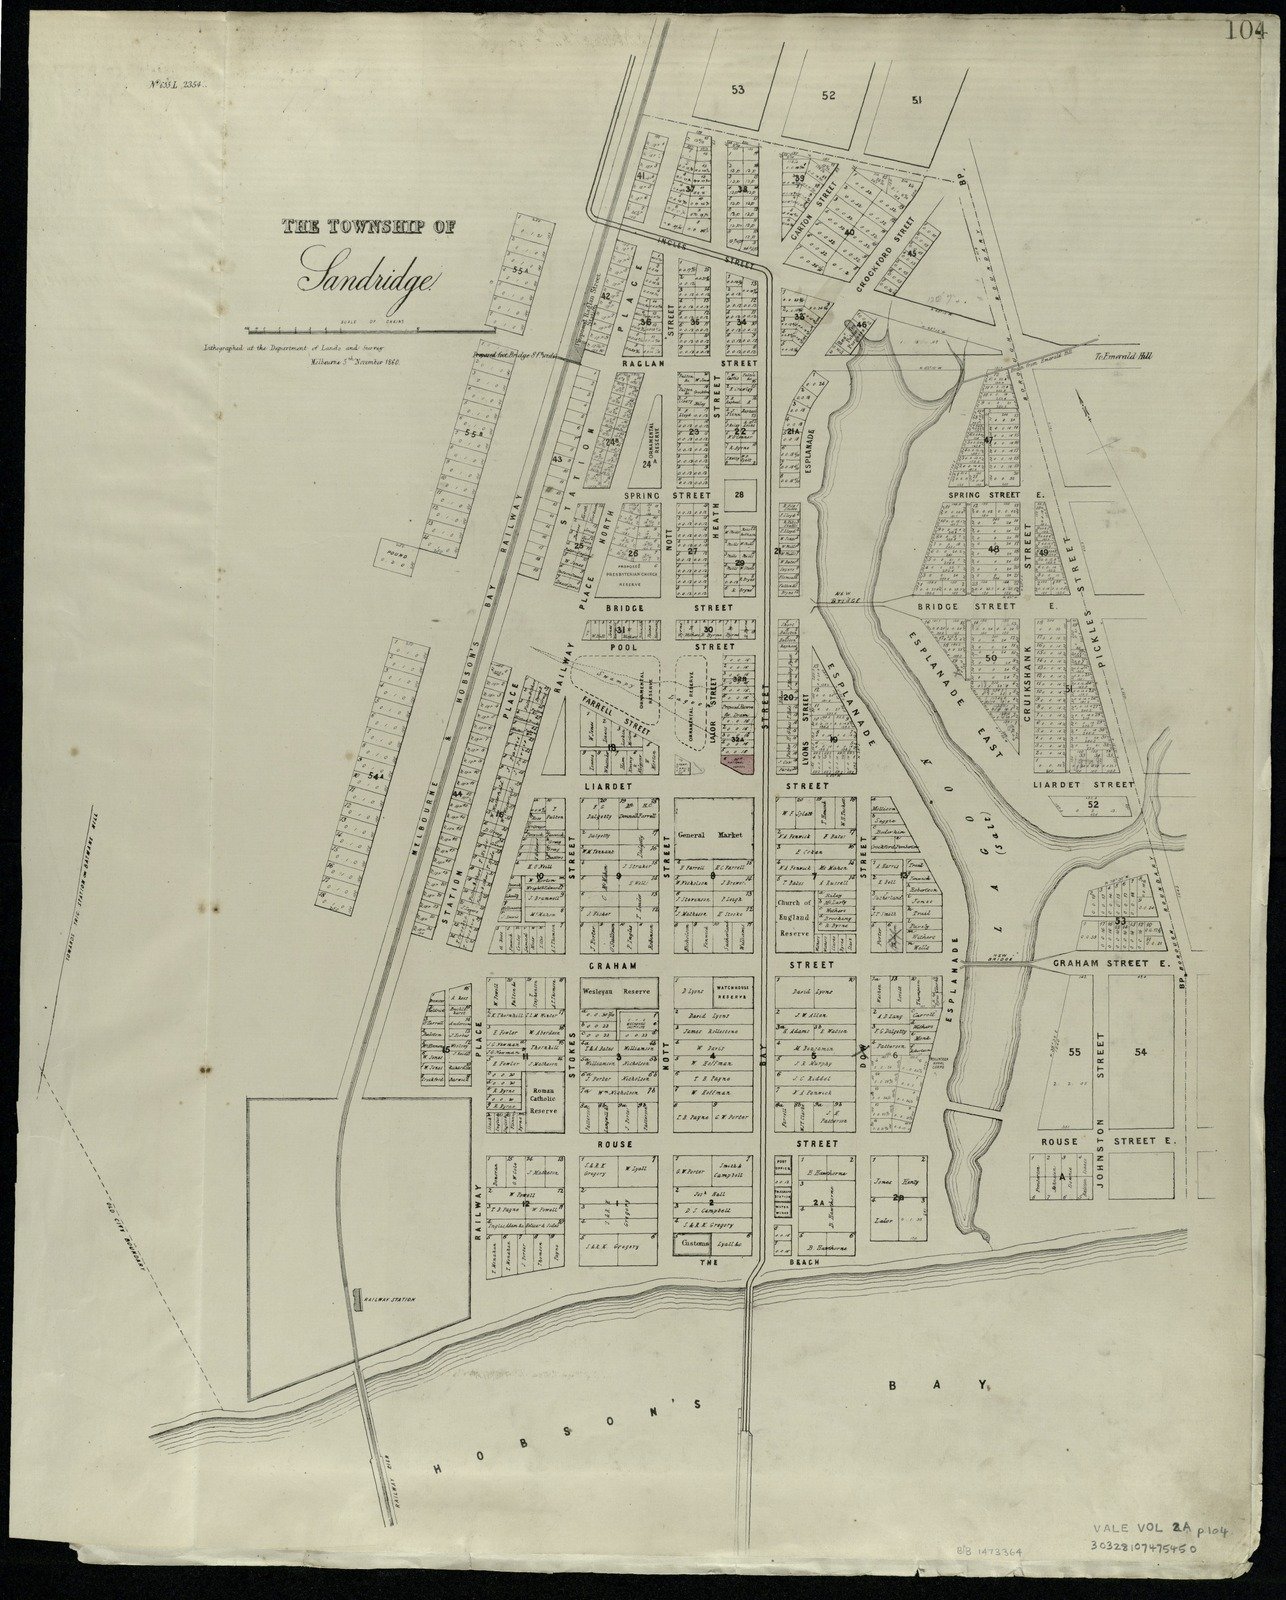
The township of Sandridge 1860

Plan of the city of Melbourne embracing Collingwood, South Melbourne and Sandridge 1854
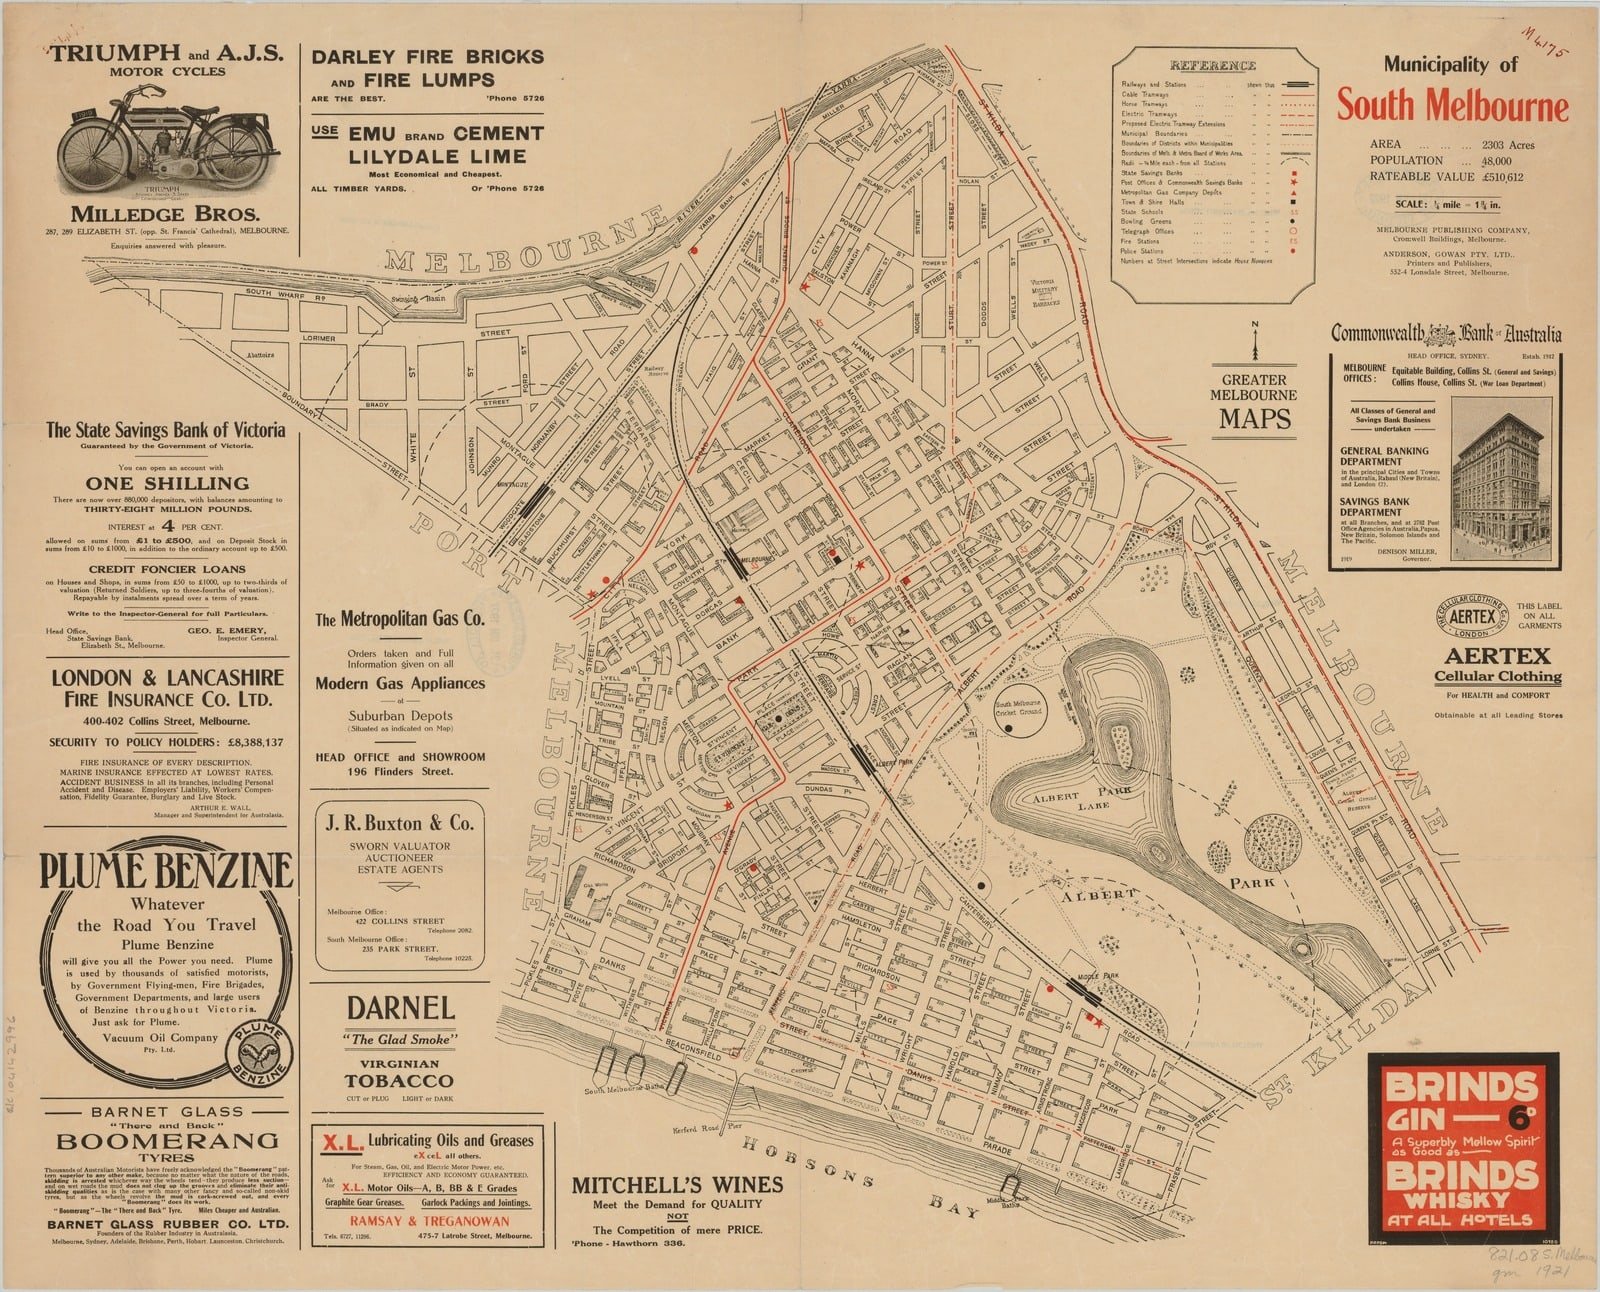
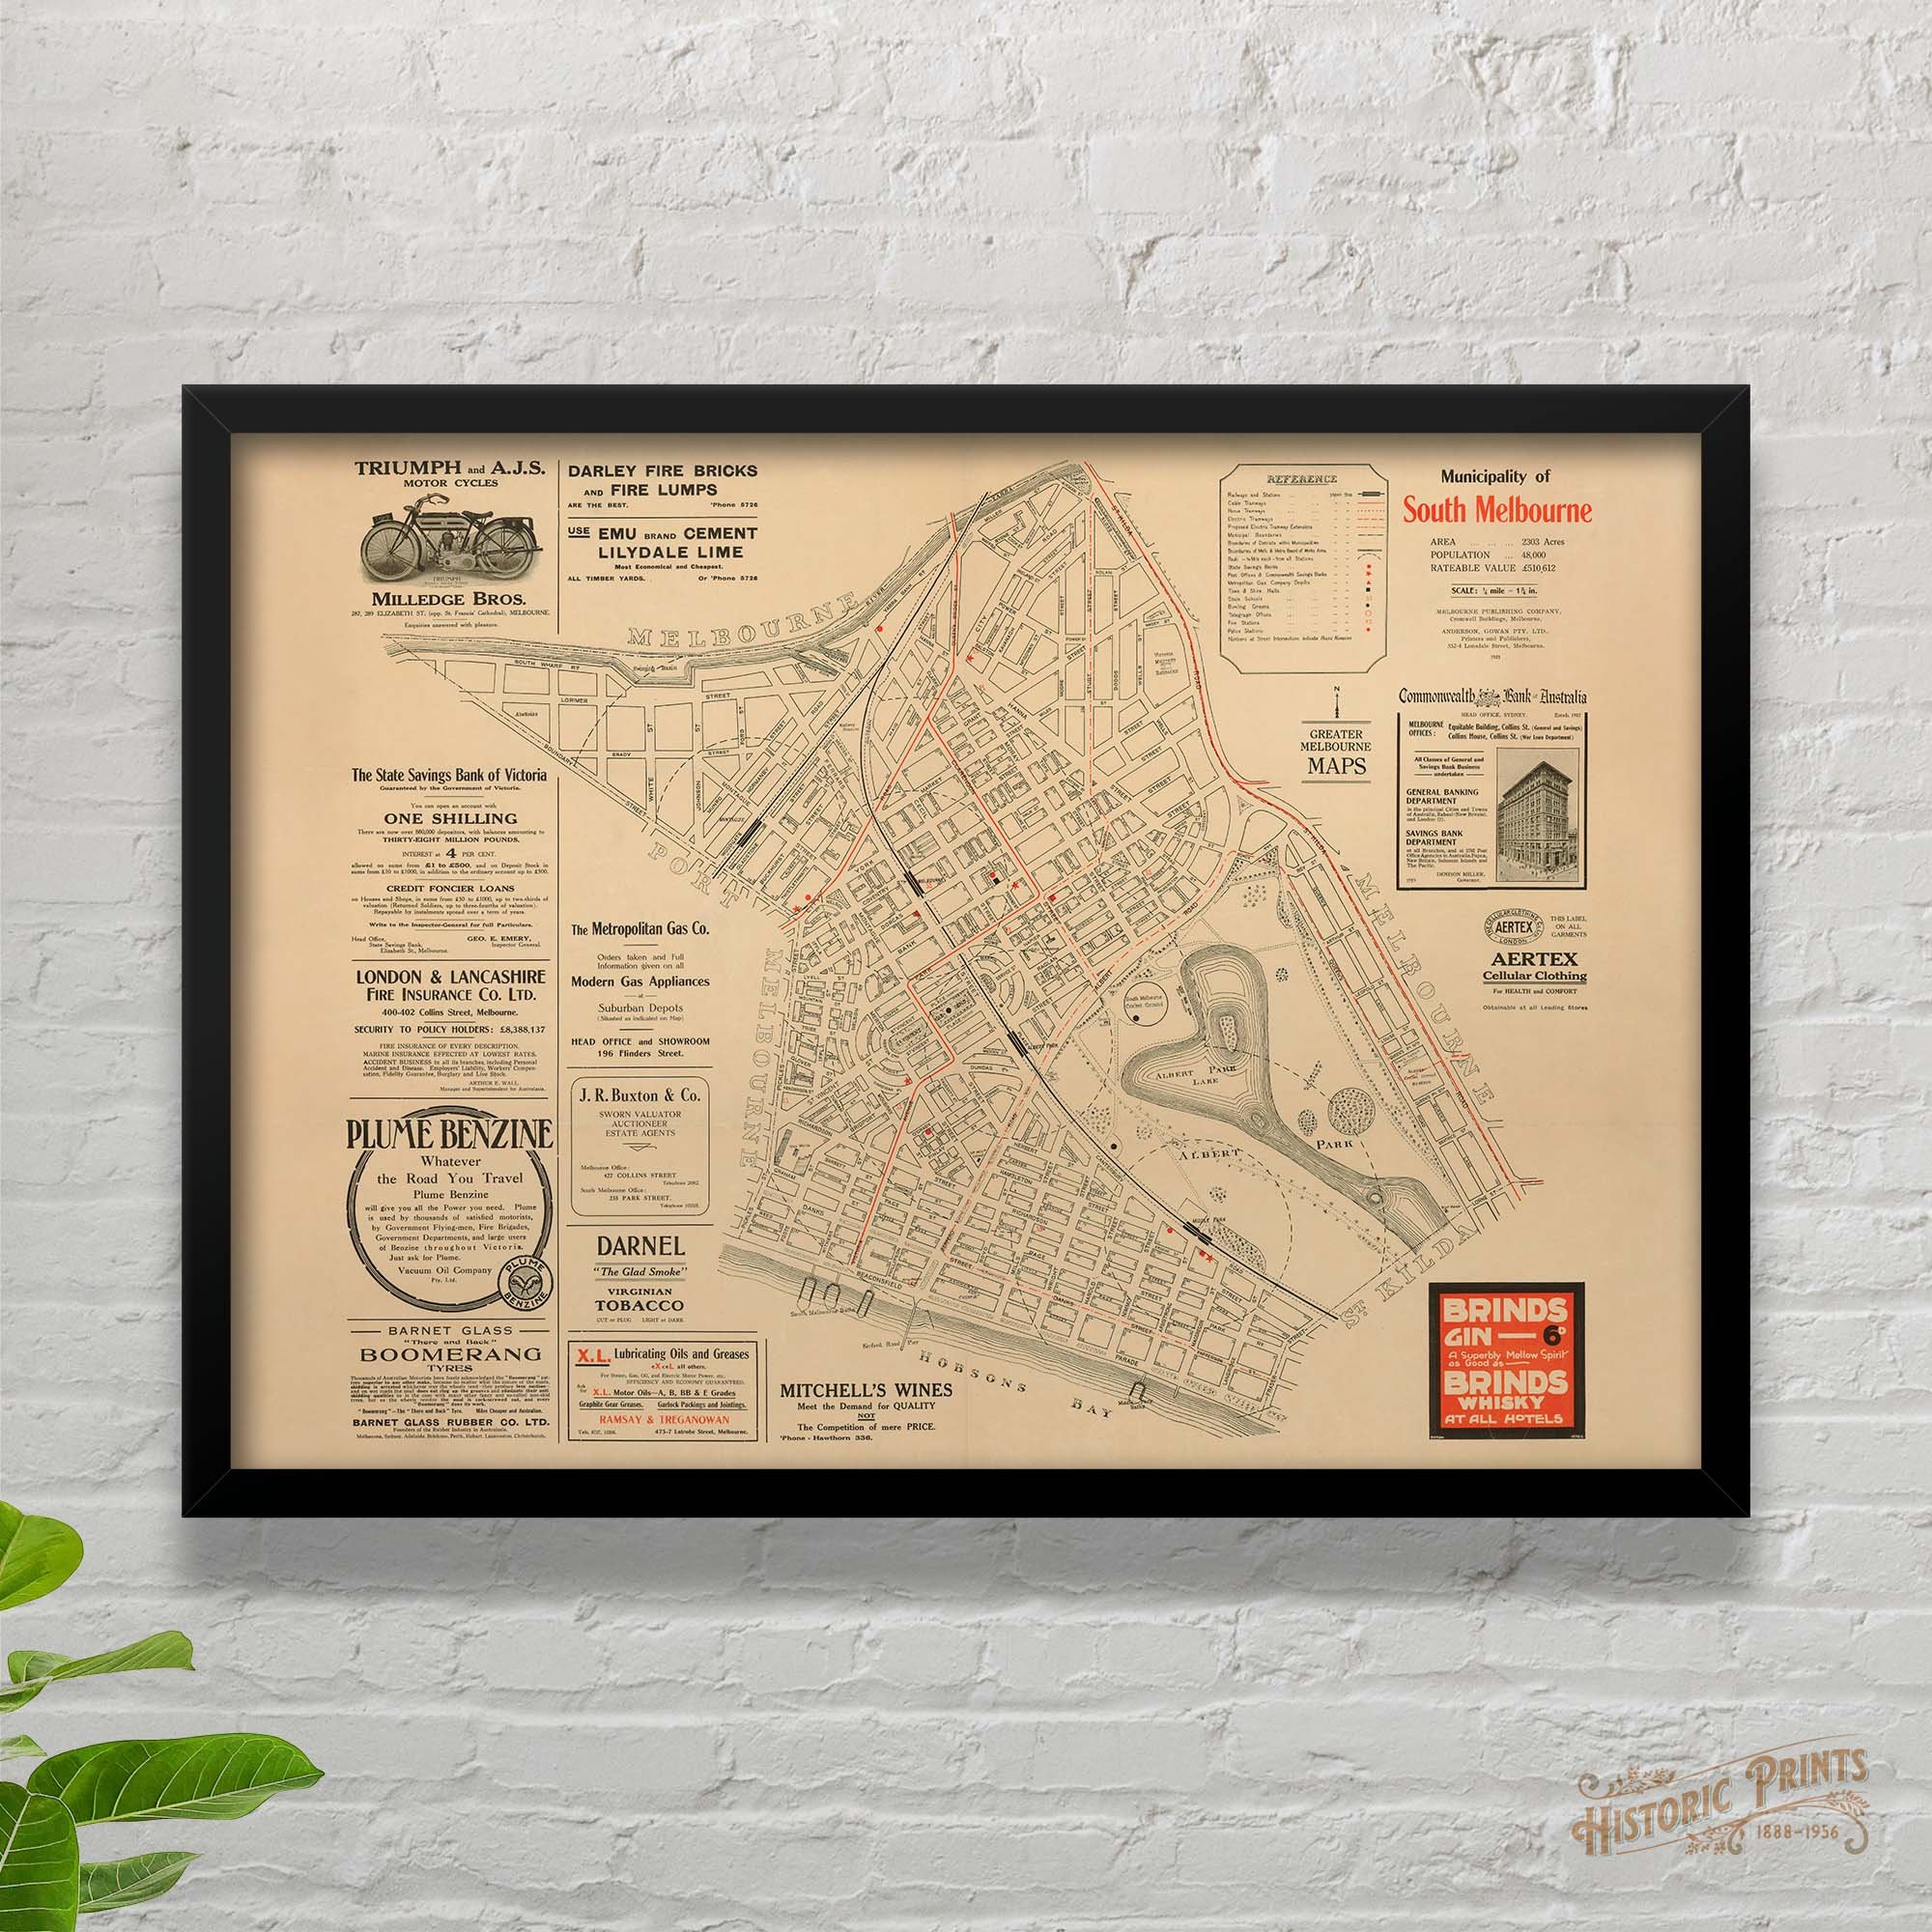
Municipality of South Melbourne 1921
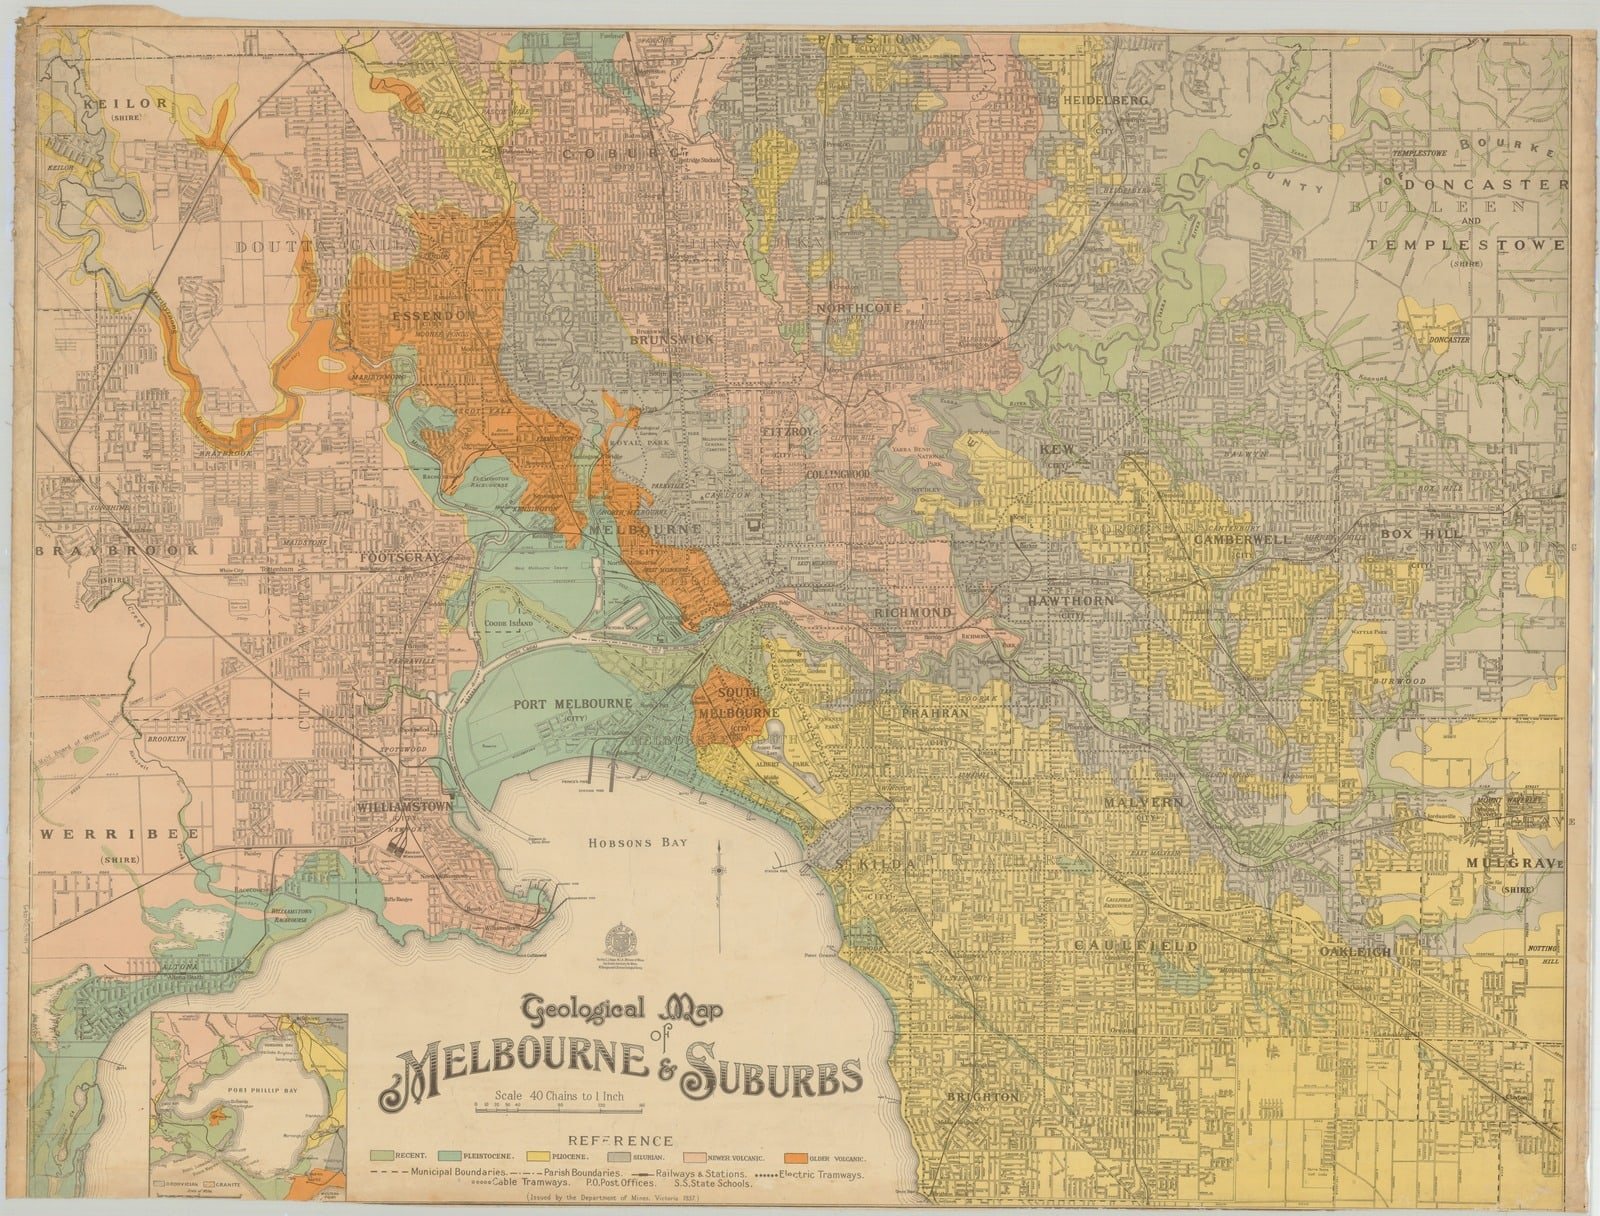
Geological map of Melbourne & suburbs 1937
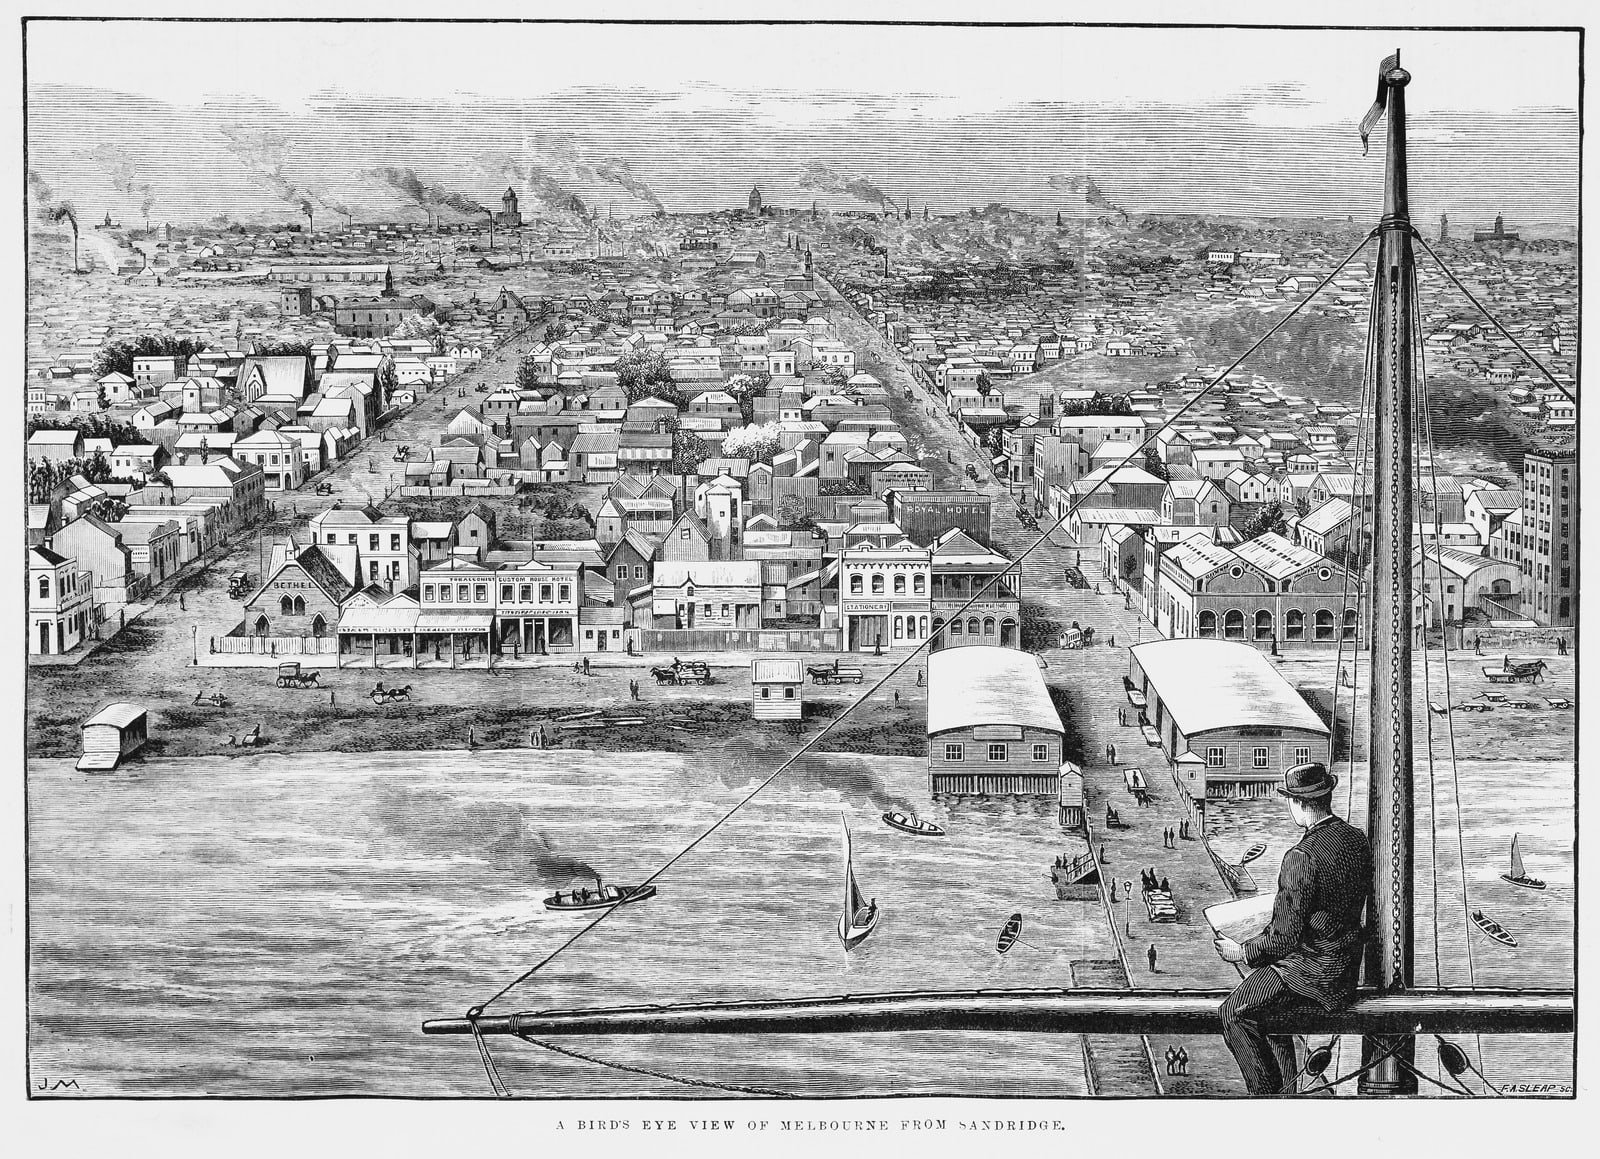
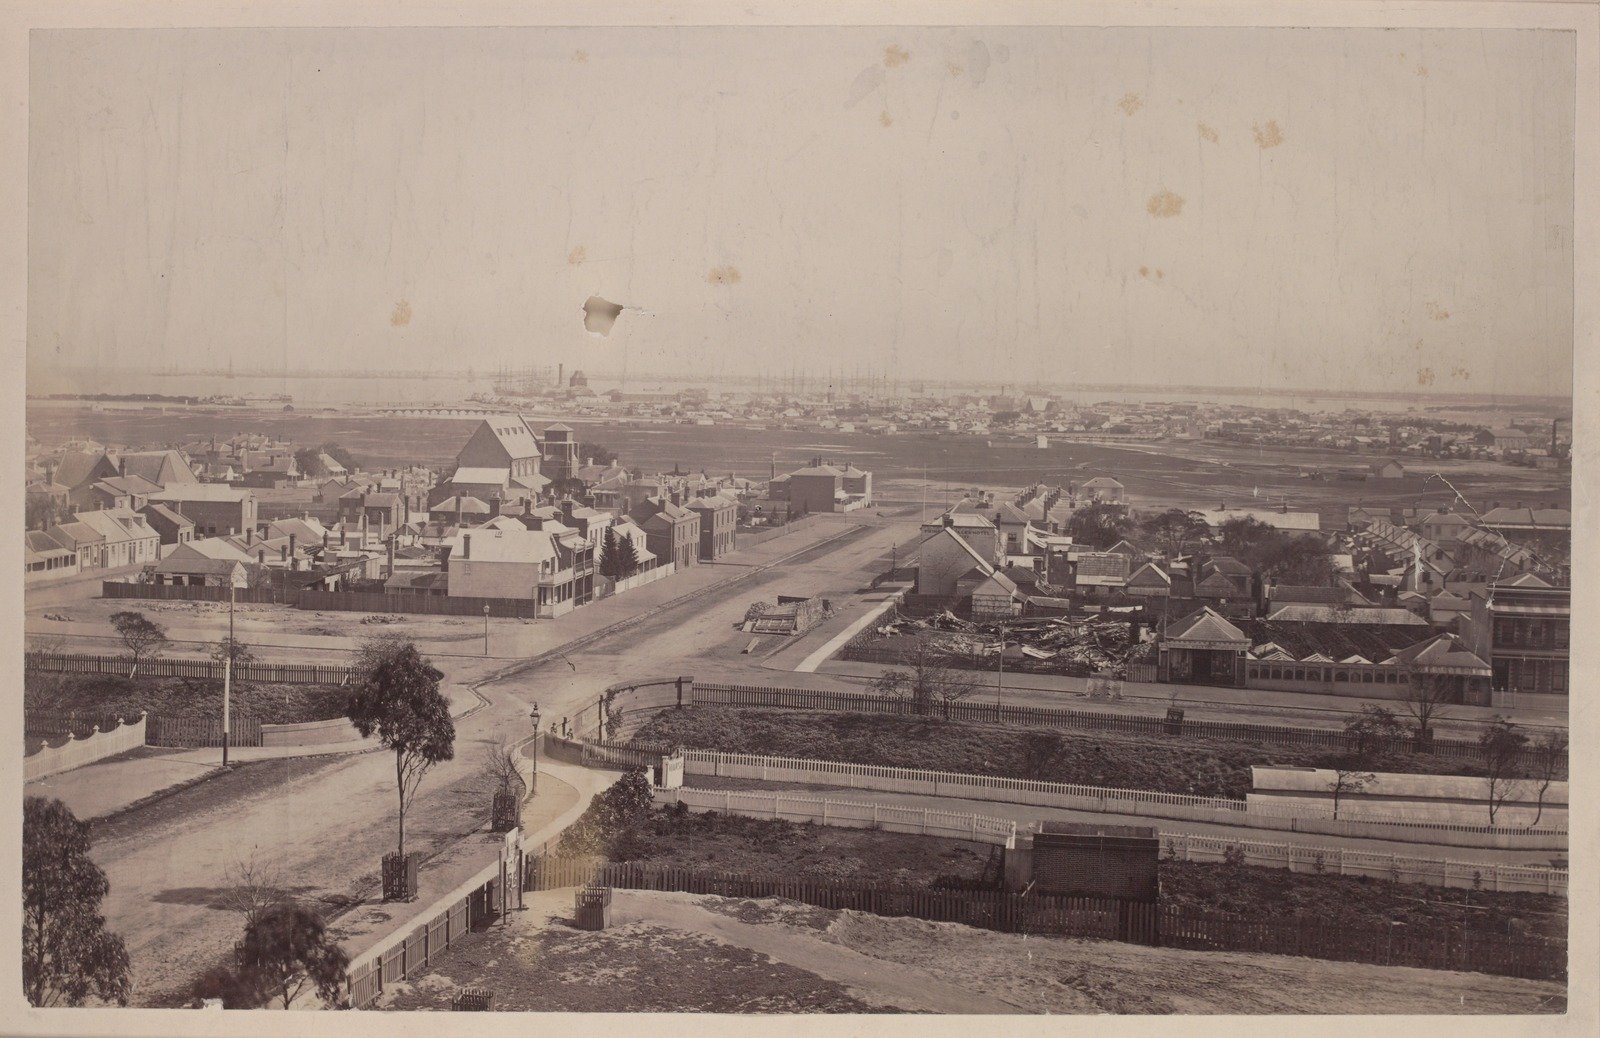
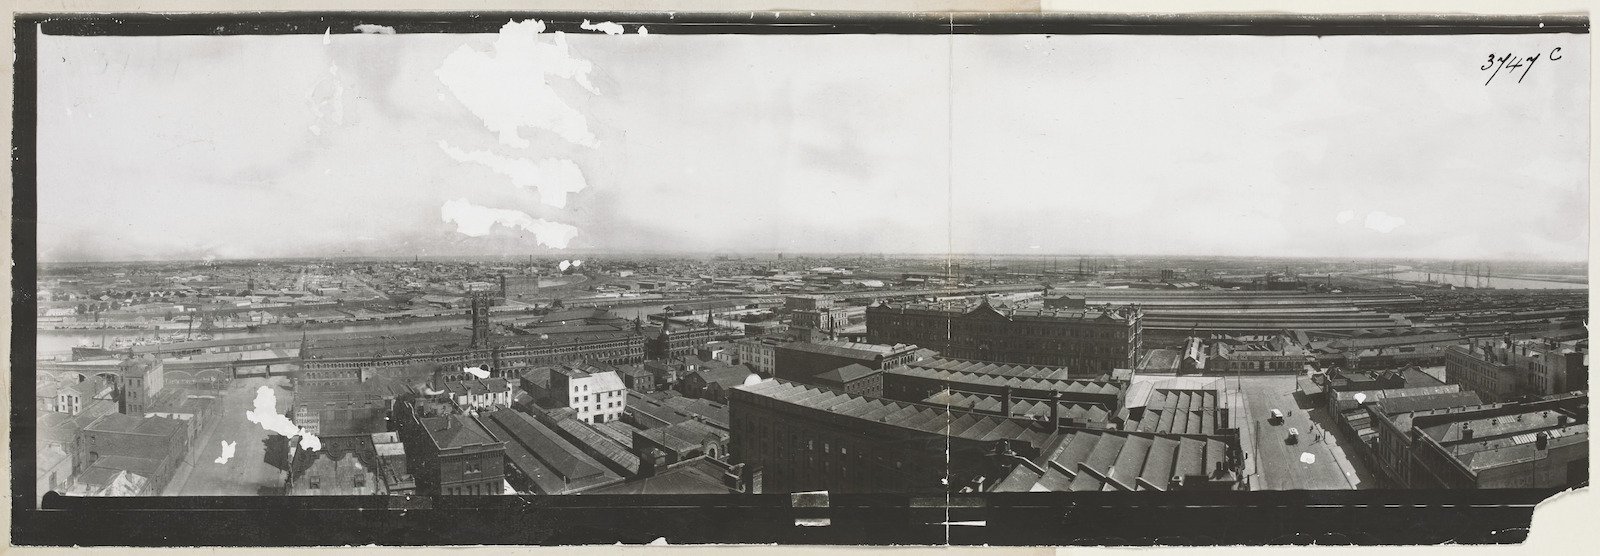
A Bird's-eye View Of Melbourne From Sandridge 1885
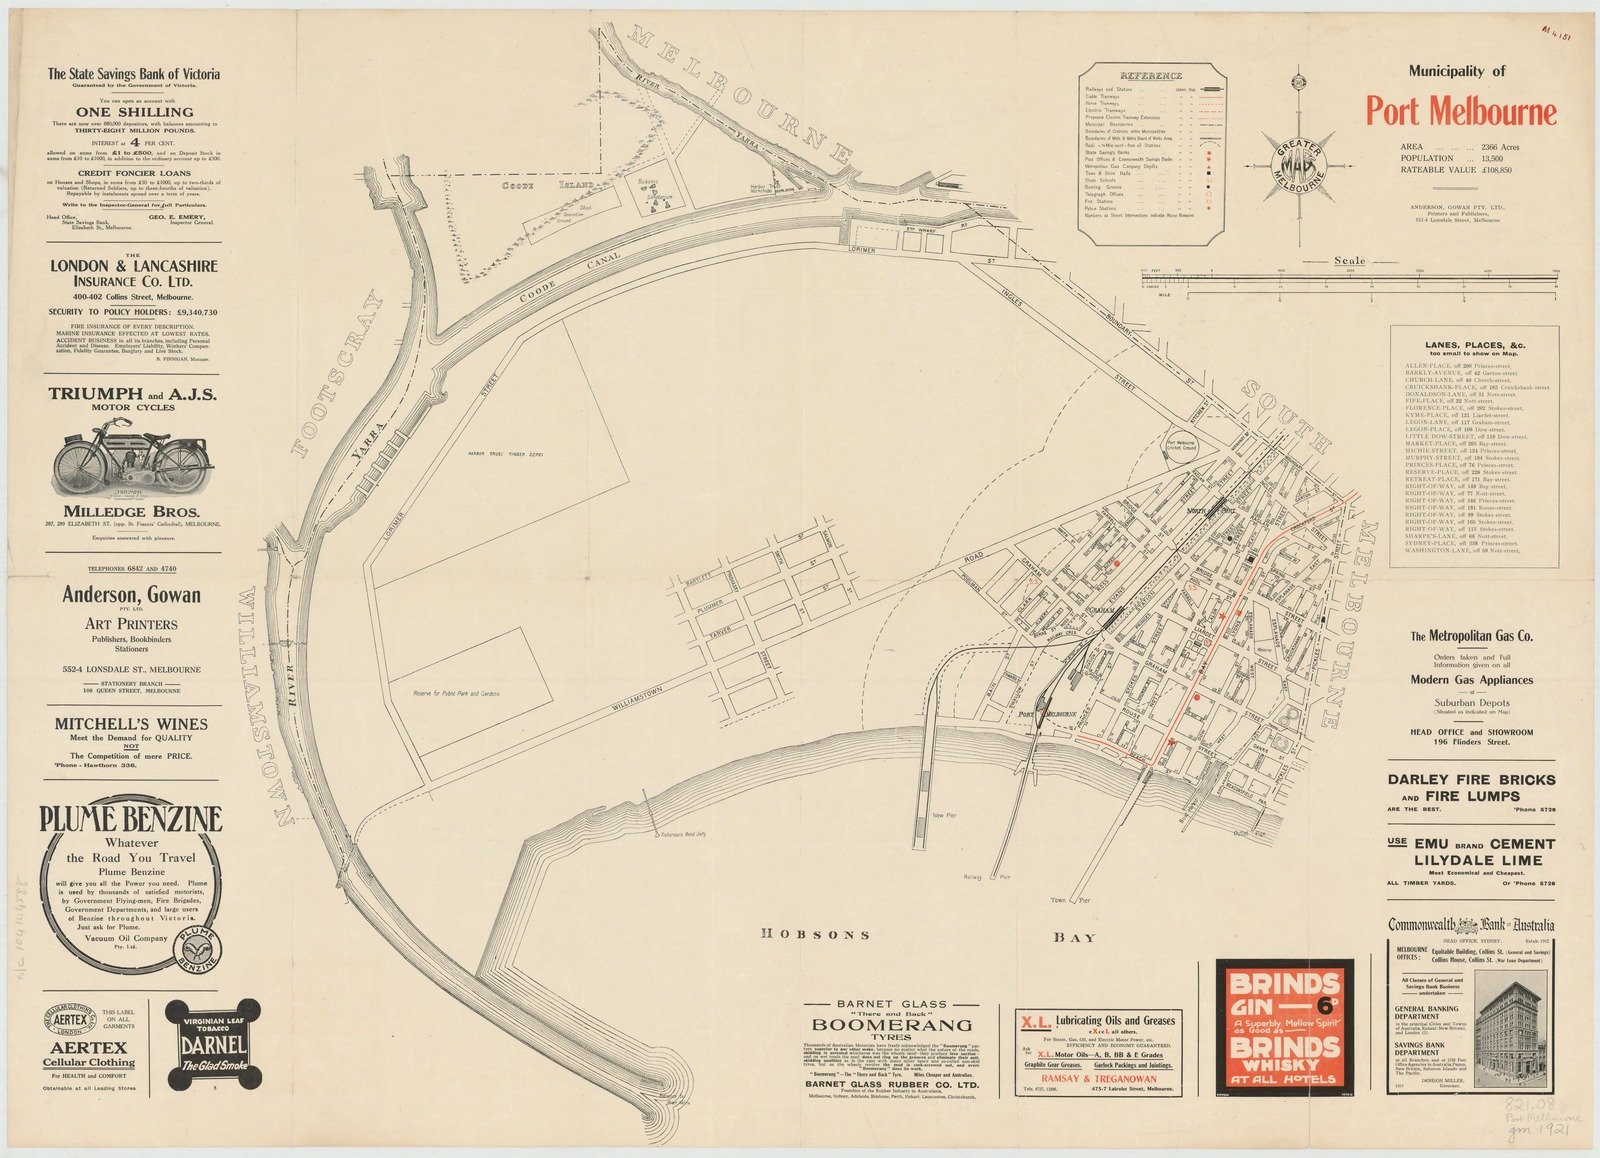
Municipality of Port Melbourne 1921

Melbourne Harbor Trust general plan shewing river and harbor improvements 1893
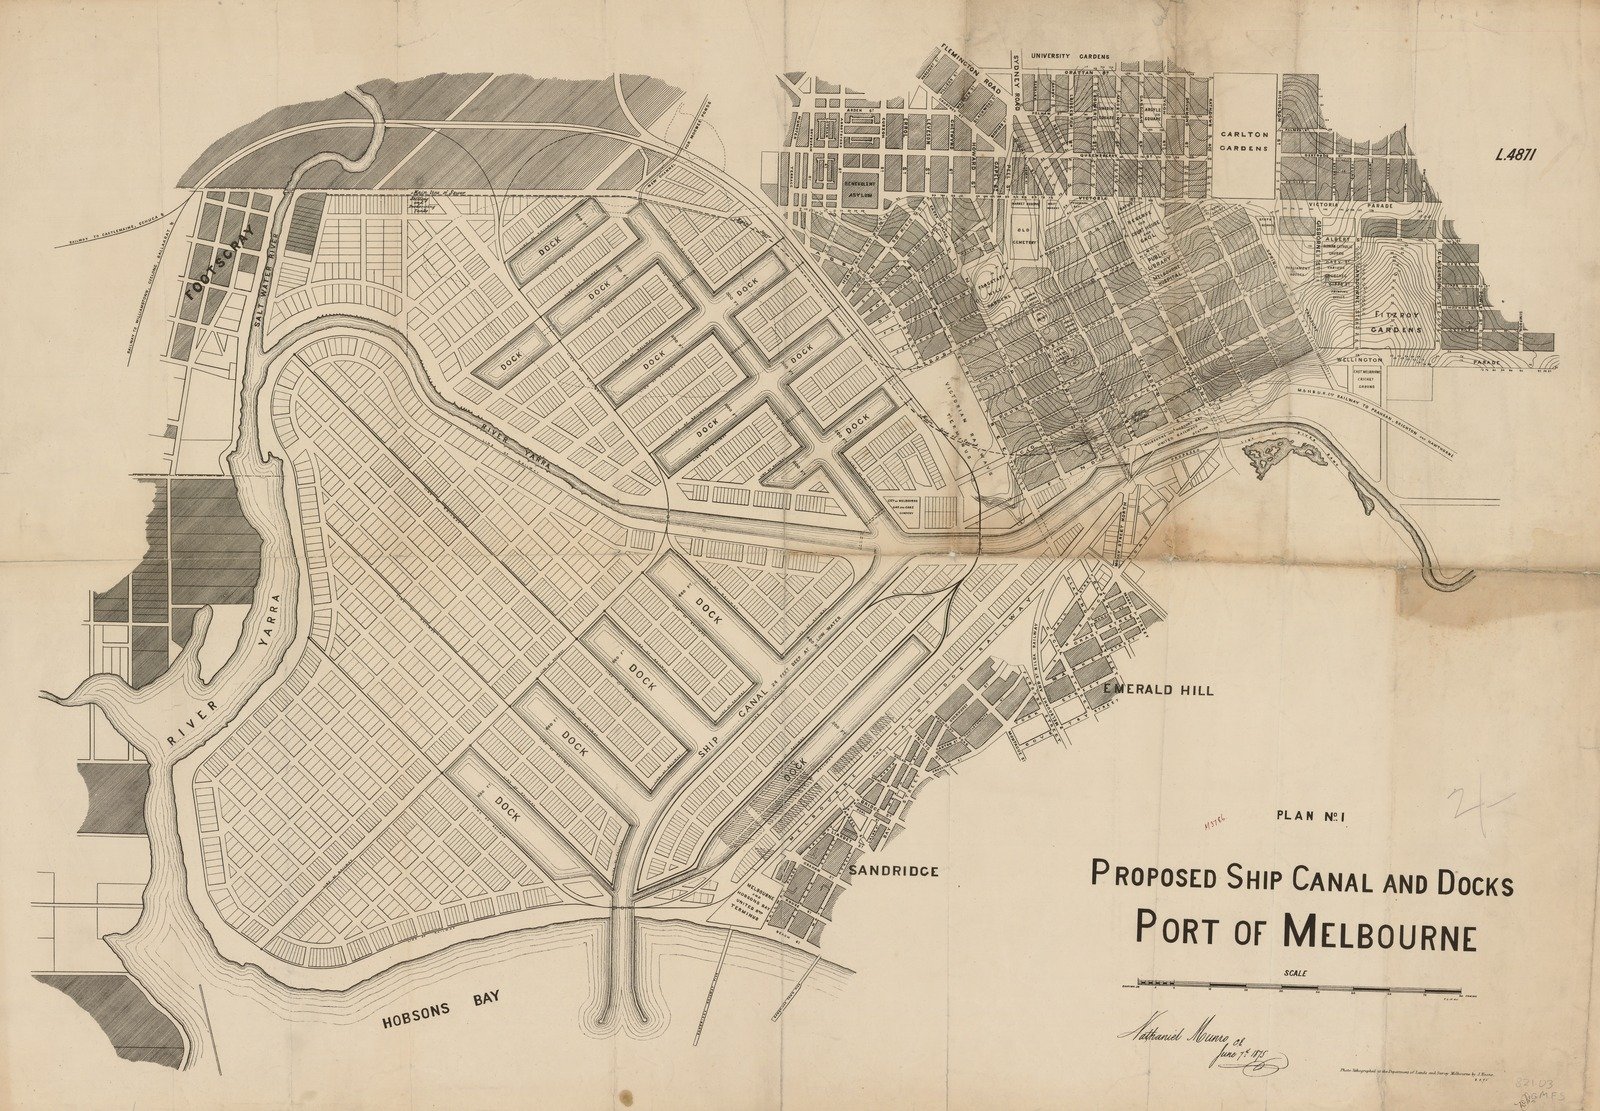
Proposed ship canal and docks, port of Melbourne 1875

Map of the settled district of 25 miles round Melbourne carefully compiled from maps in the Office of the Survey Department, Victoria 1854
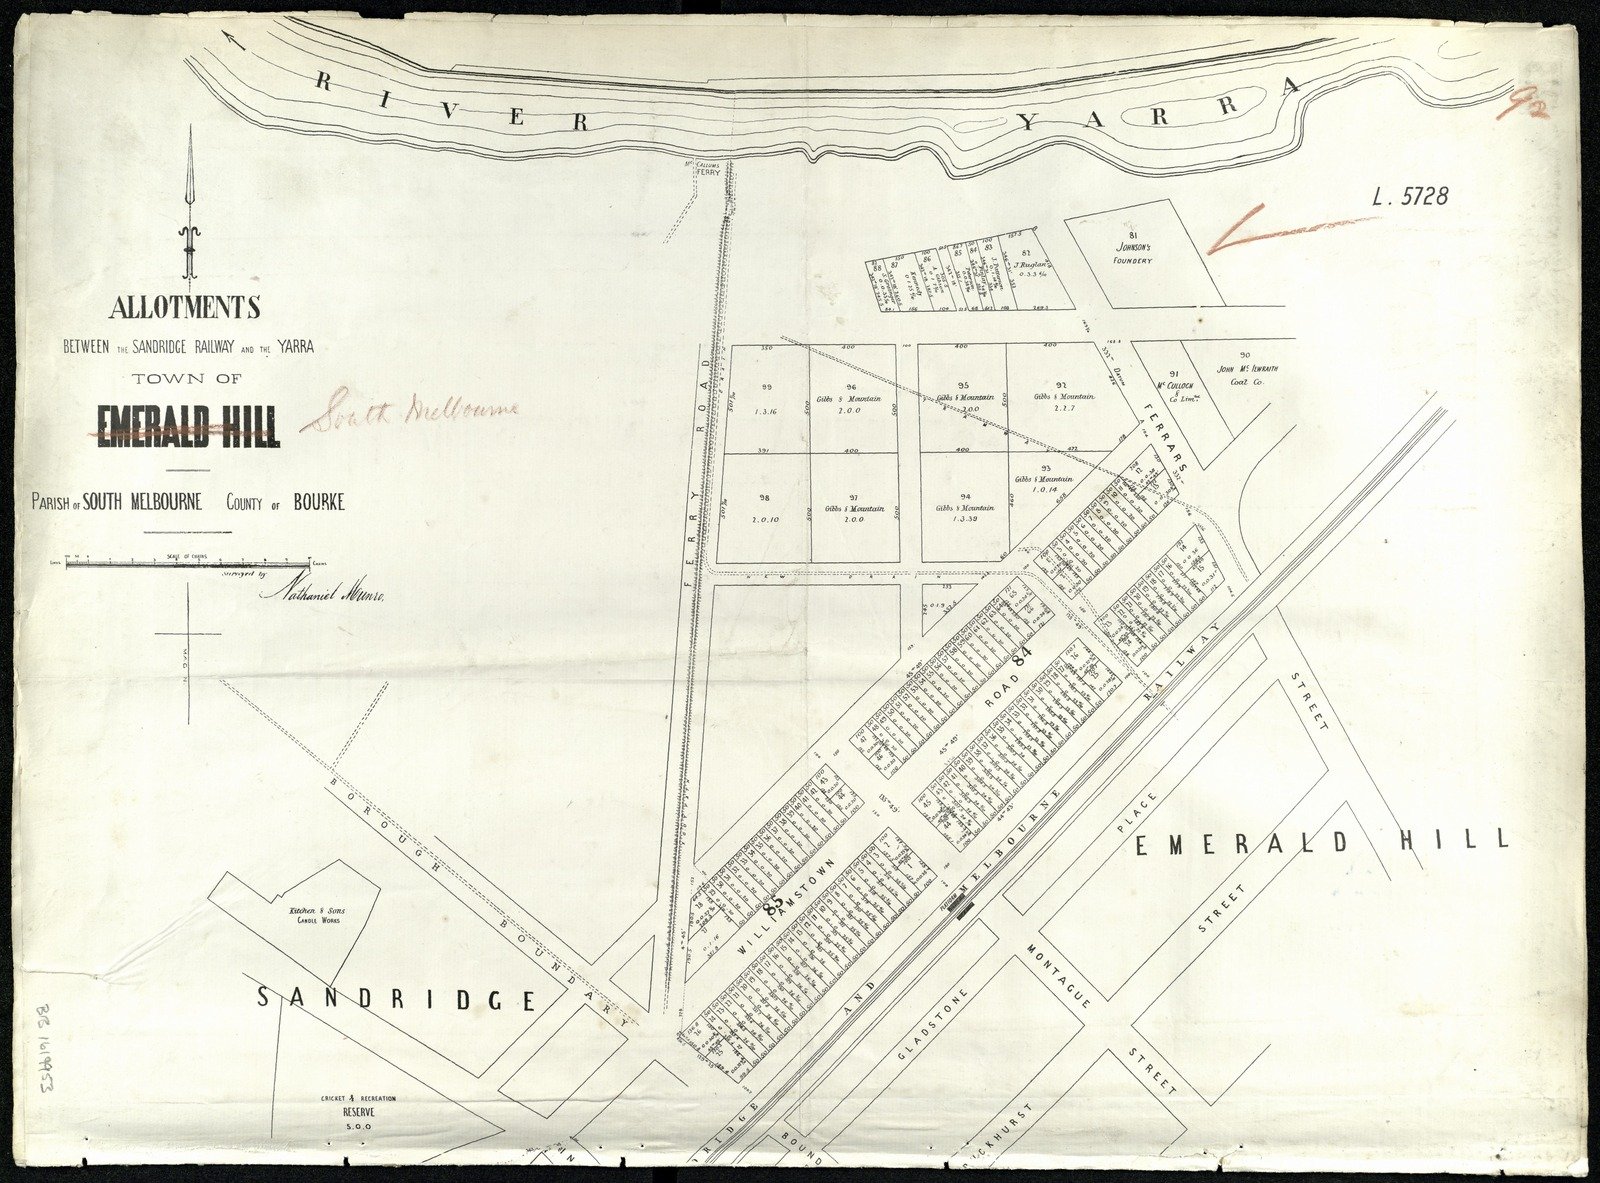
Allotments between the Sandridge railway and the Yarra 1879

Business frontages Sandridge Road 1885

City of South Melbourne, Parish of South Melbourne, County of Bourke 1890
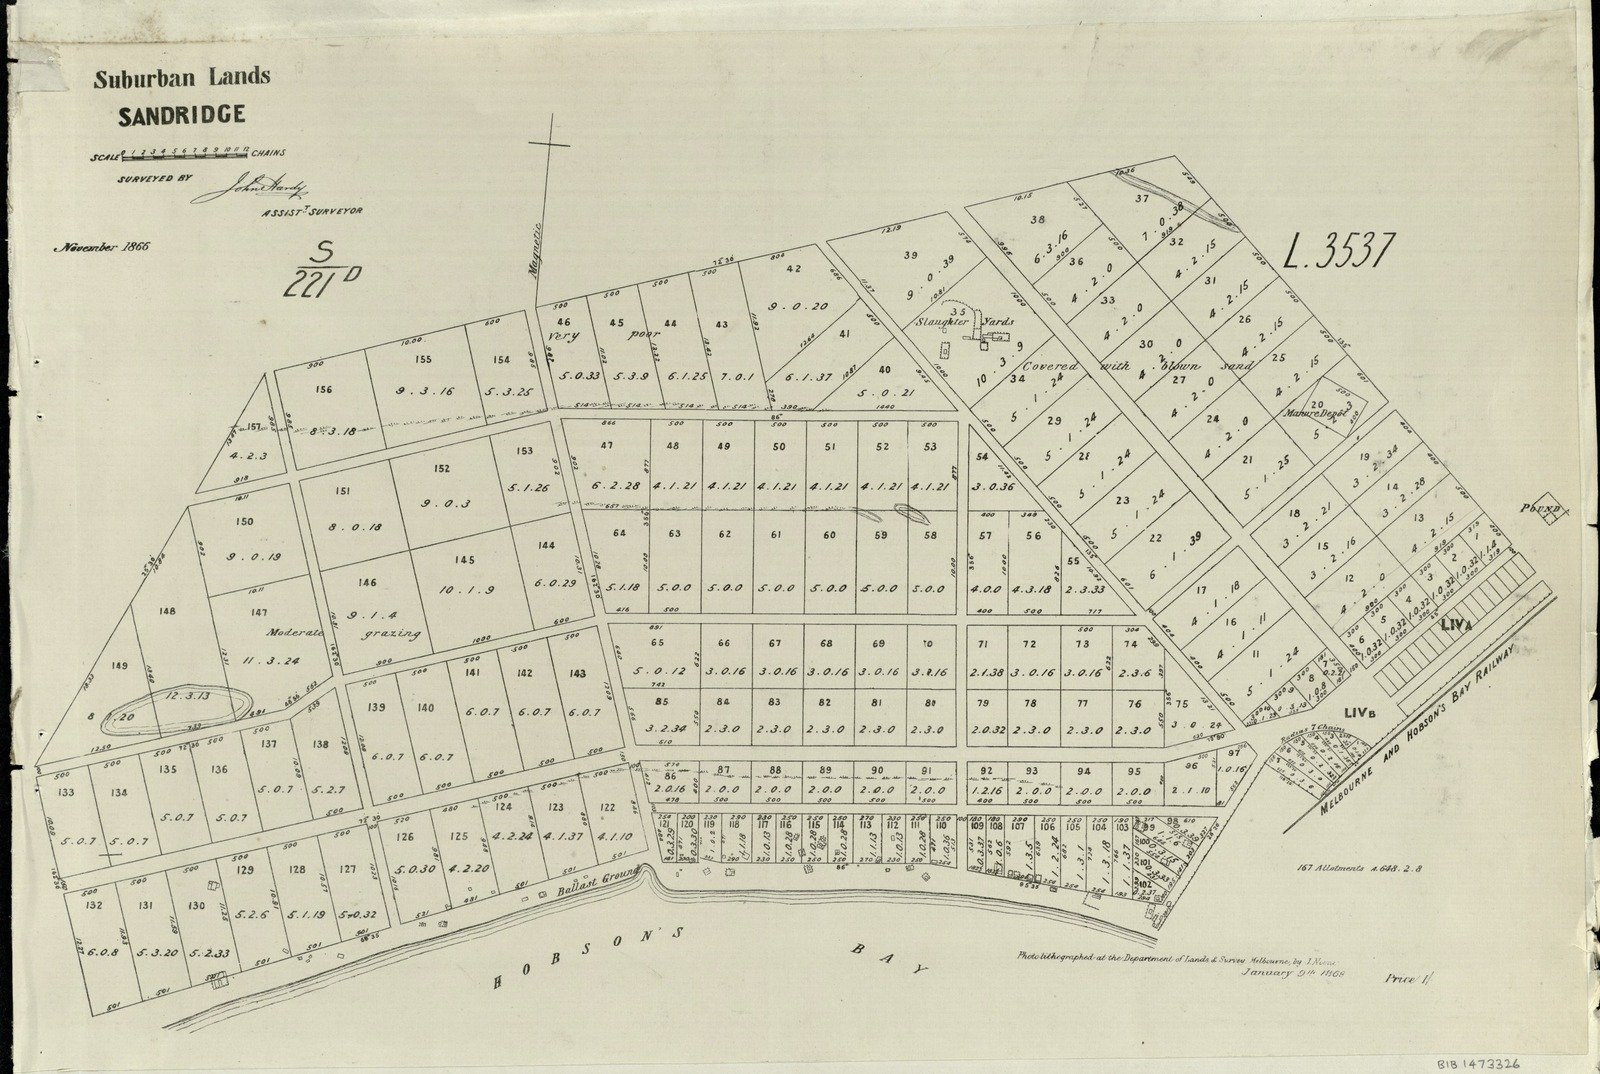
Early Crown Allotments - Suburban Lands Sandridge 1868

Flinders Street railway bridge (also known as Sandridge bridge) crossing the Yarra ca 1892-1900

Melbourne & Hobson's Bay Railway Coy's Pier. Sandridge Vic Railways 1905
Photograph of Emerald Hill and Sandridge, South Melbourne, ca.1875
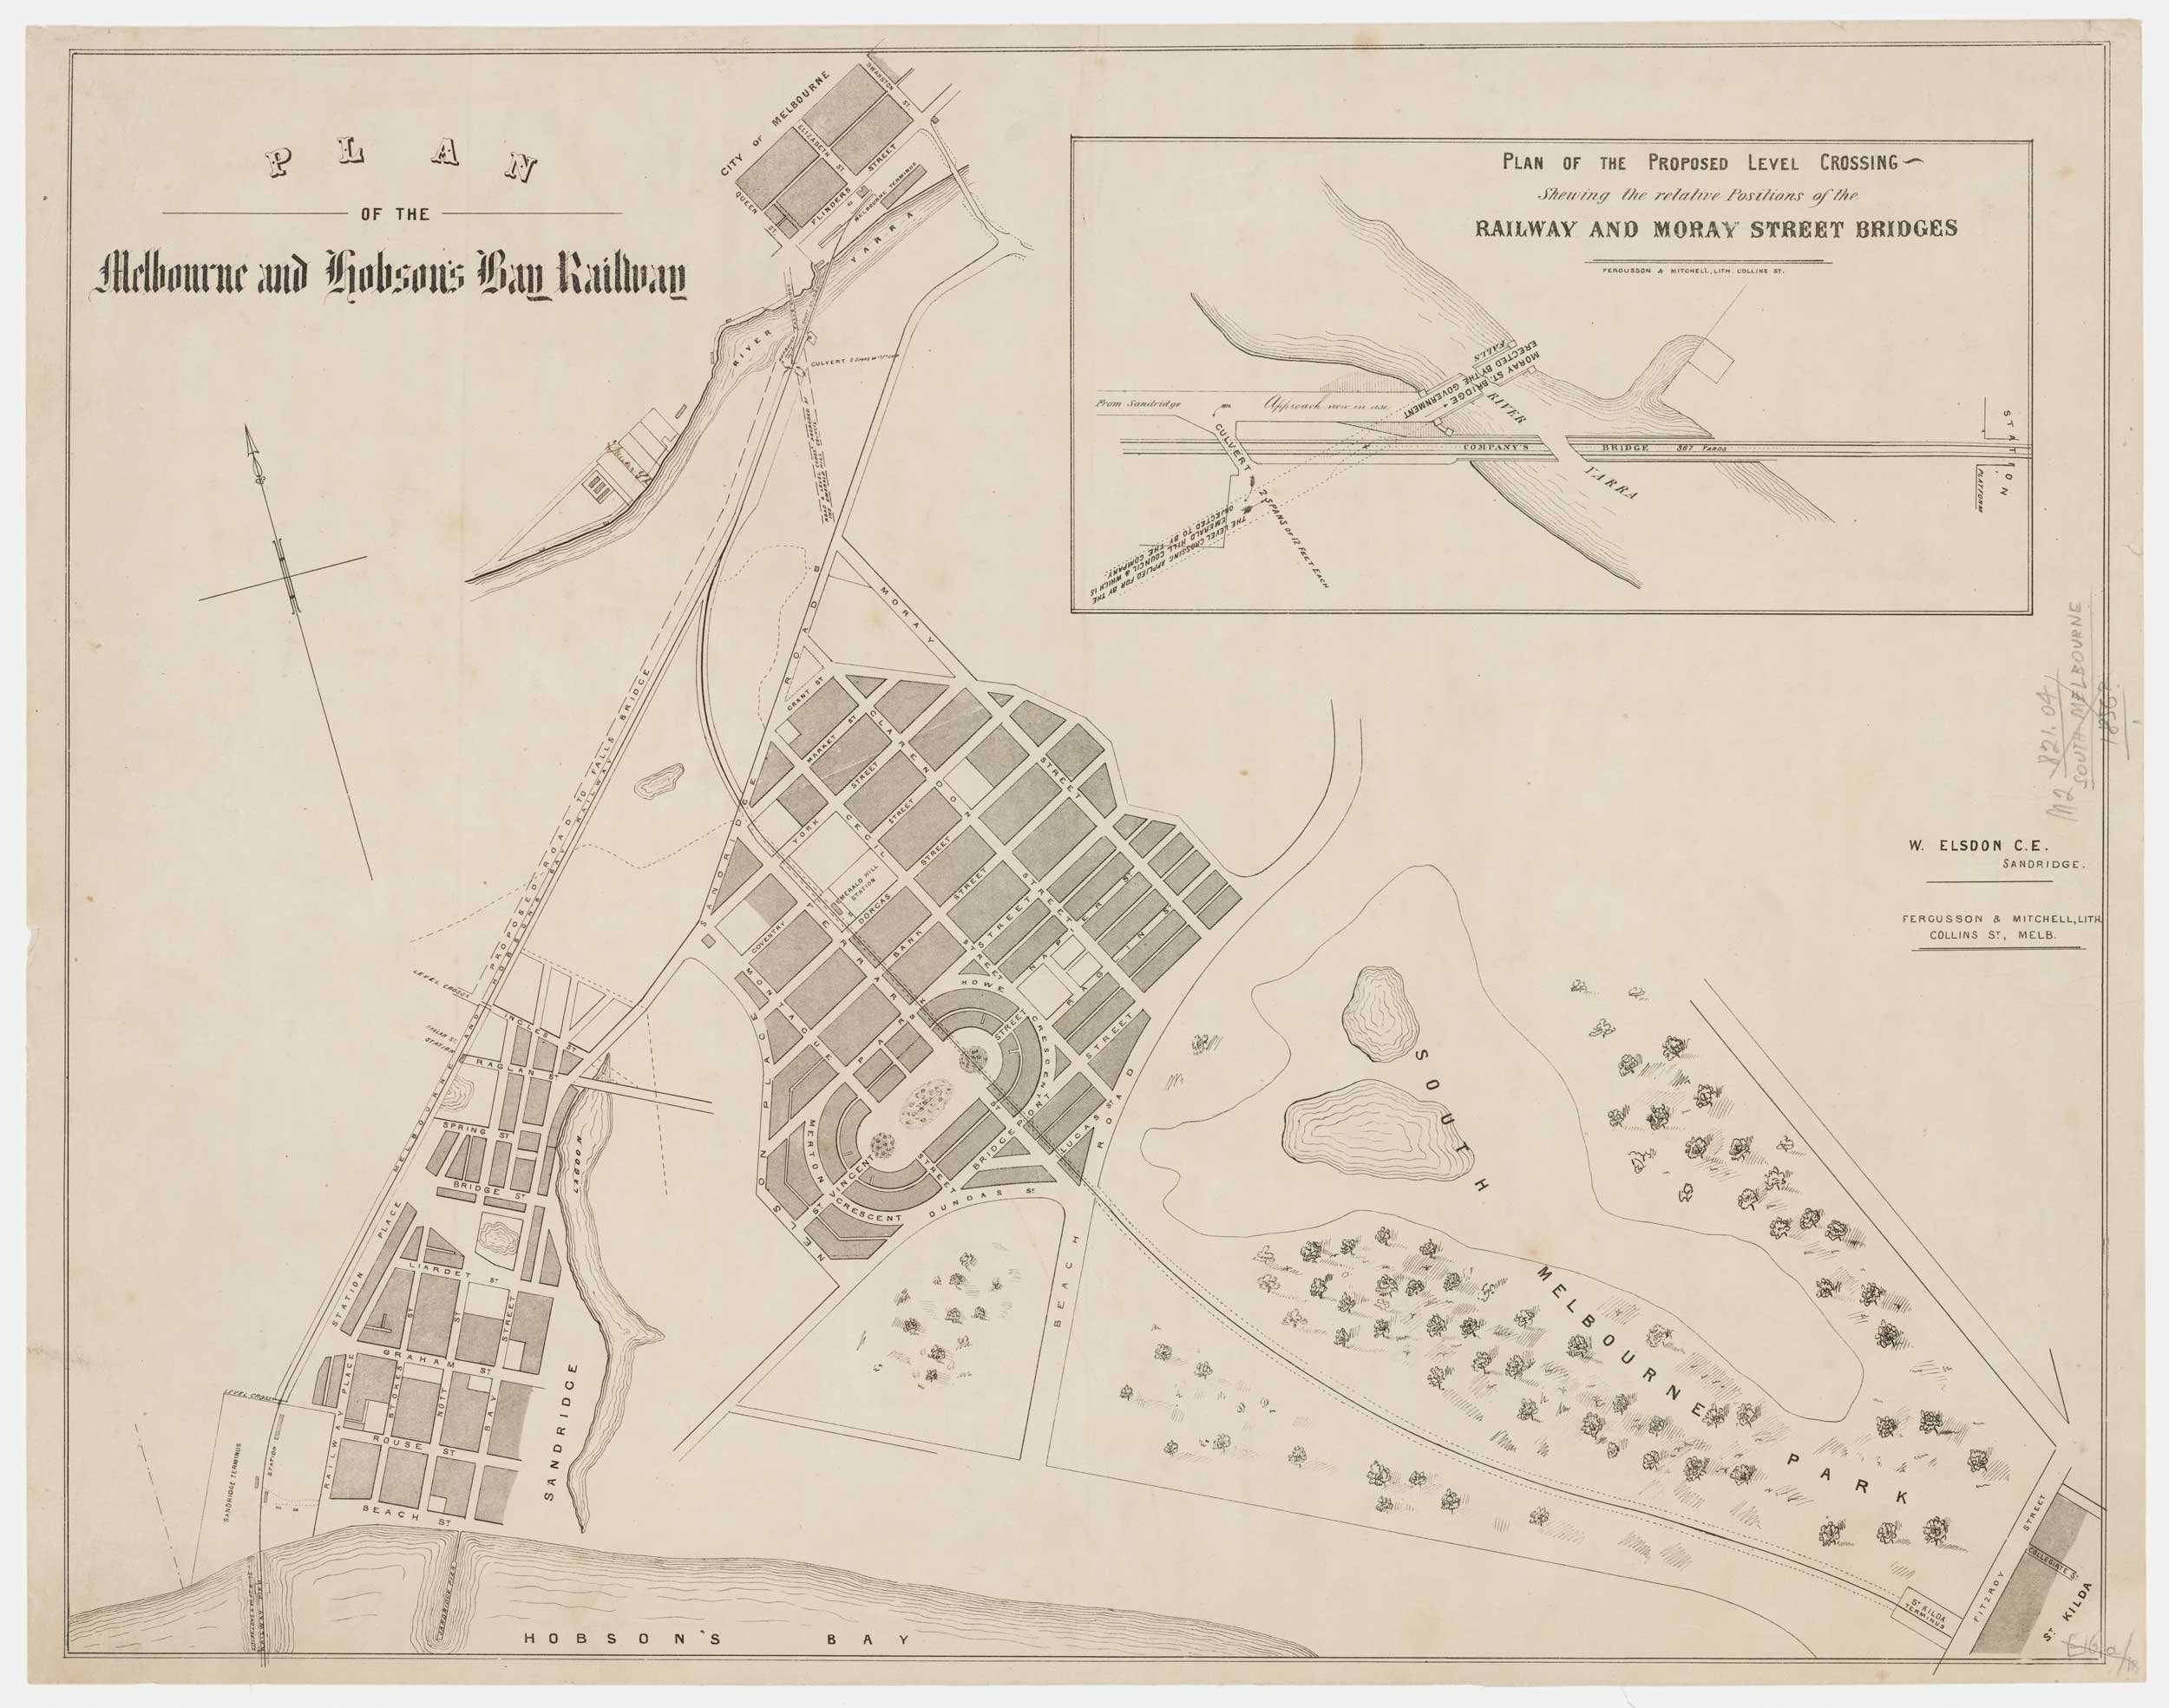
Plan of the Melbourne and Hobson's Bay Railway 1854
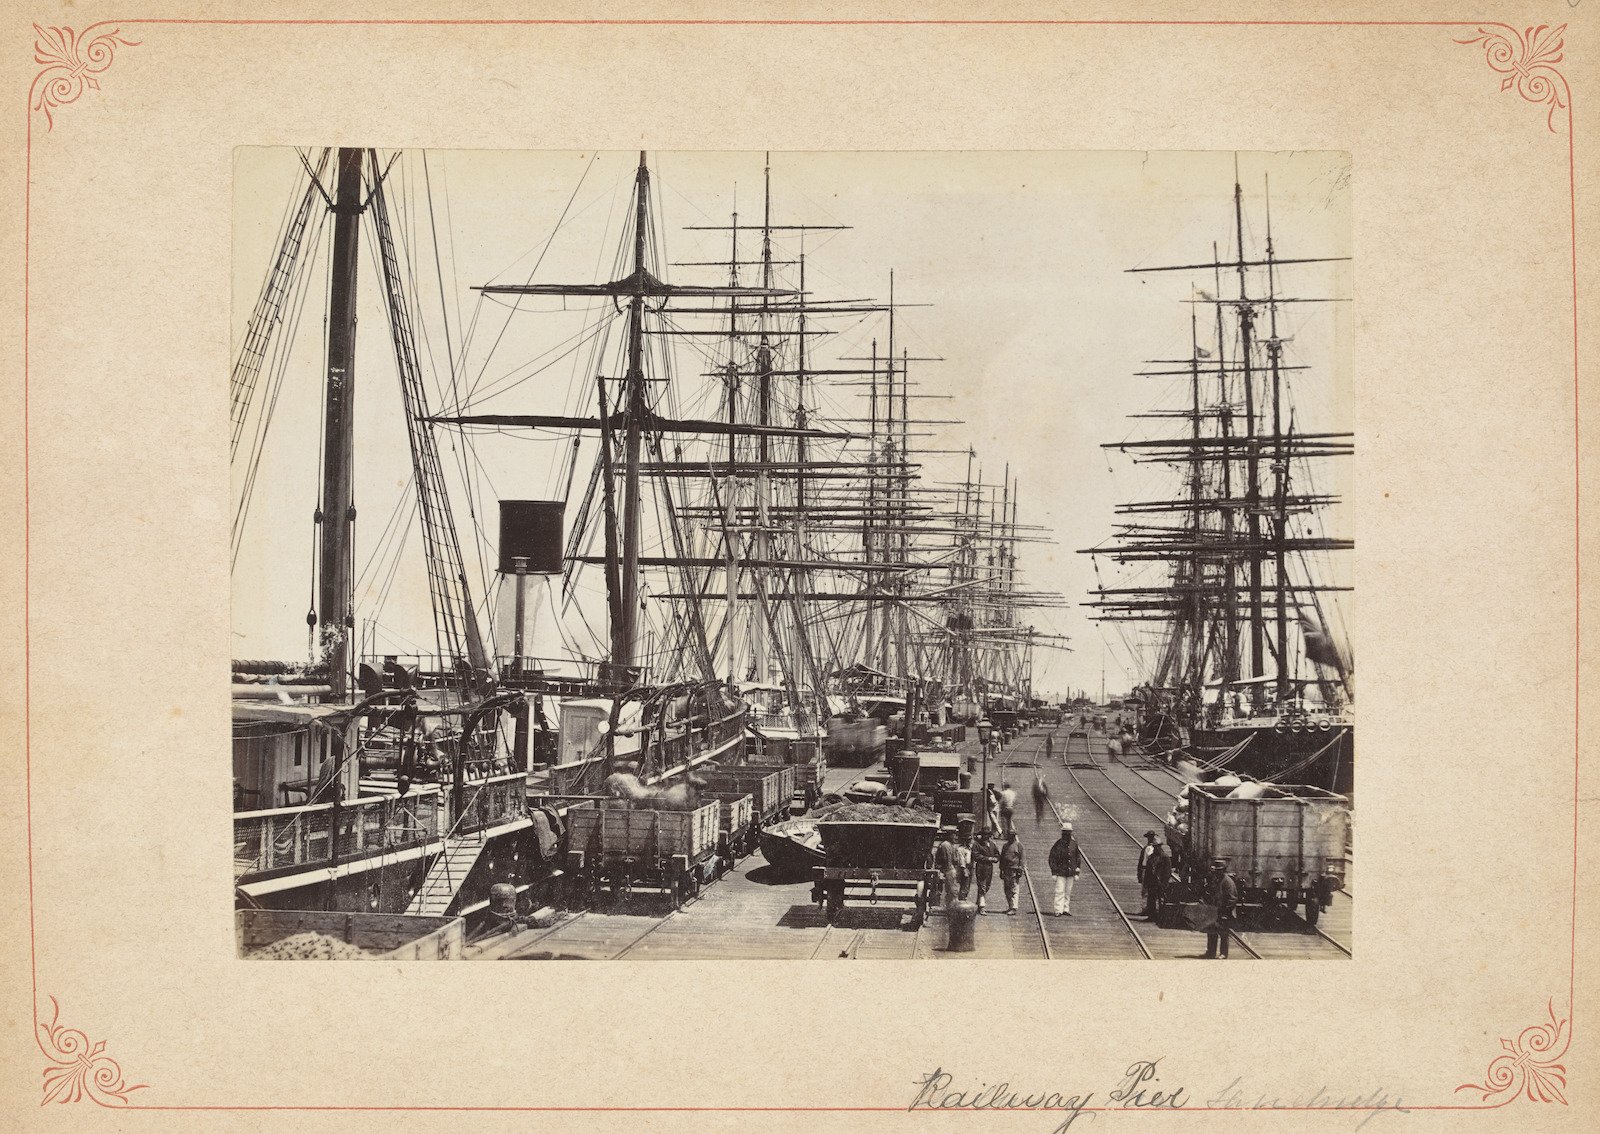
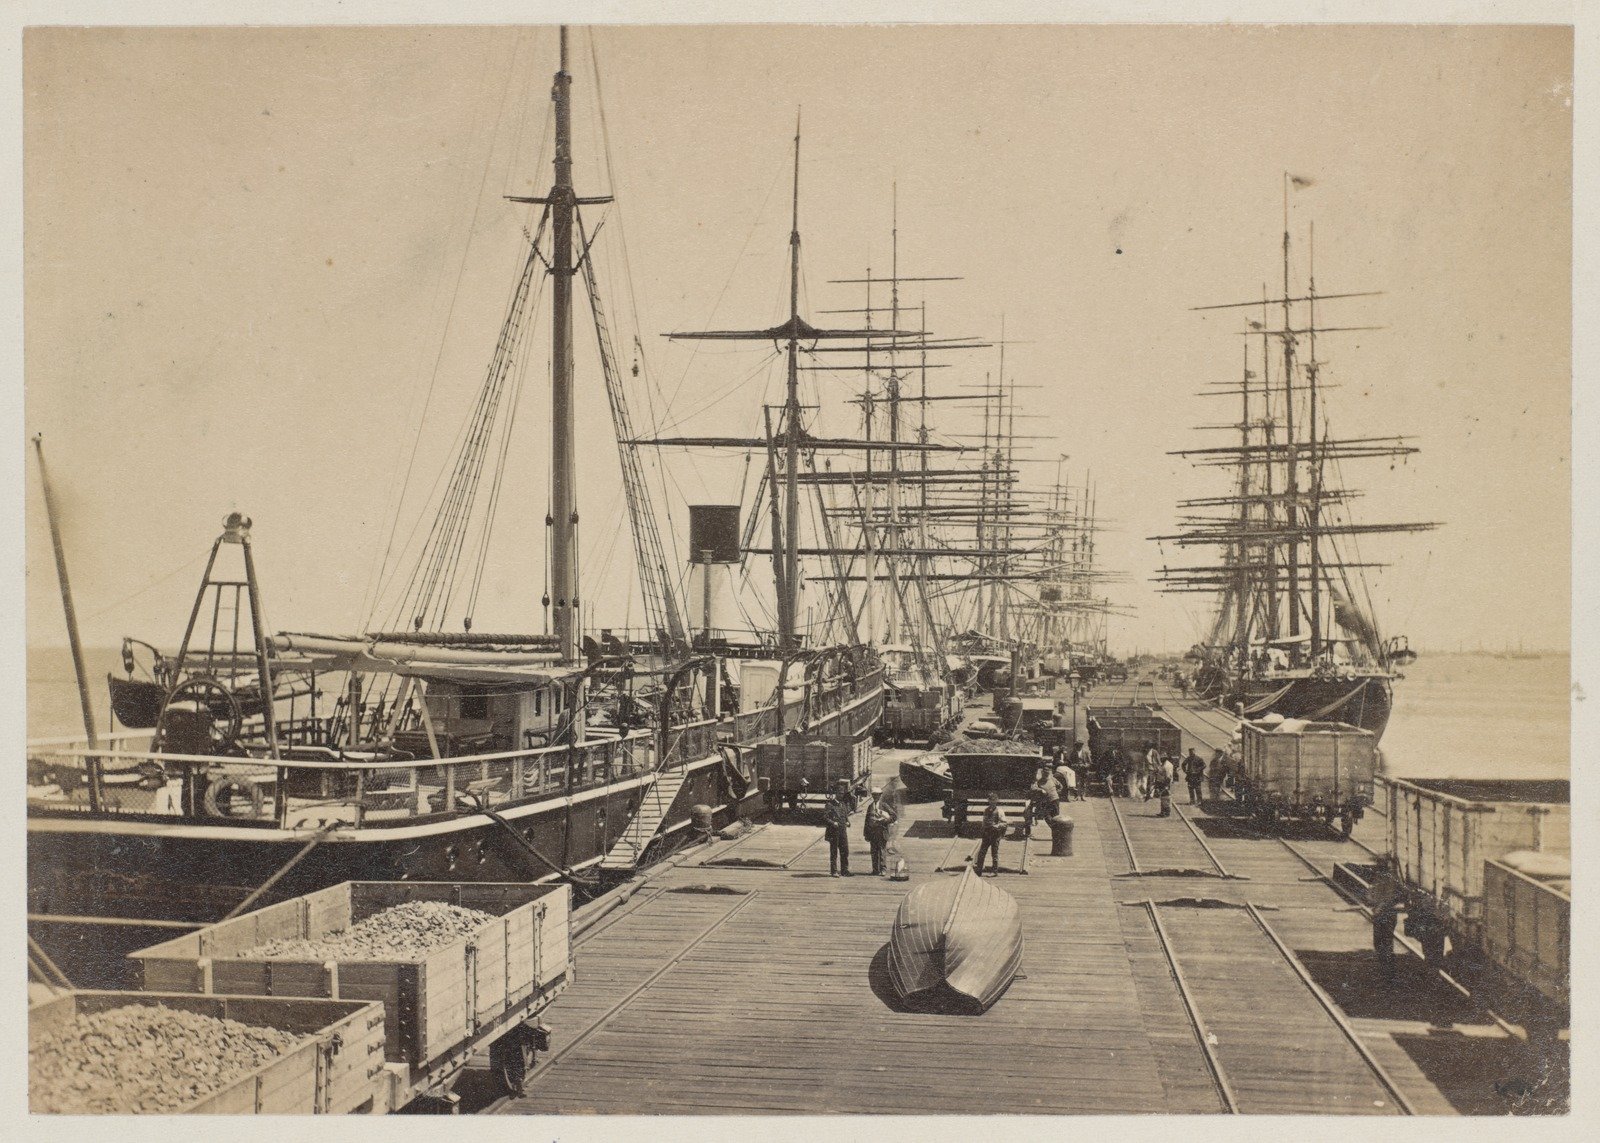
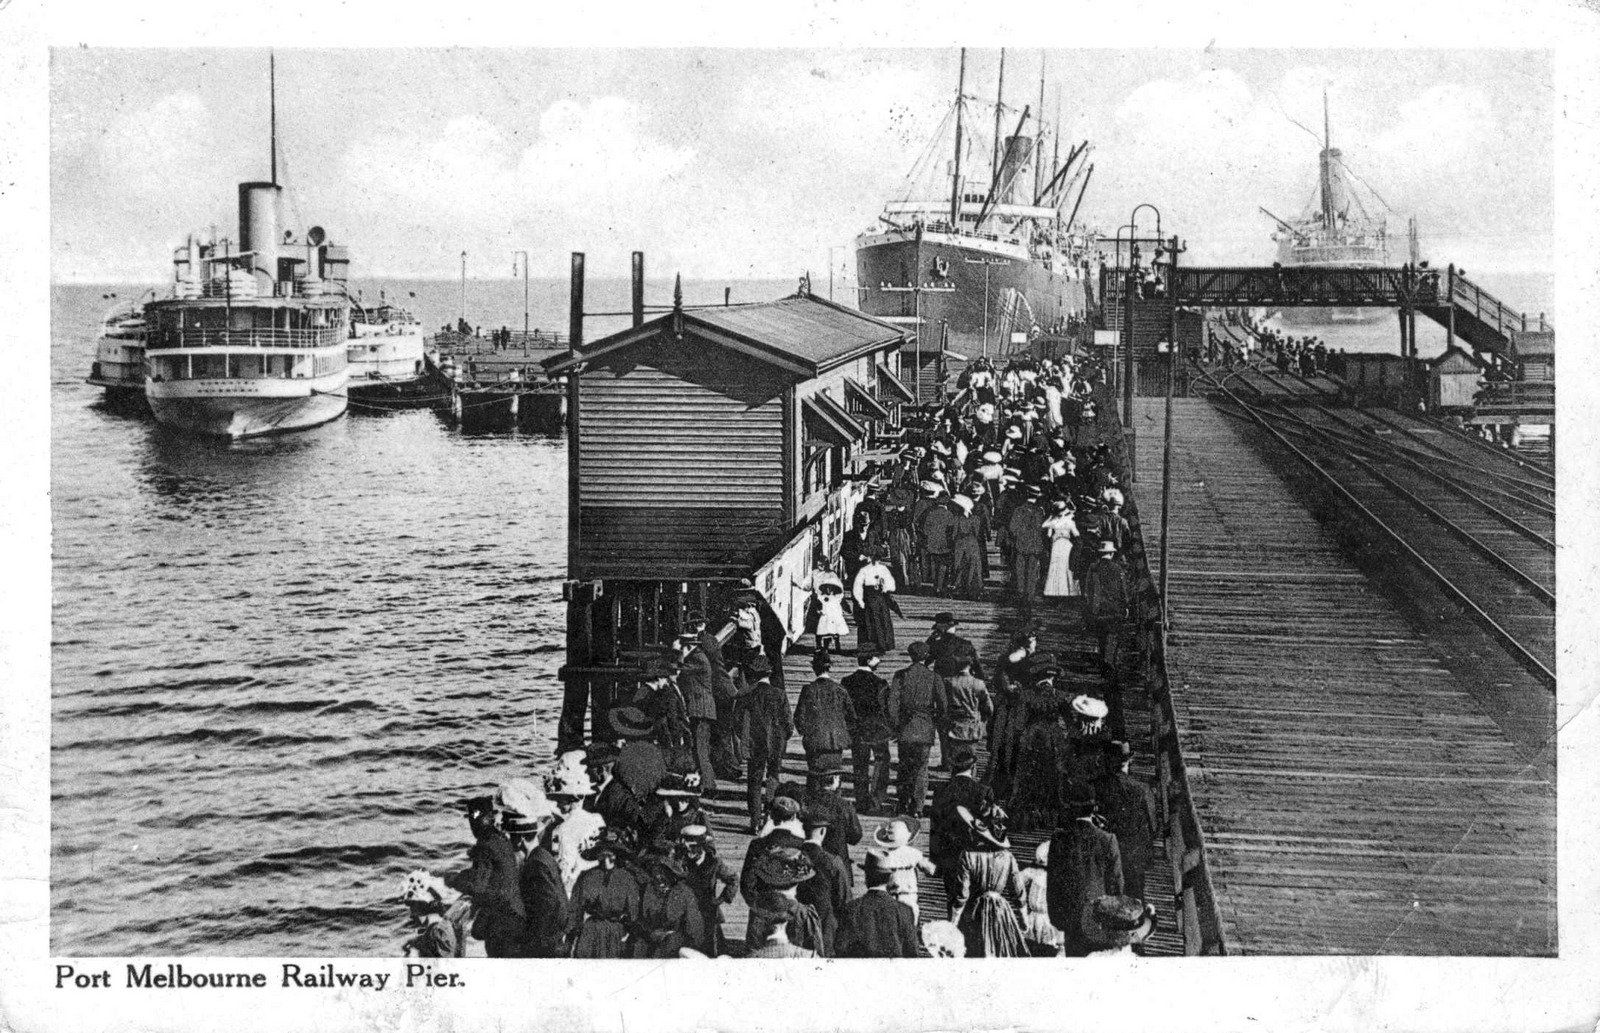
Railway Pier Sandridge 1880
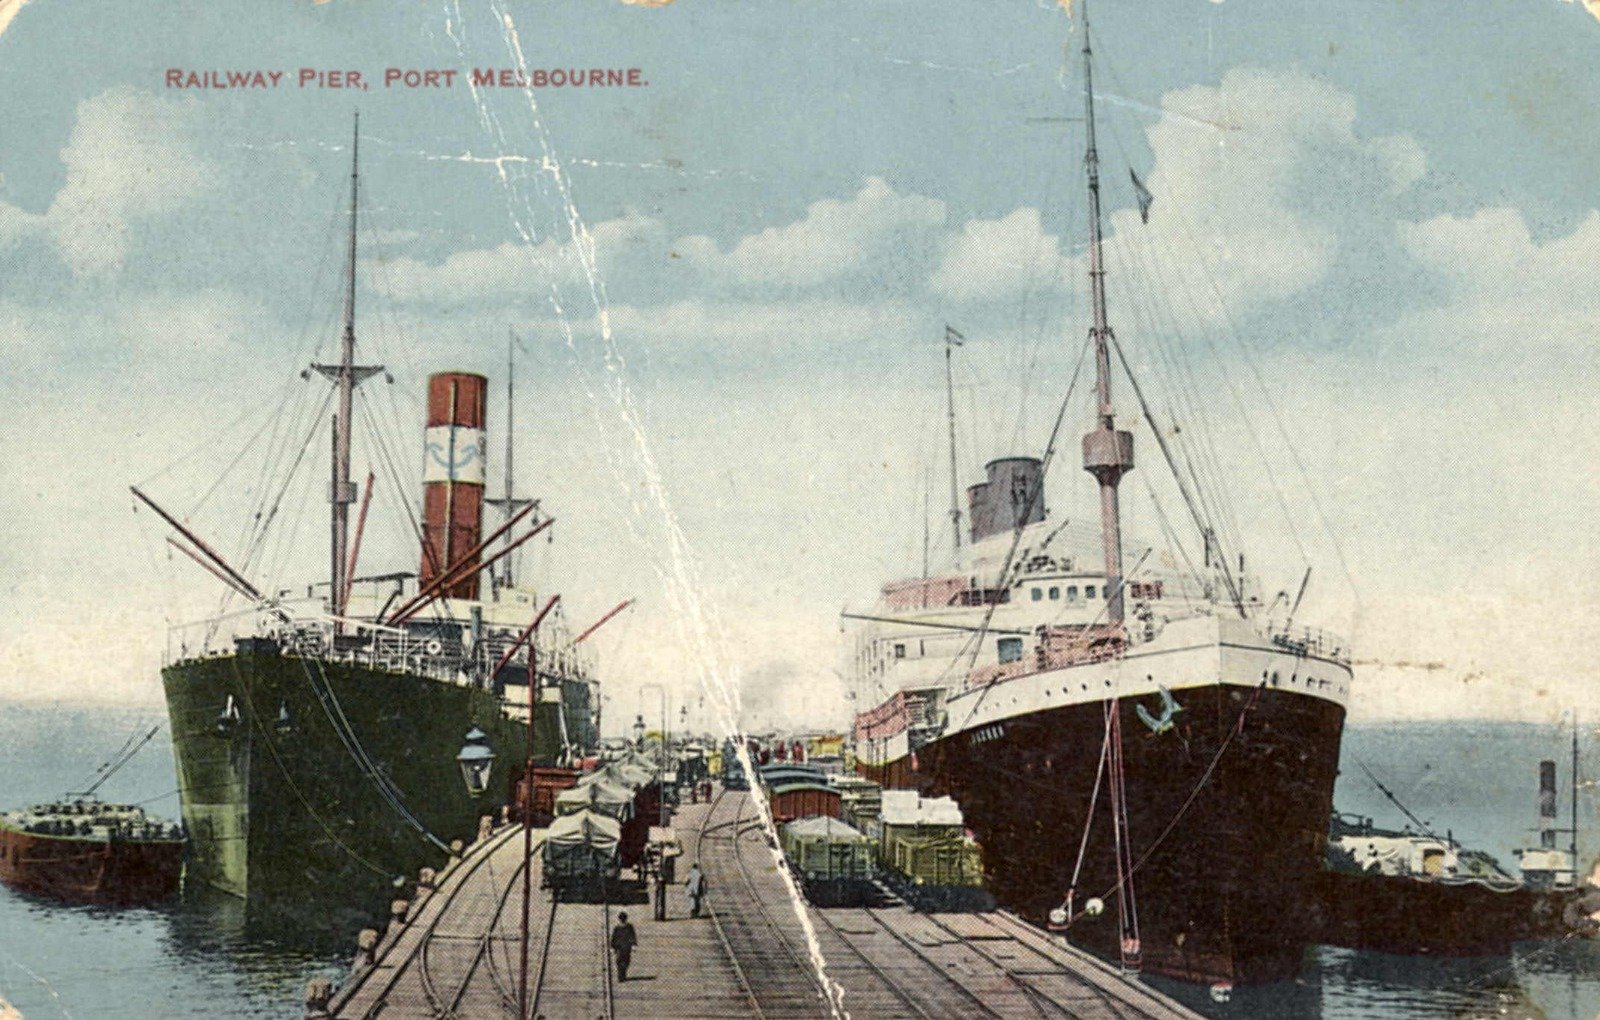
Railway Pier, Port Melbourne (Vic.) ca 1900
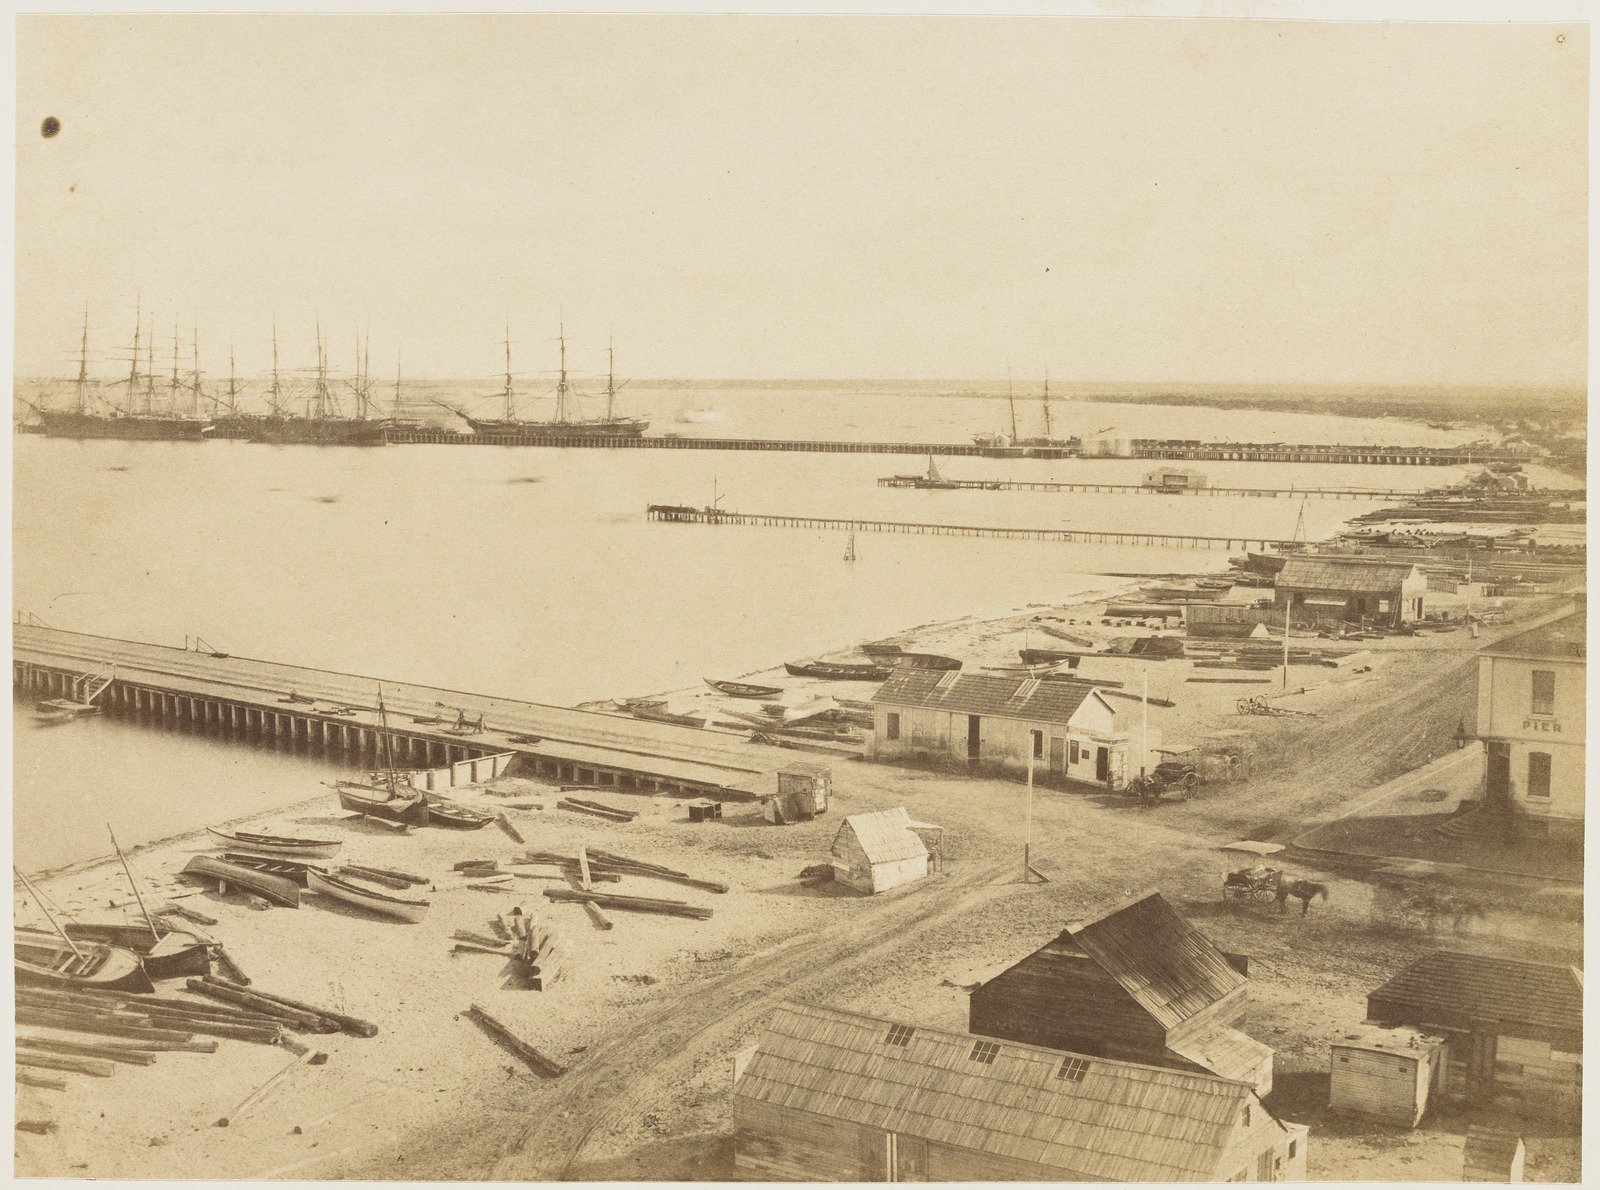
Sandridge Pier 1875
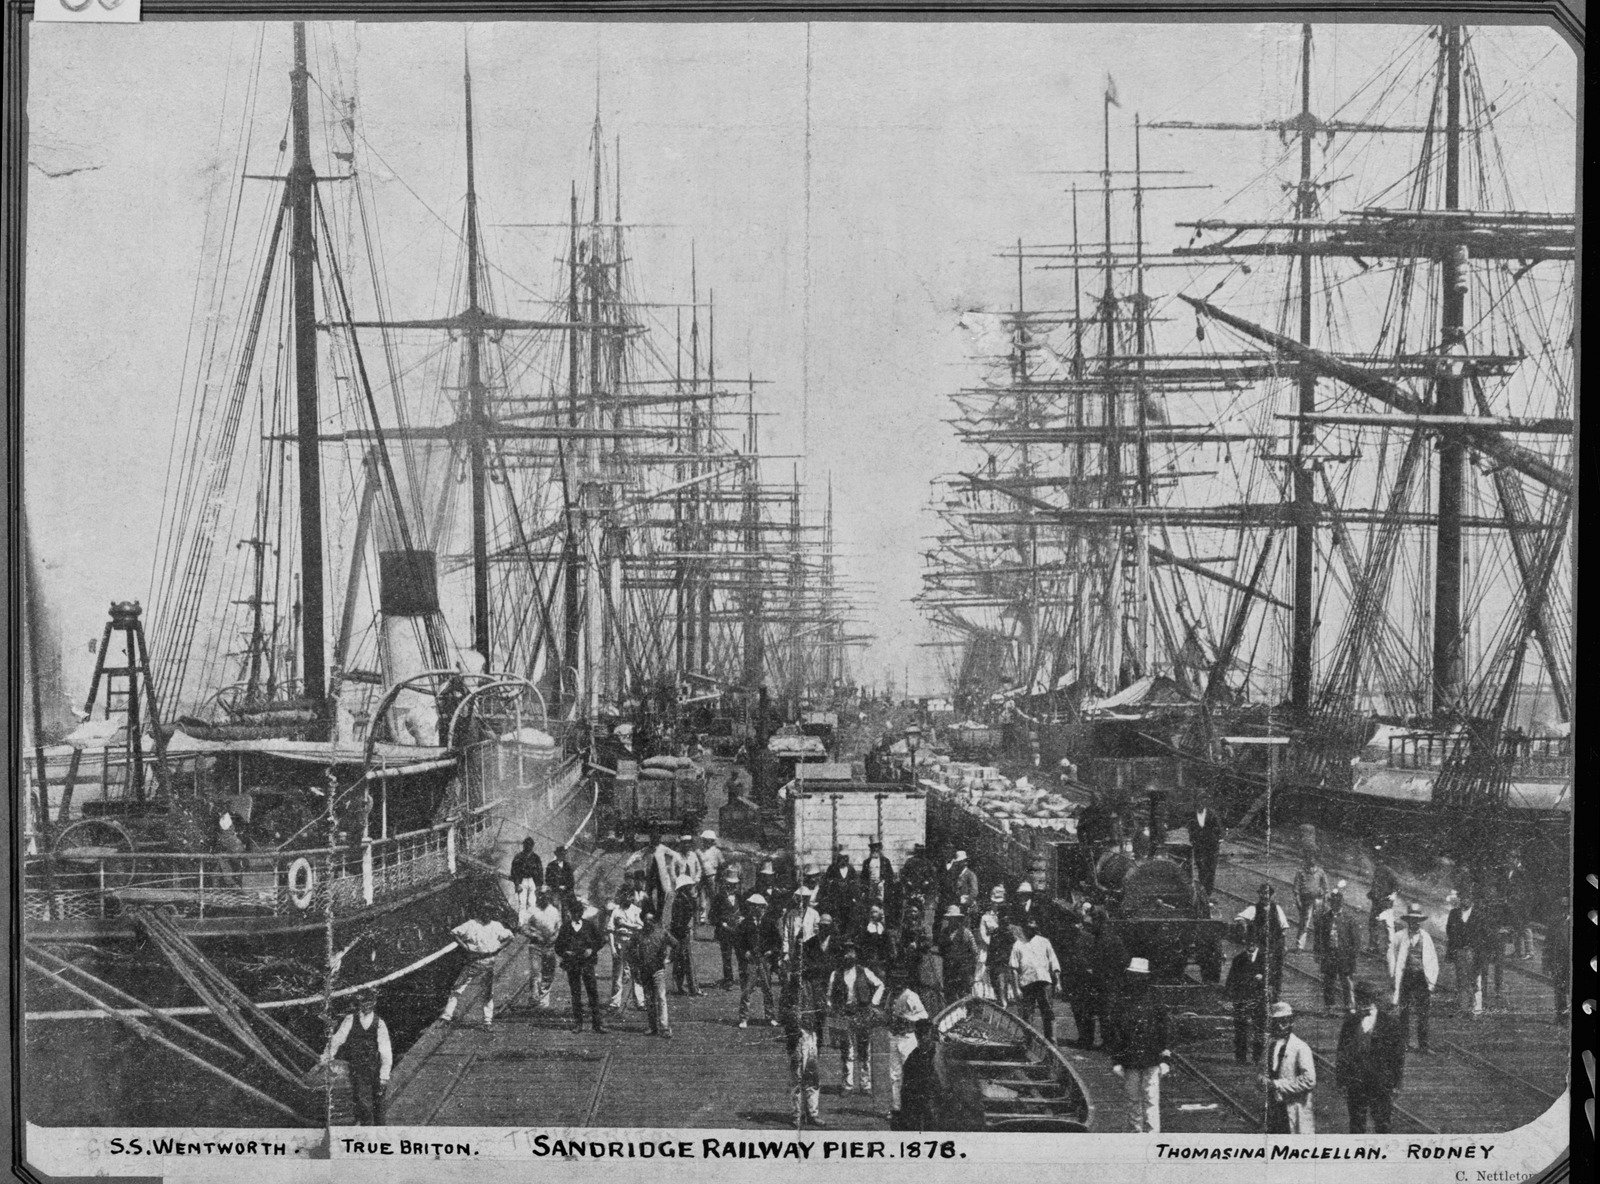
Sandridge Railway Pier, 1878
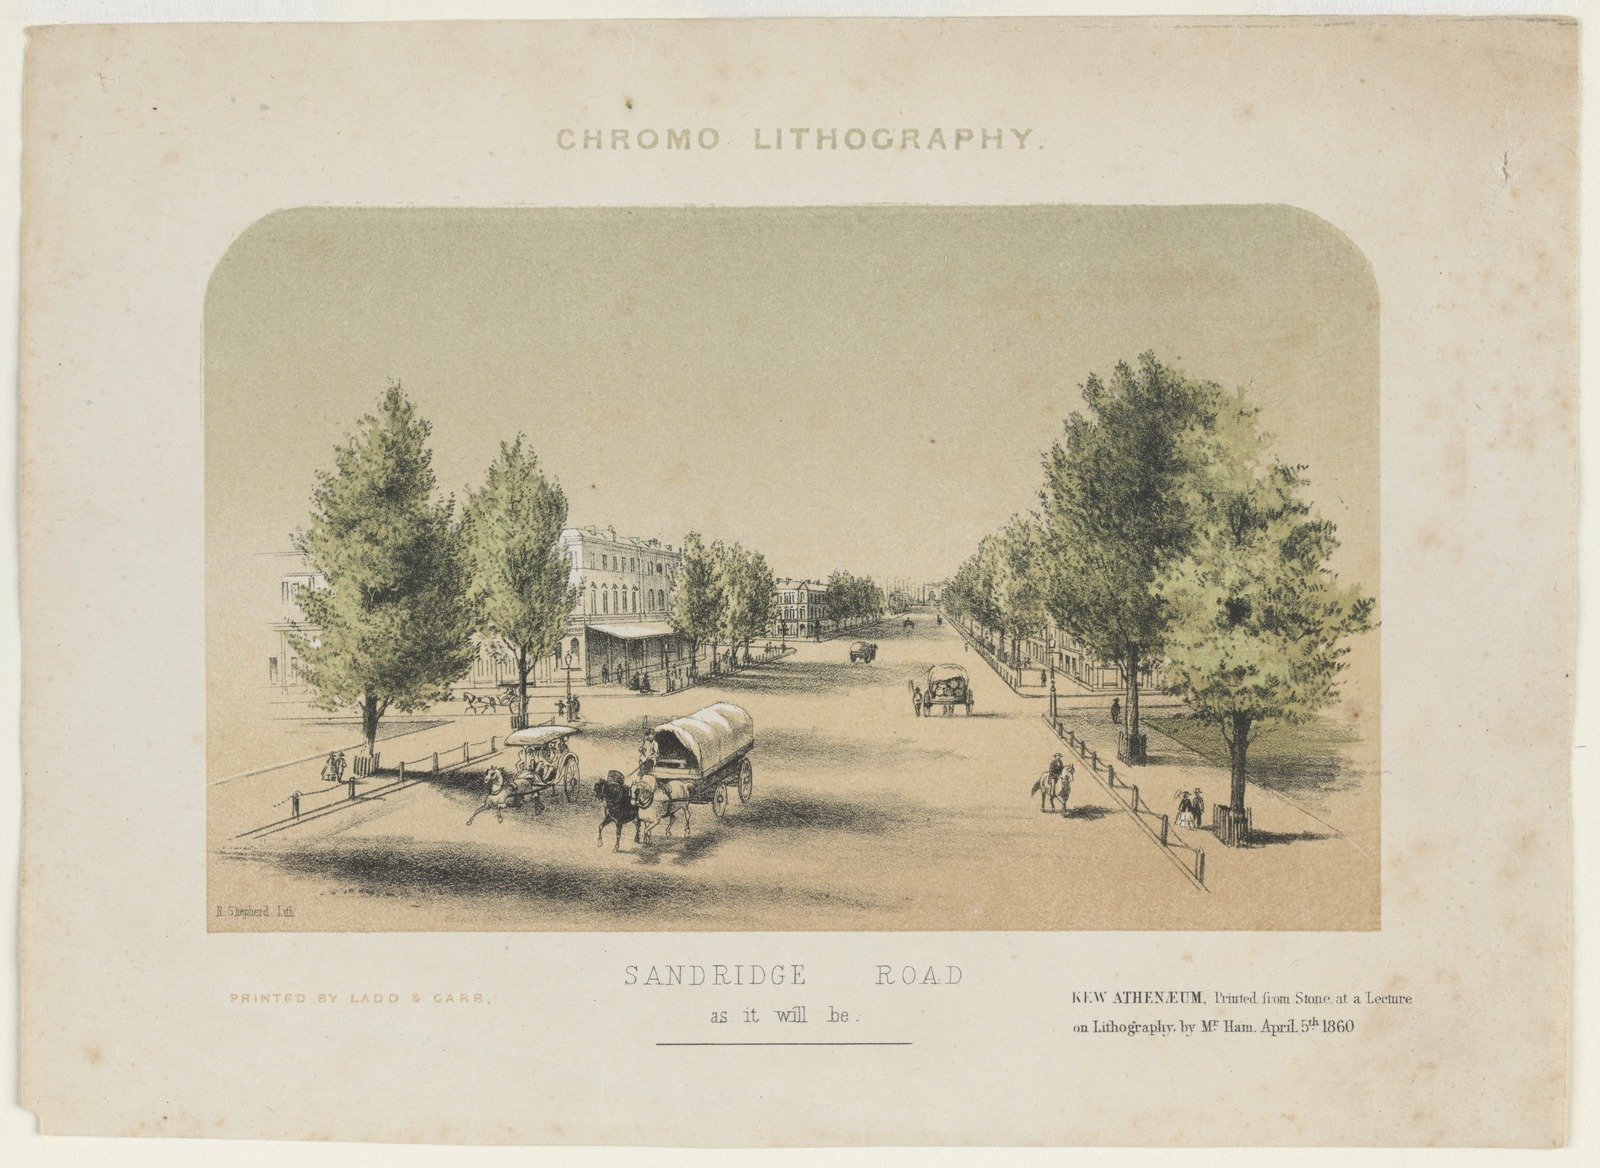
Sandridge Road as it will be - artist impression 1860
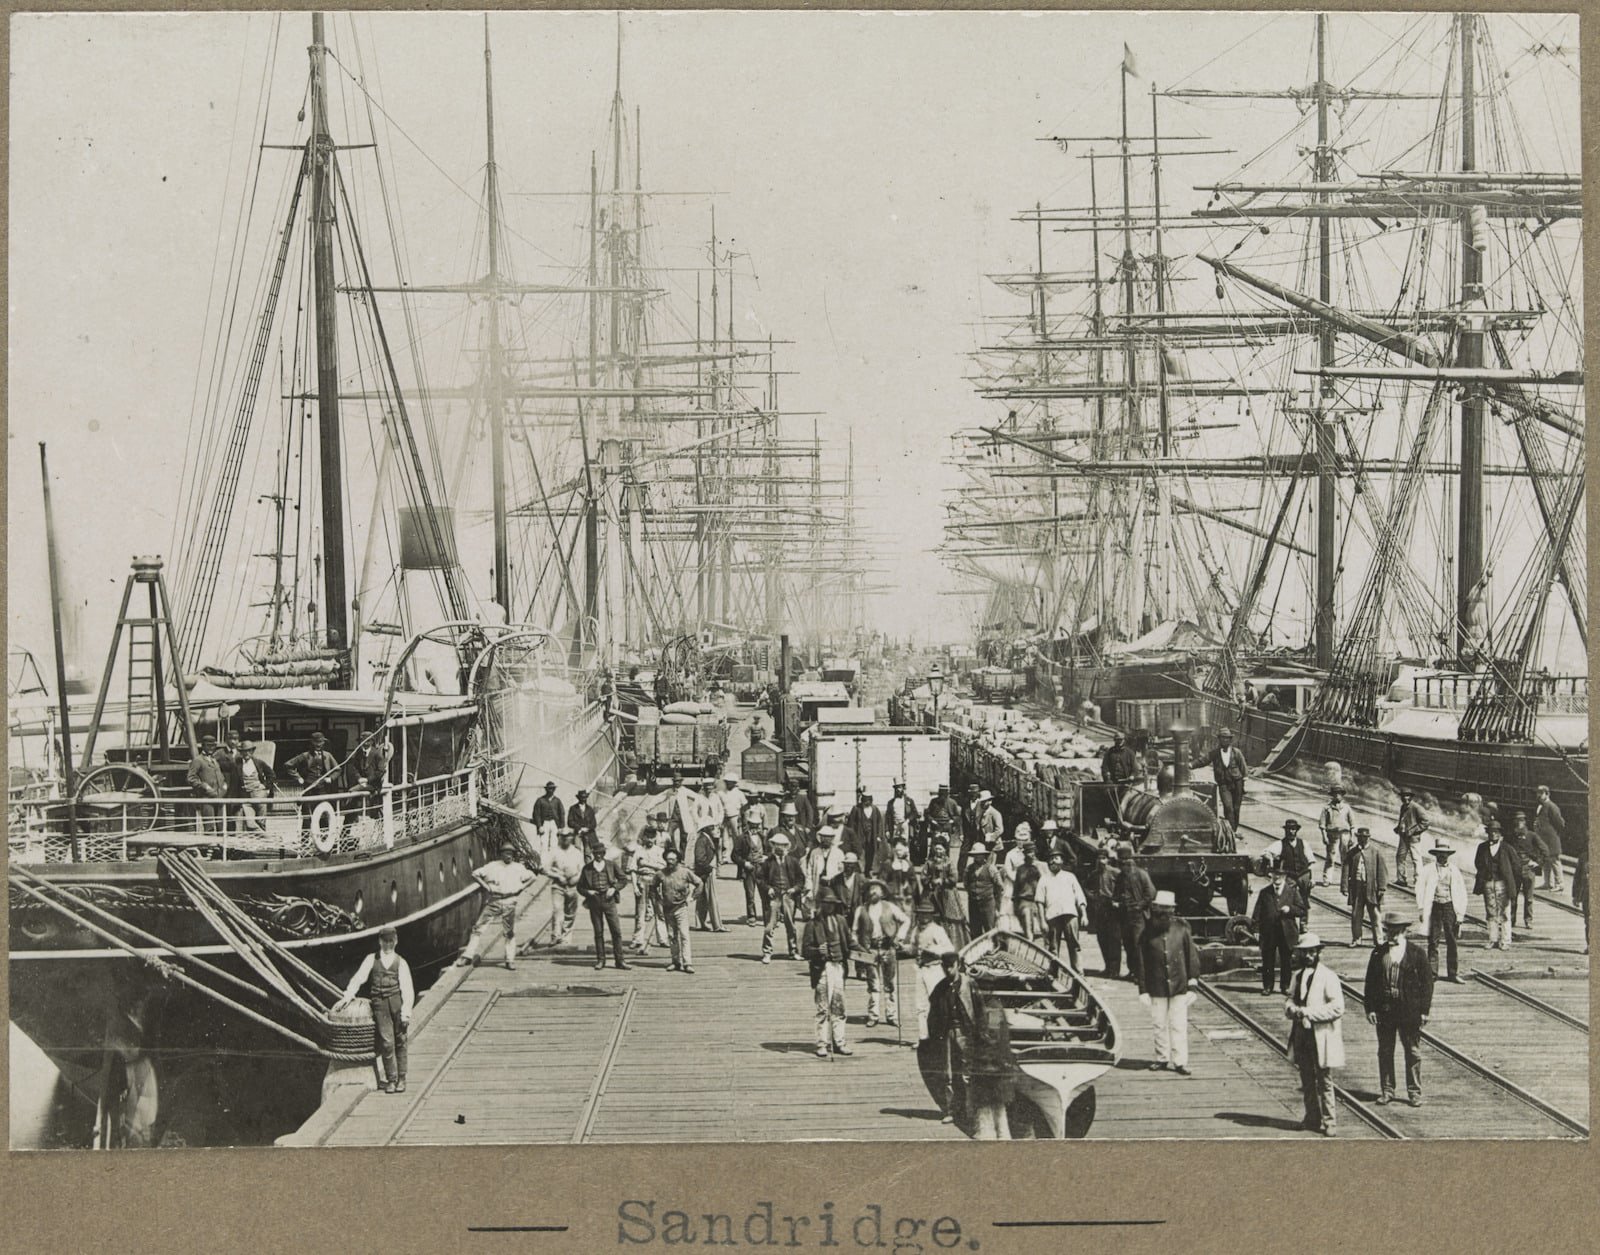
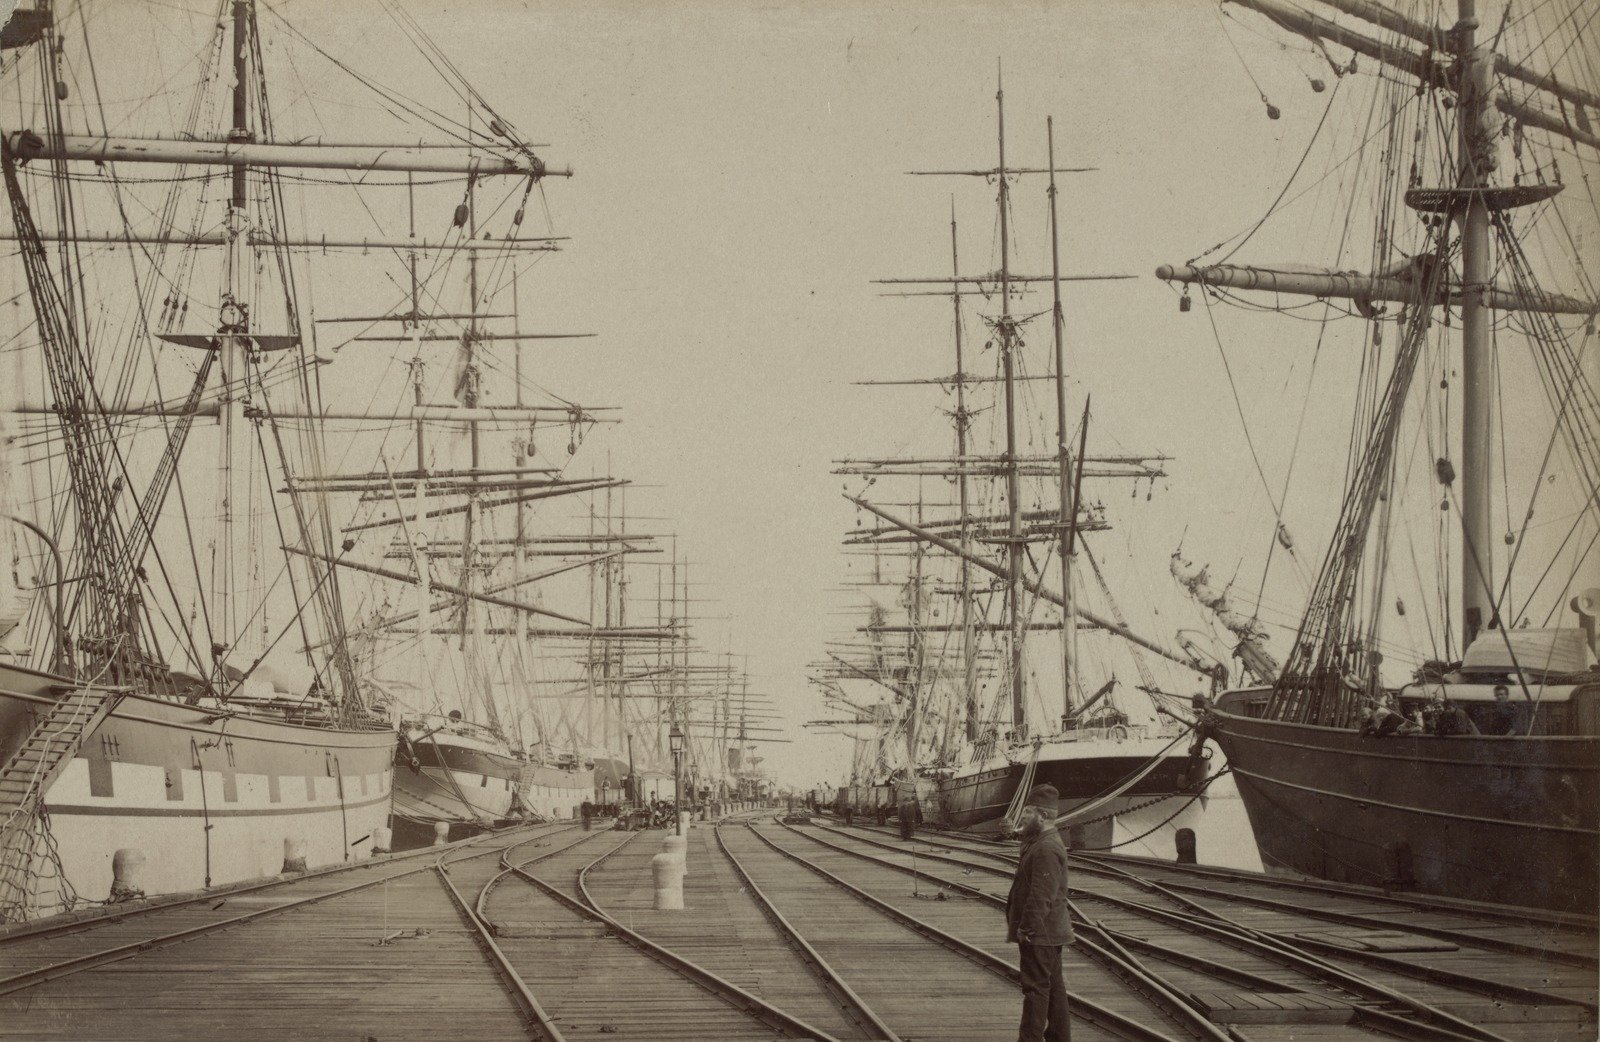
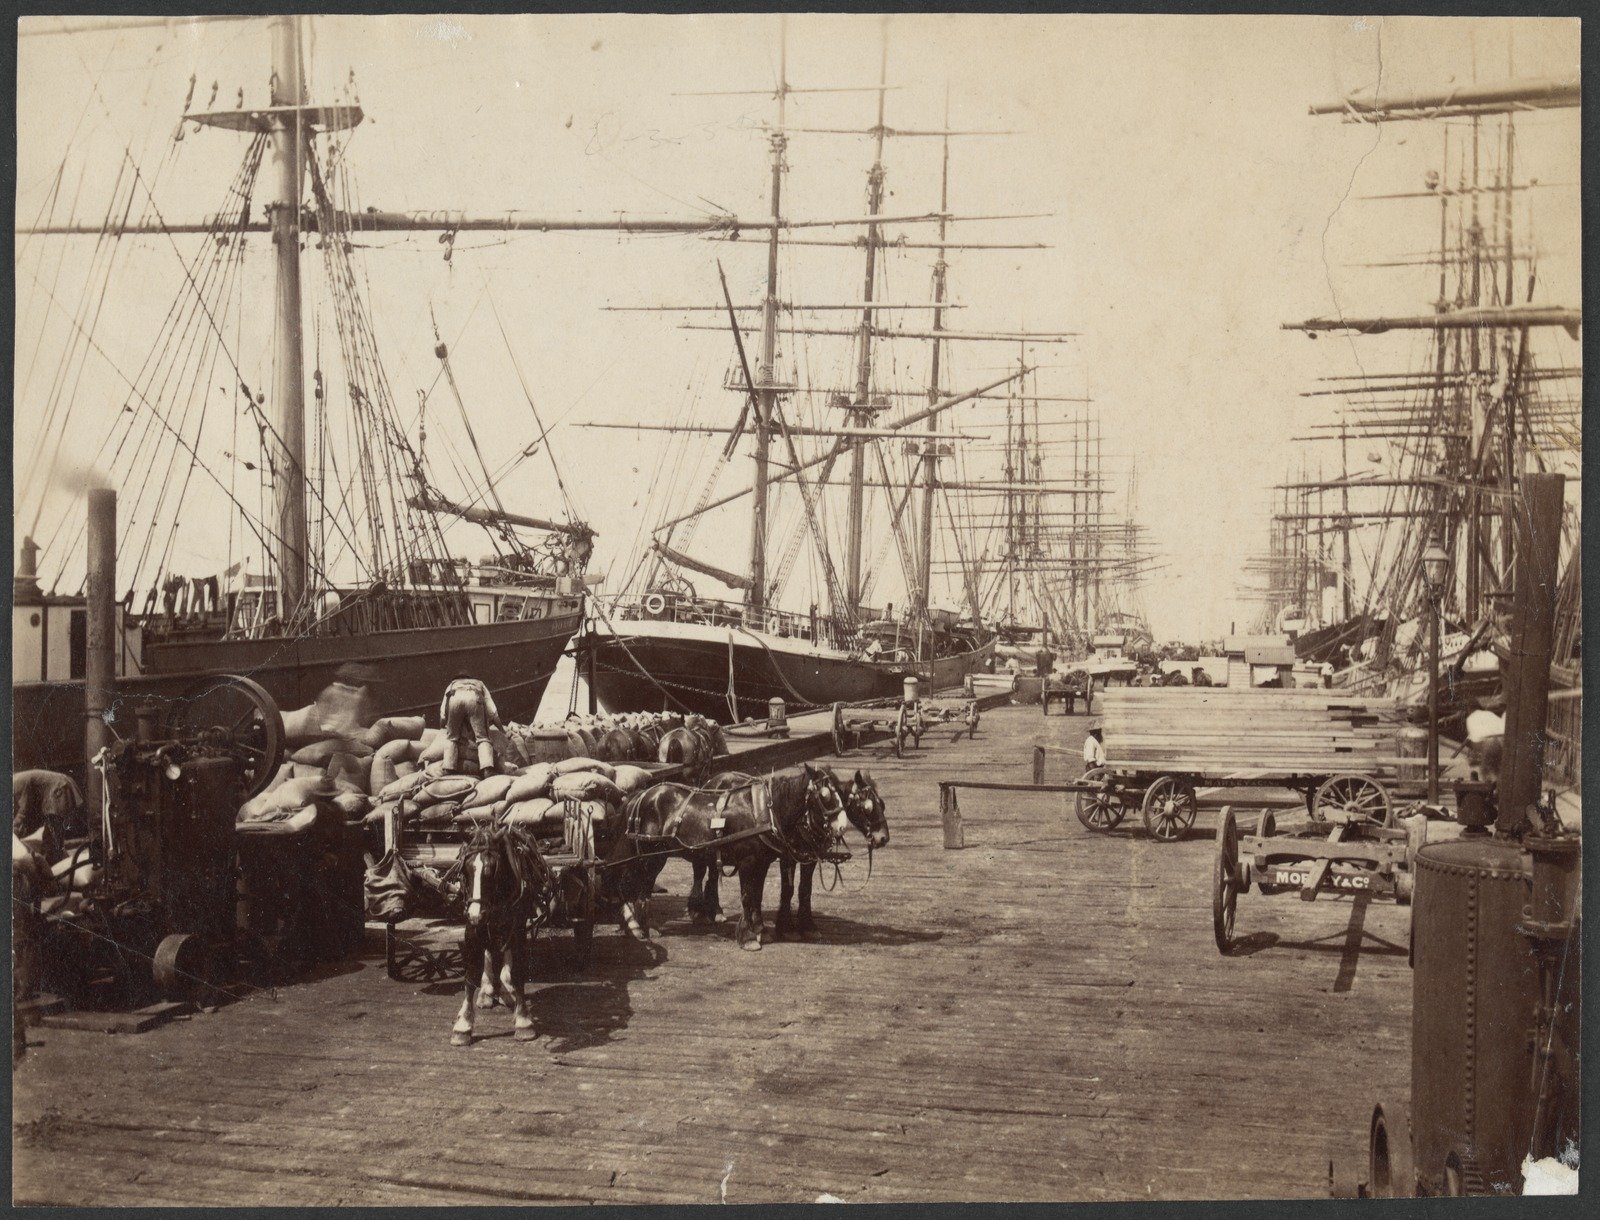
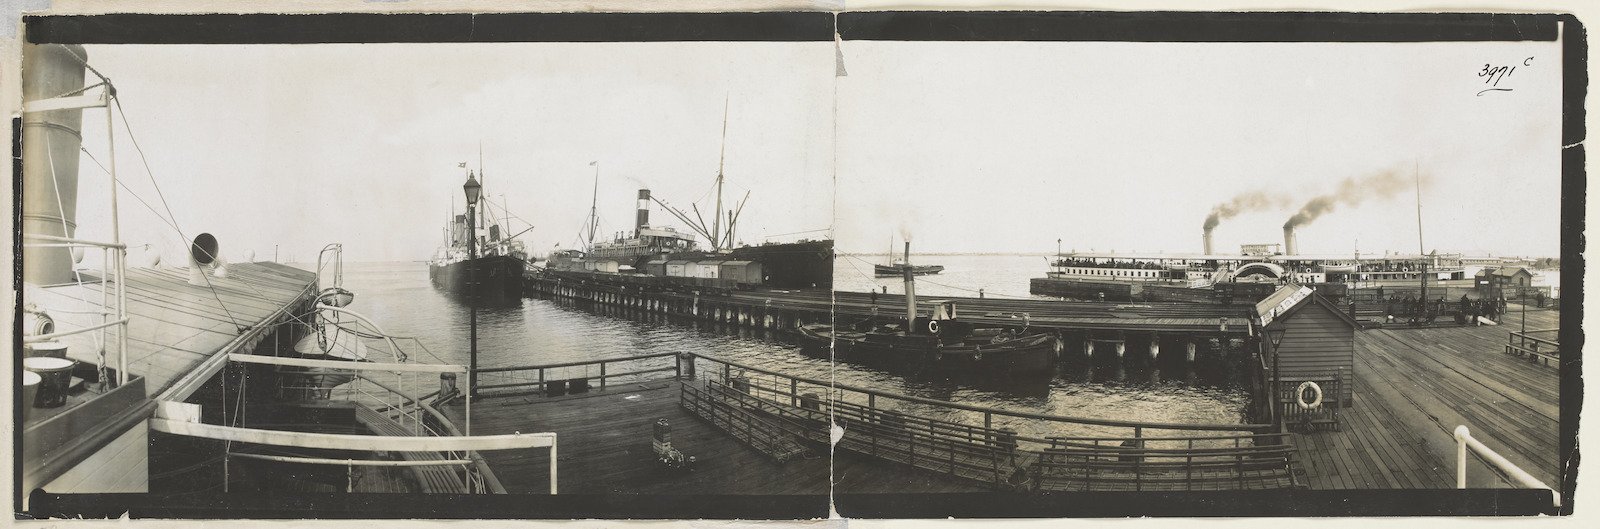
Sandridge. Looking down the centre of the pier 1905

South Melbourne, plan of subdivision of Crown allotments nos. 3, 4, 5 and 6, sec. 88, and no. 17 of sec. 55 1884

Swallow & Ariell Treacle & Golden Syrup refiners, Sandridge & Melbourne
The Railway Pier. Sandridge 1858

Aerial view of Swallows & Ariell Ltd Port Melbourne Victoria 1950

Areas of Port Melbourne and South Melbourne with Port Melbourne Cricket Ground 1948
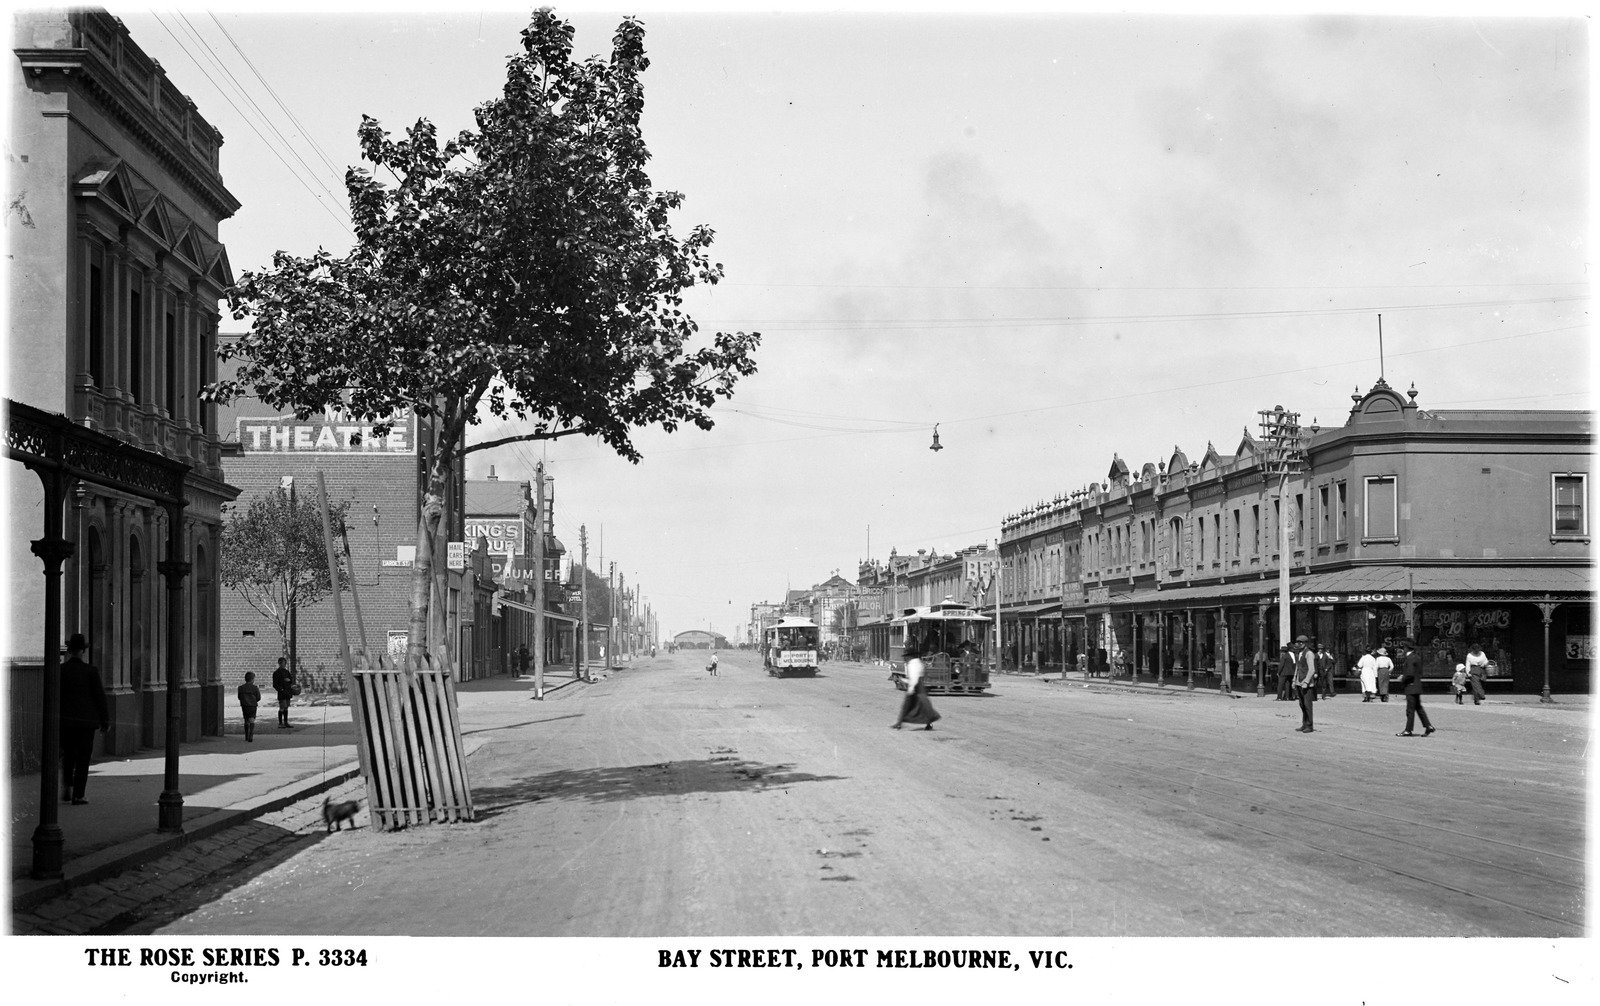
Bay St Port Melbourne 1920-1937
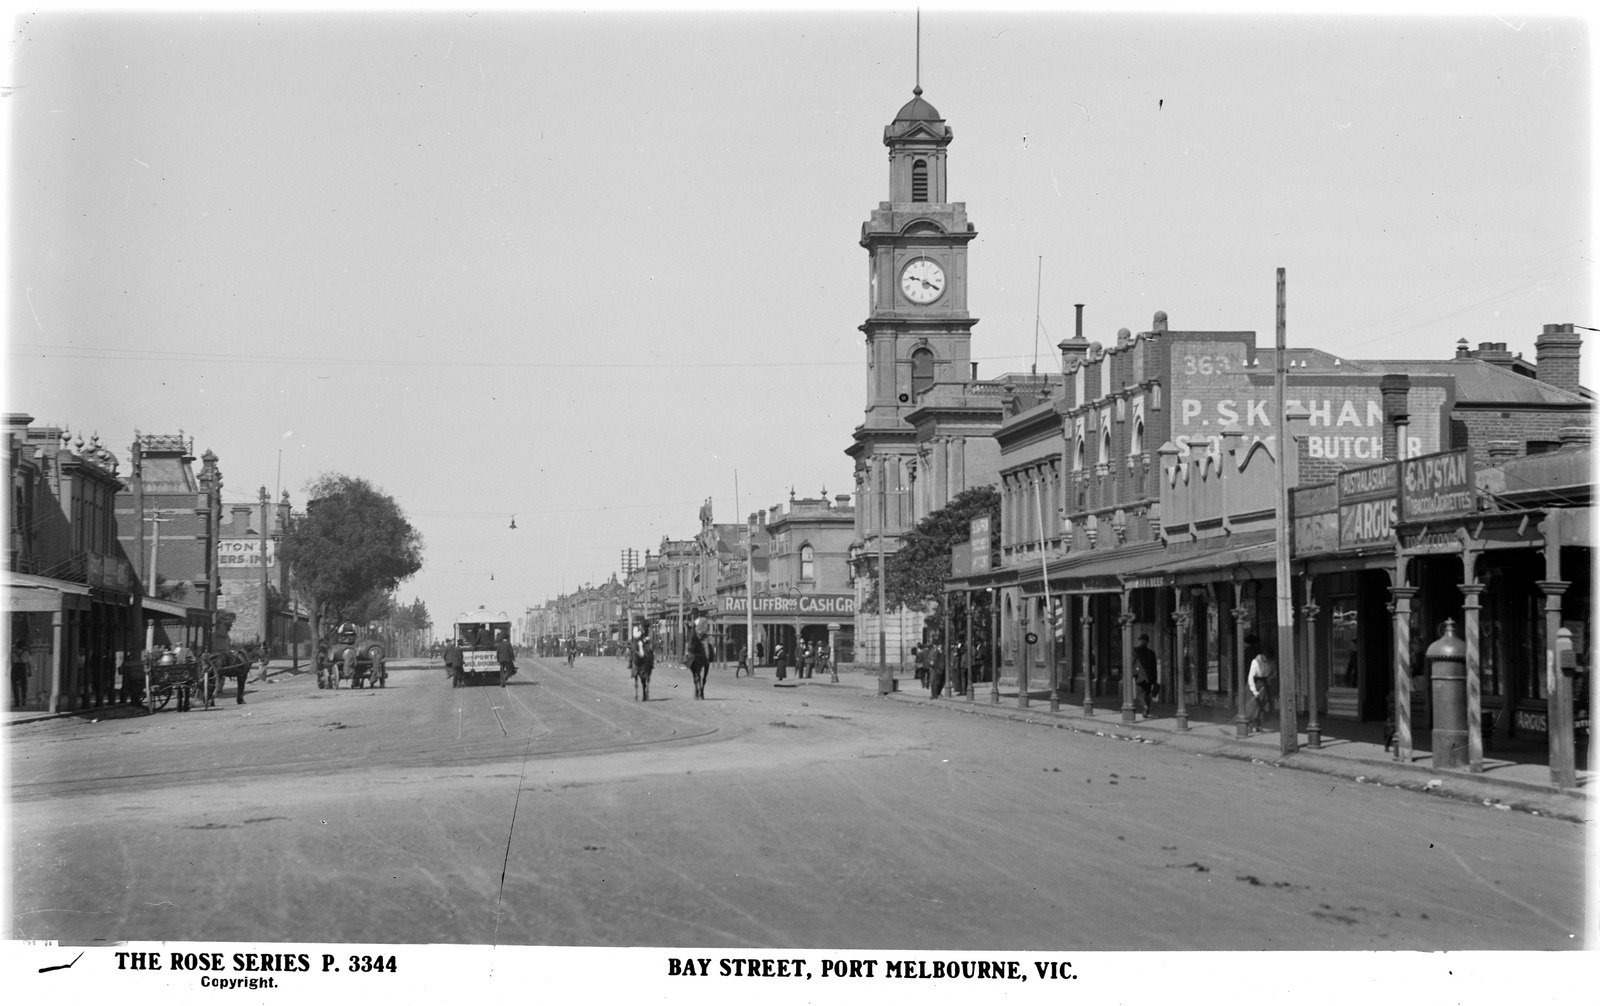
Bay Street Port Melbourne 1913-1952
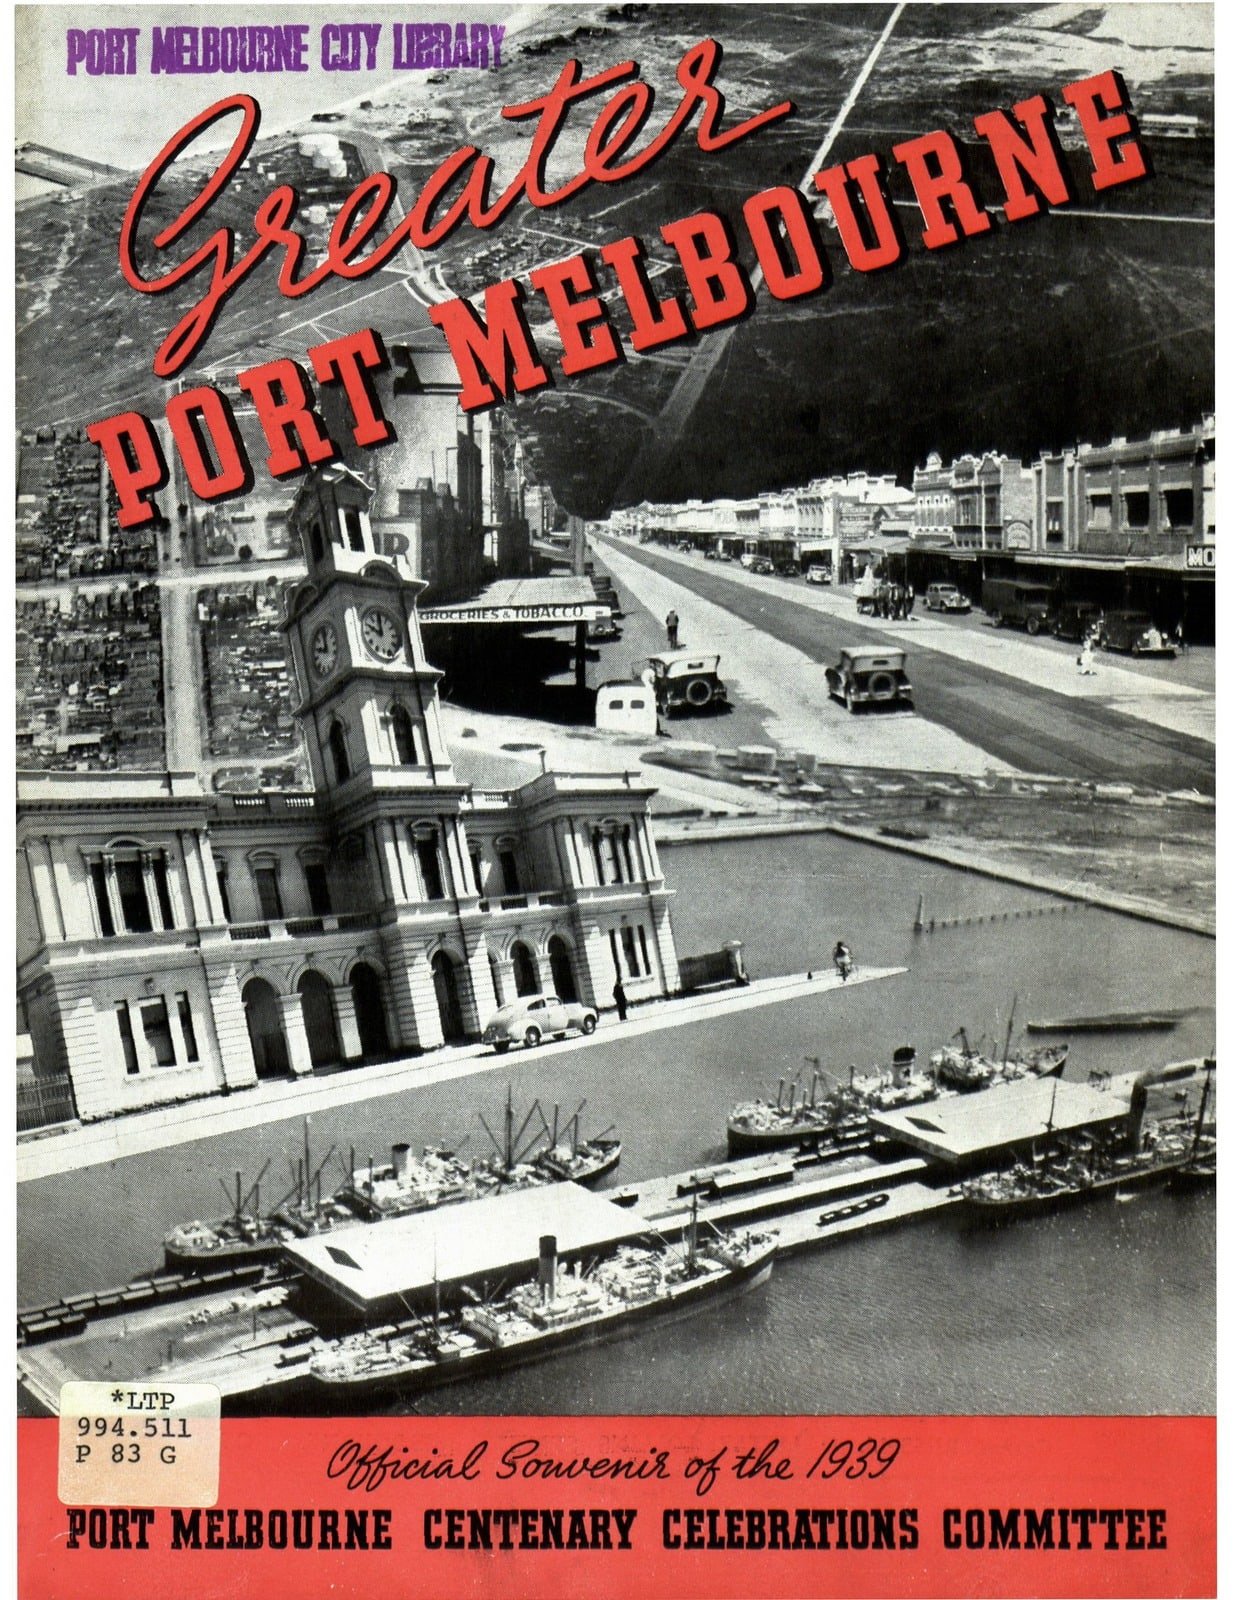
Greater Port Melbourne Cover
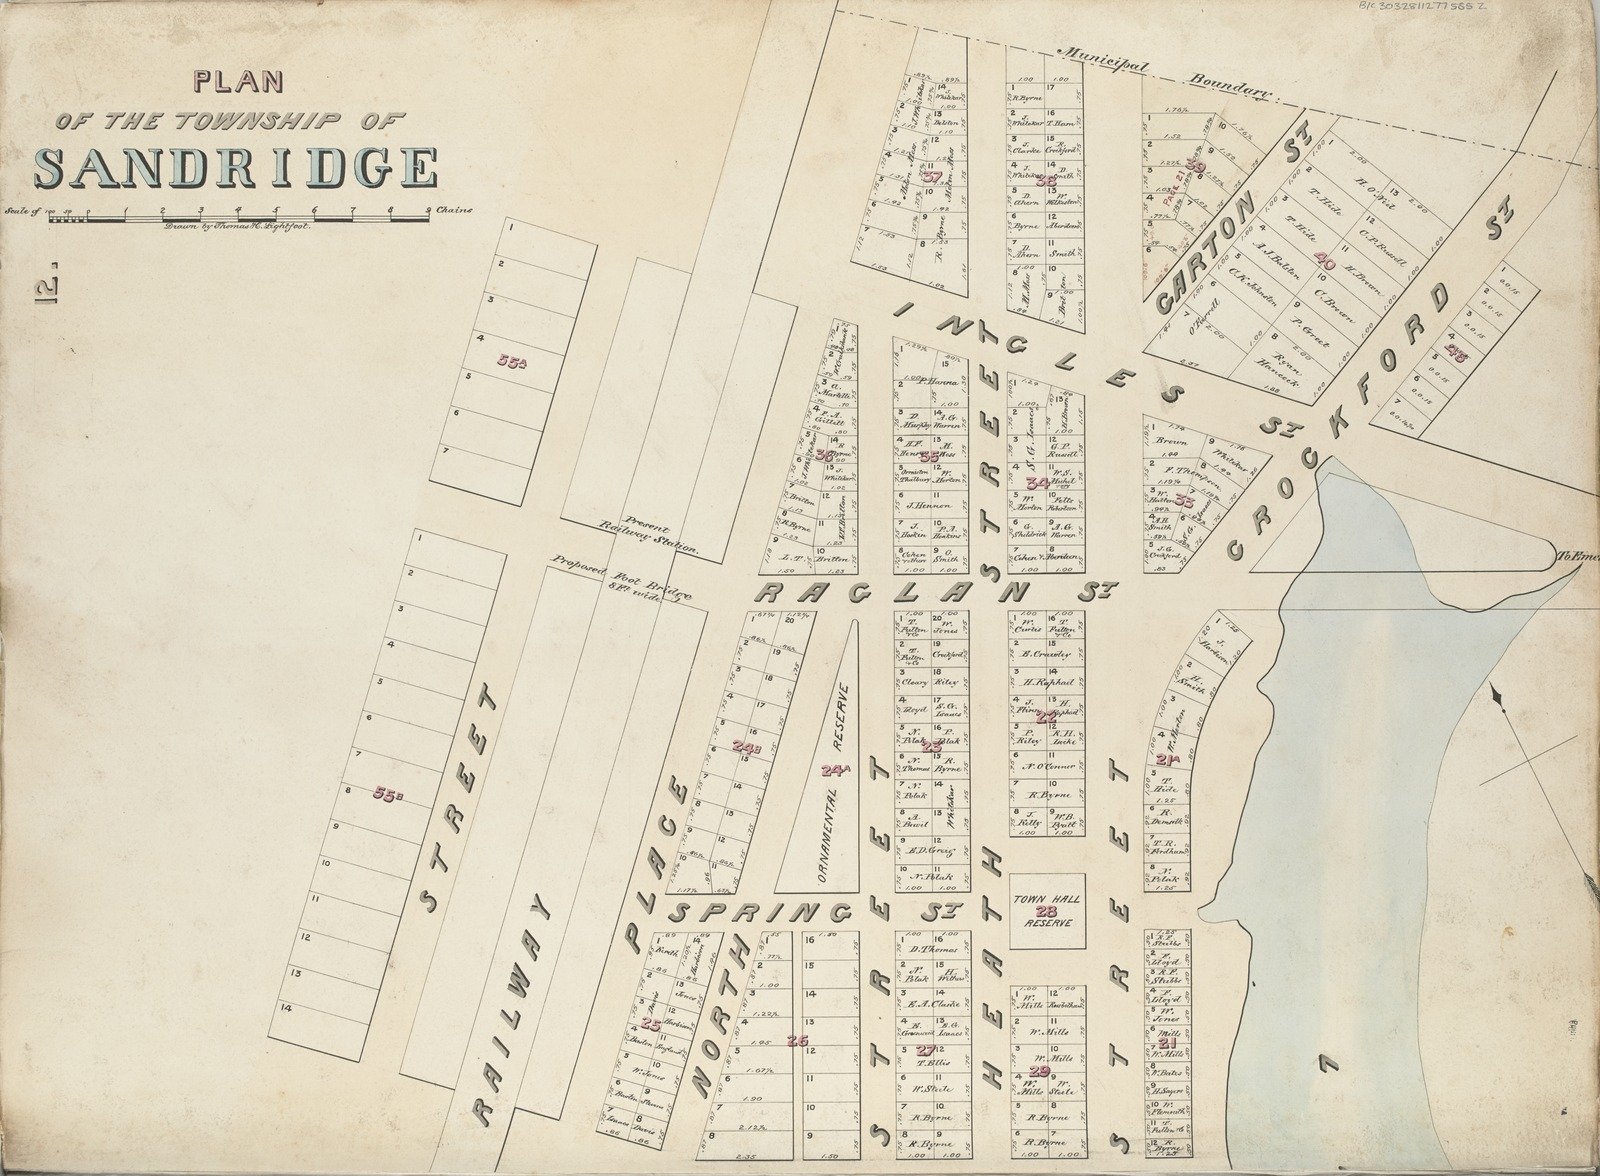
Plan of the township Sandridge A 1860-1888
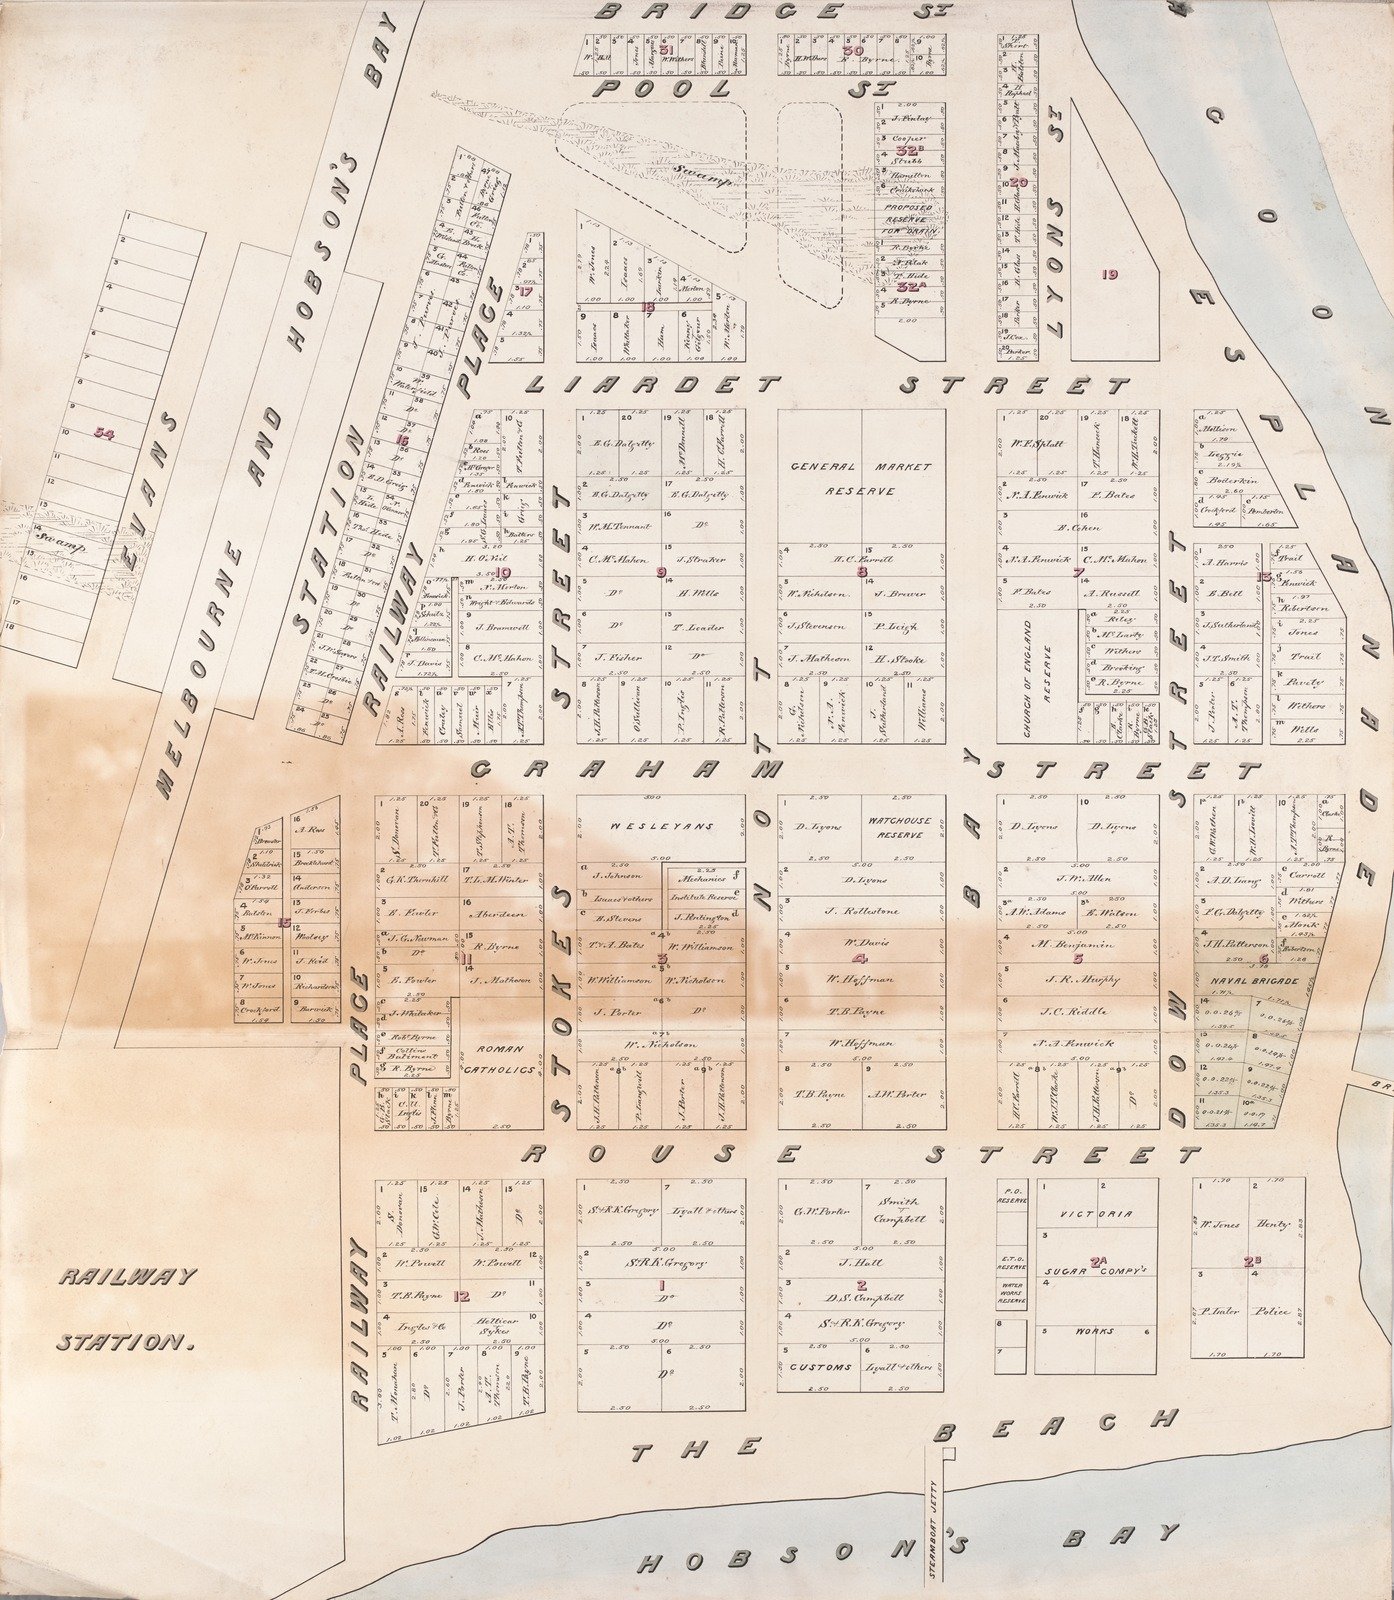
Plan of the township Sandridge B 1860-1888
Port Melbourne, from King and Flinders Streets 1903

Port Melbourne, South Melbourne area with Dunlop chimney in centre of image A - 1925-40

Port Melbourne, South Melbourne area with Dunlop chimney in centre of image B - 1925-40

The Melbourne Harbor Trust Commissioners general plan of the Port of Melbourne 1930
Town Pier, Port Melbourne 1890
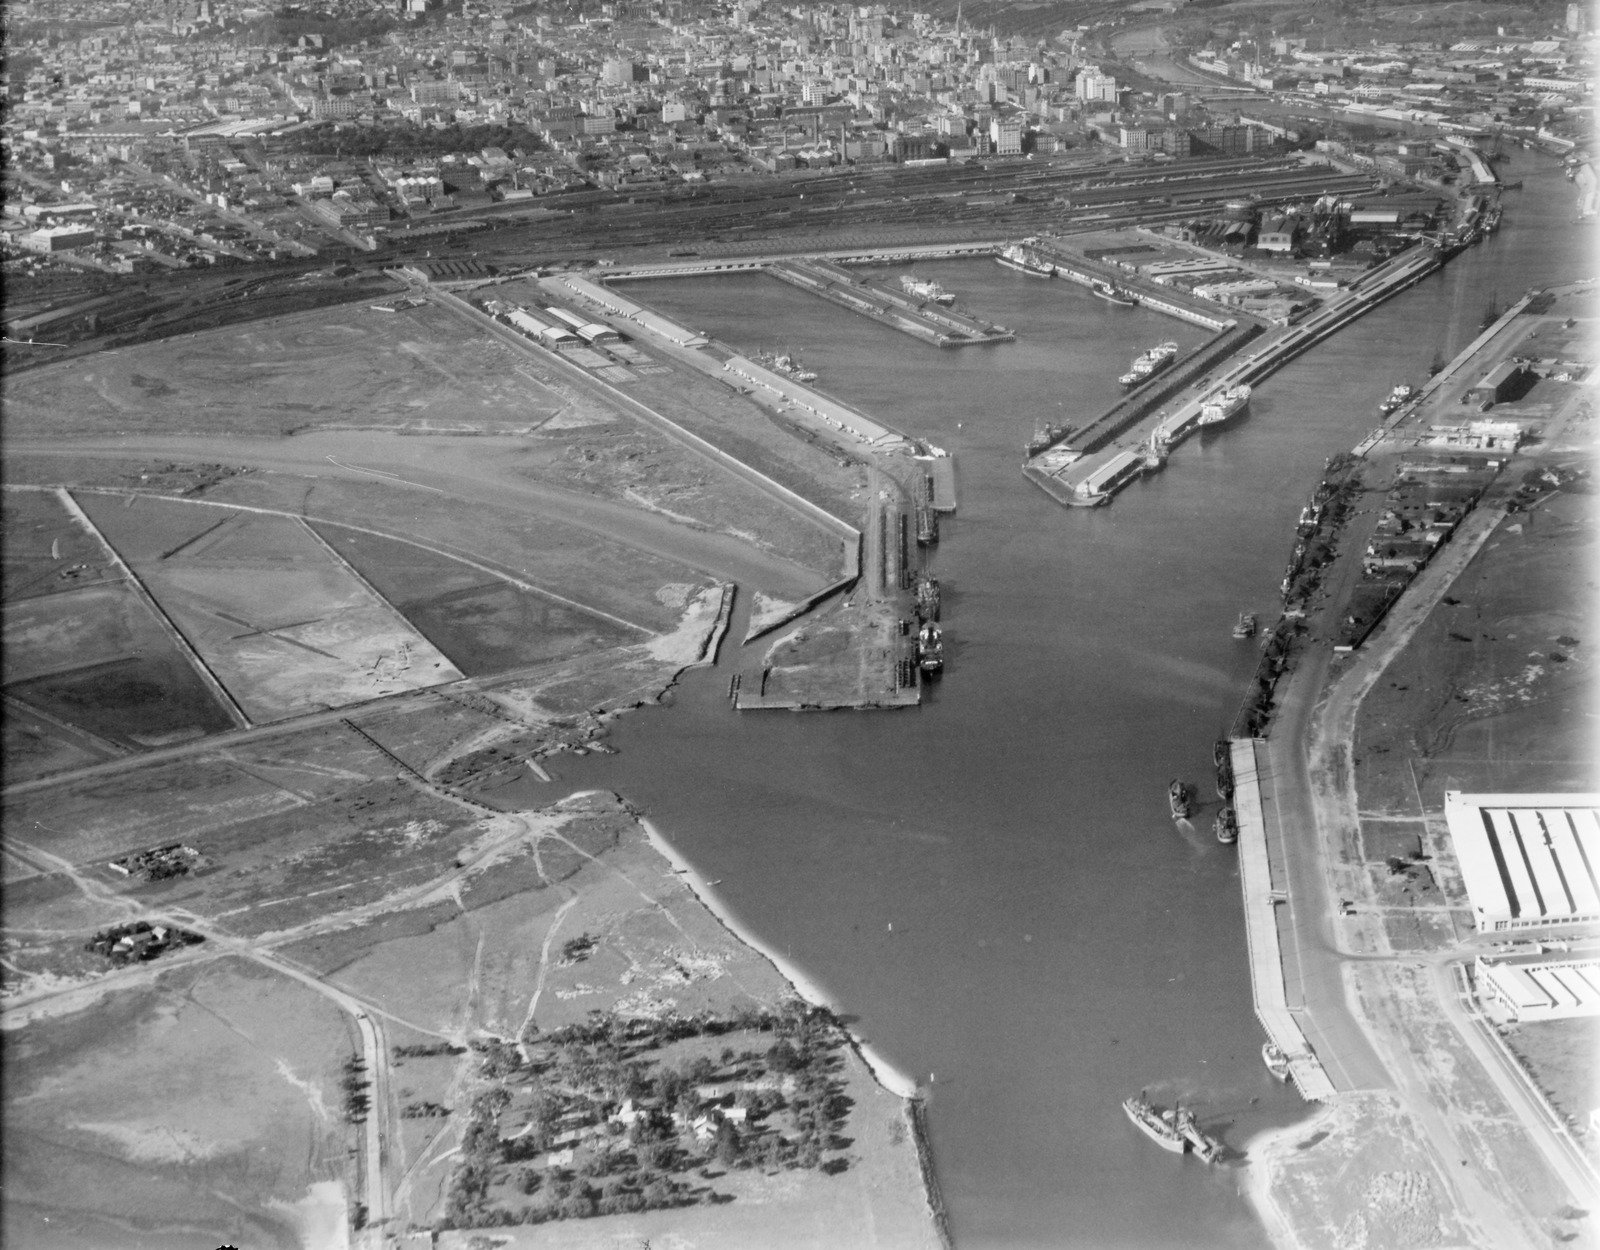
Victoria Docks, Port of Melbourne 1939
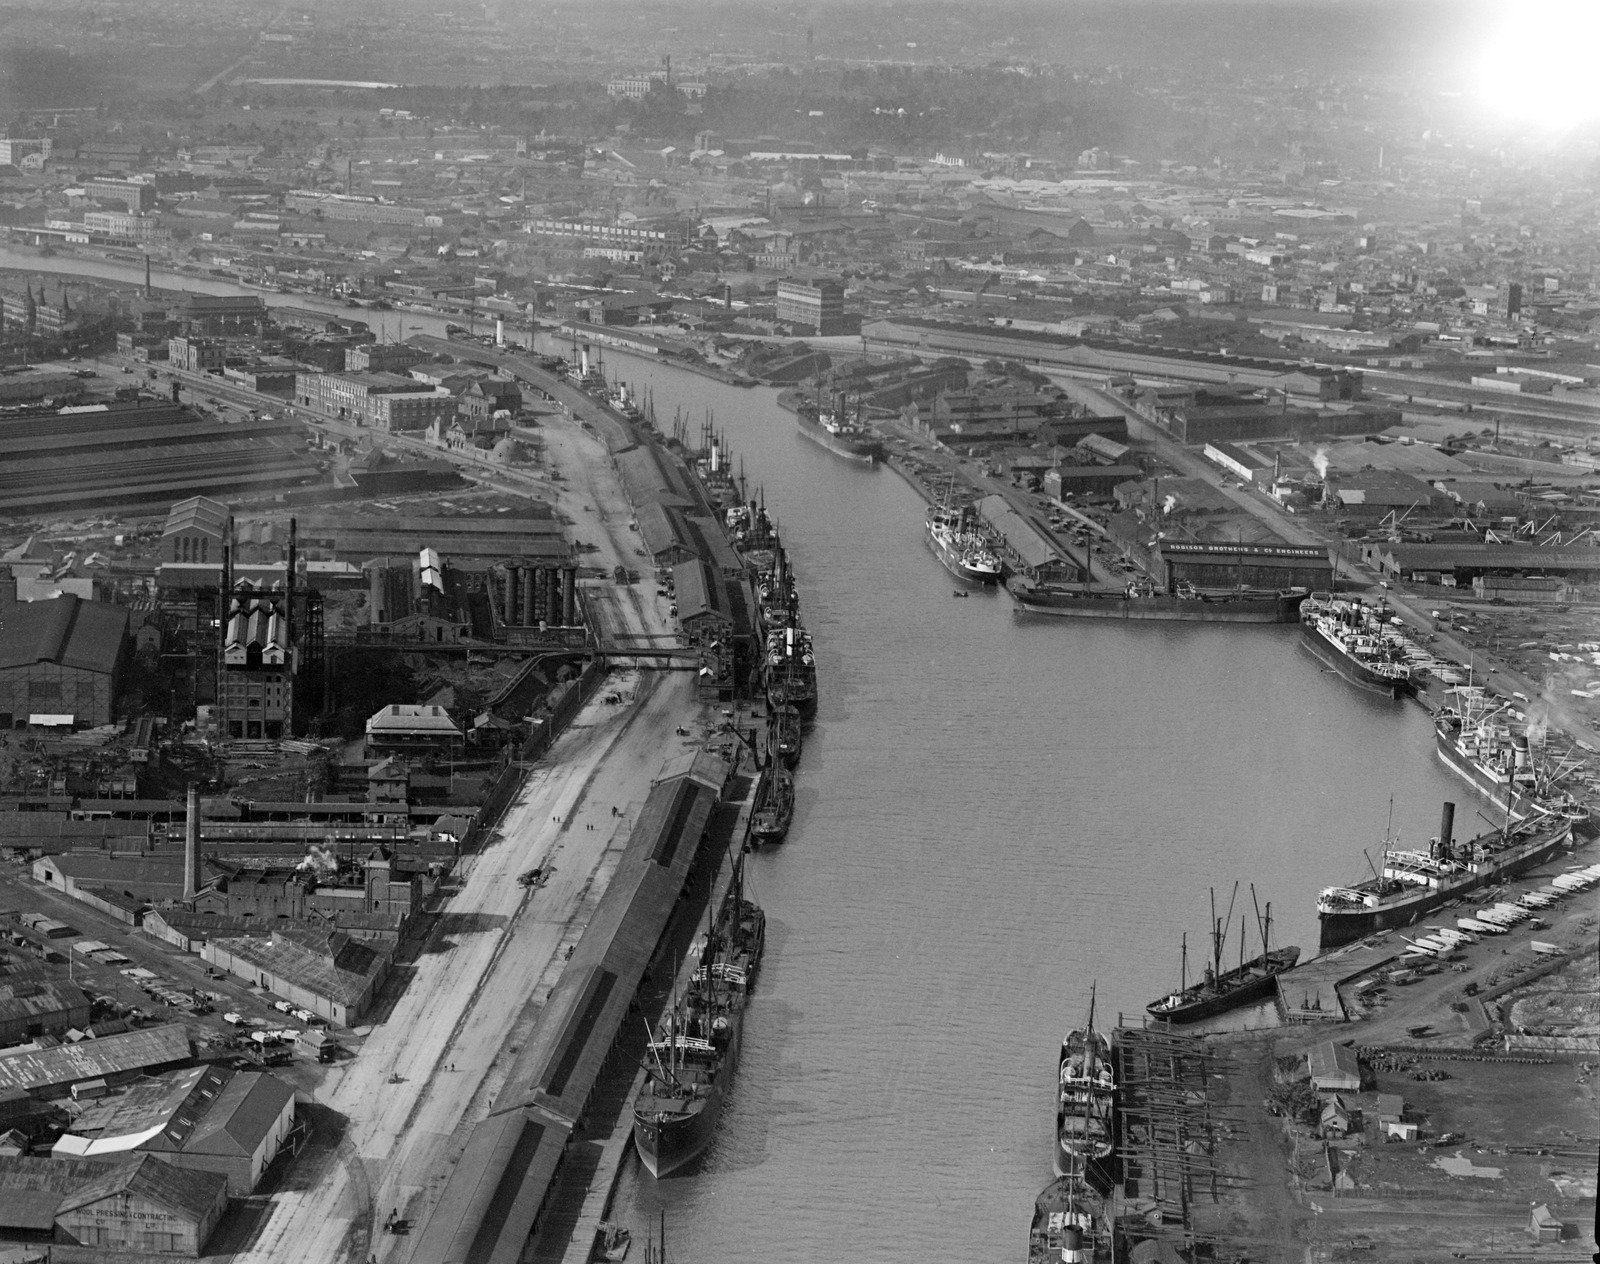
Yarra River docks at Port Melbourne A 1939
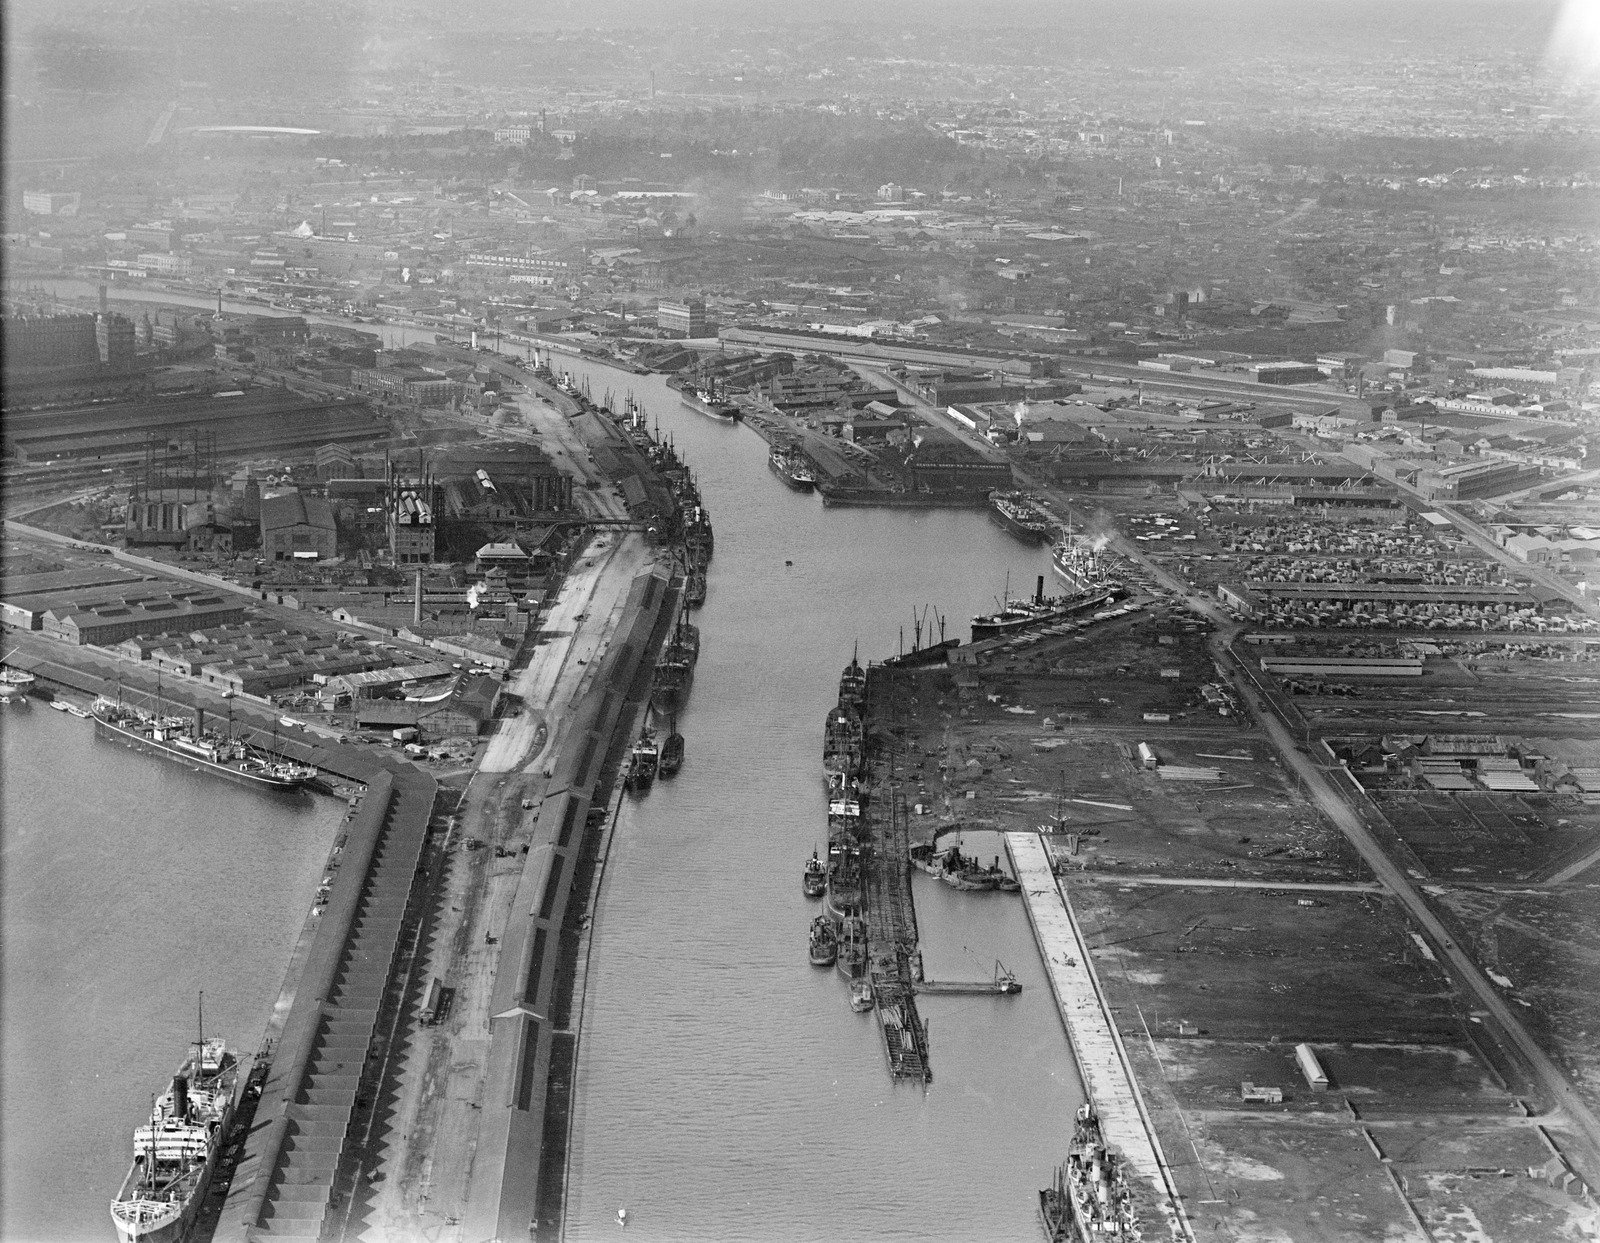
Yarra River docks at Port Melbourne B 1939
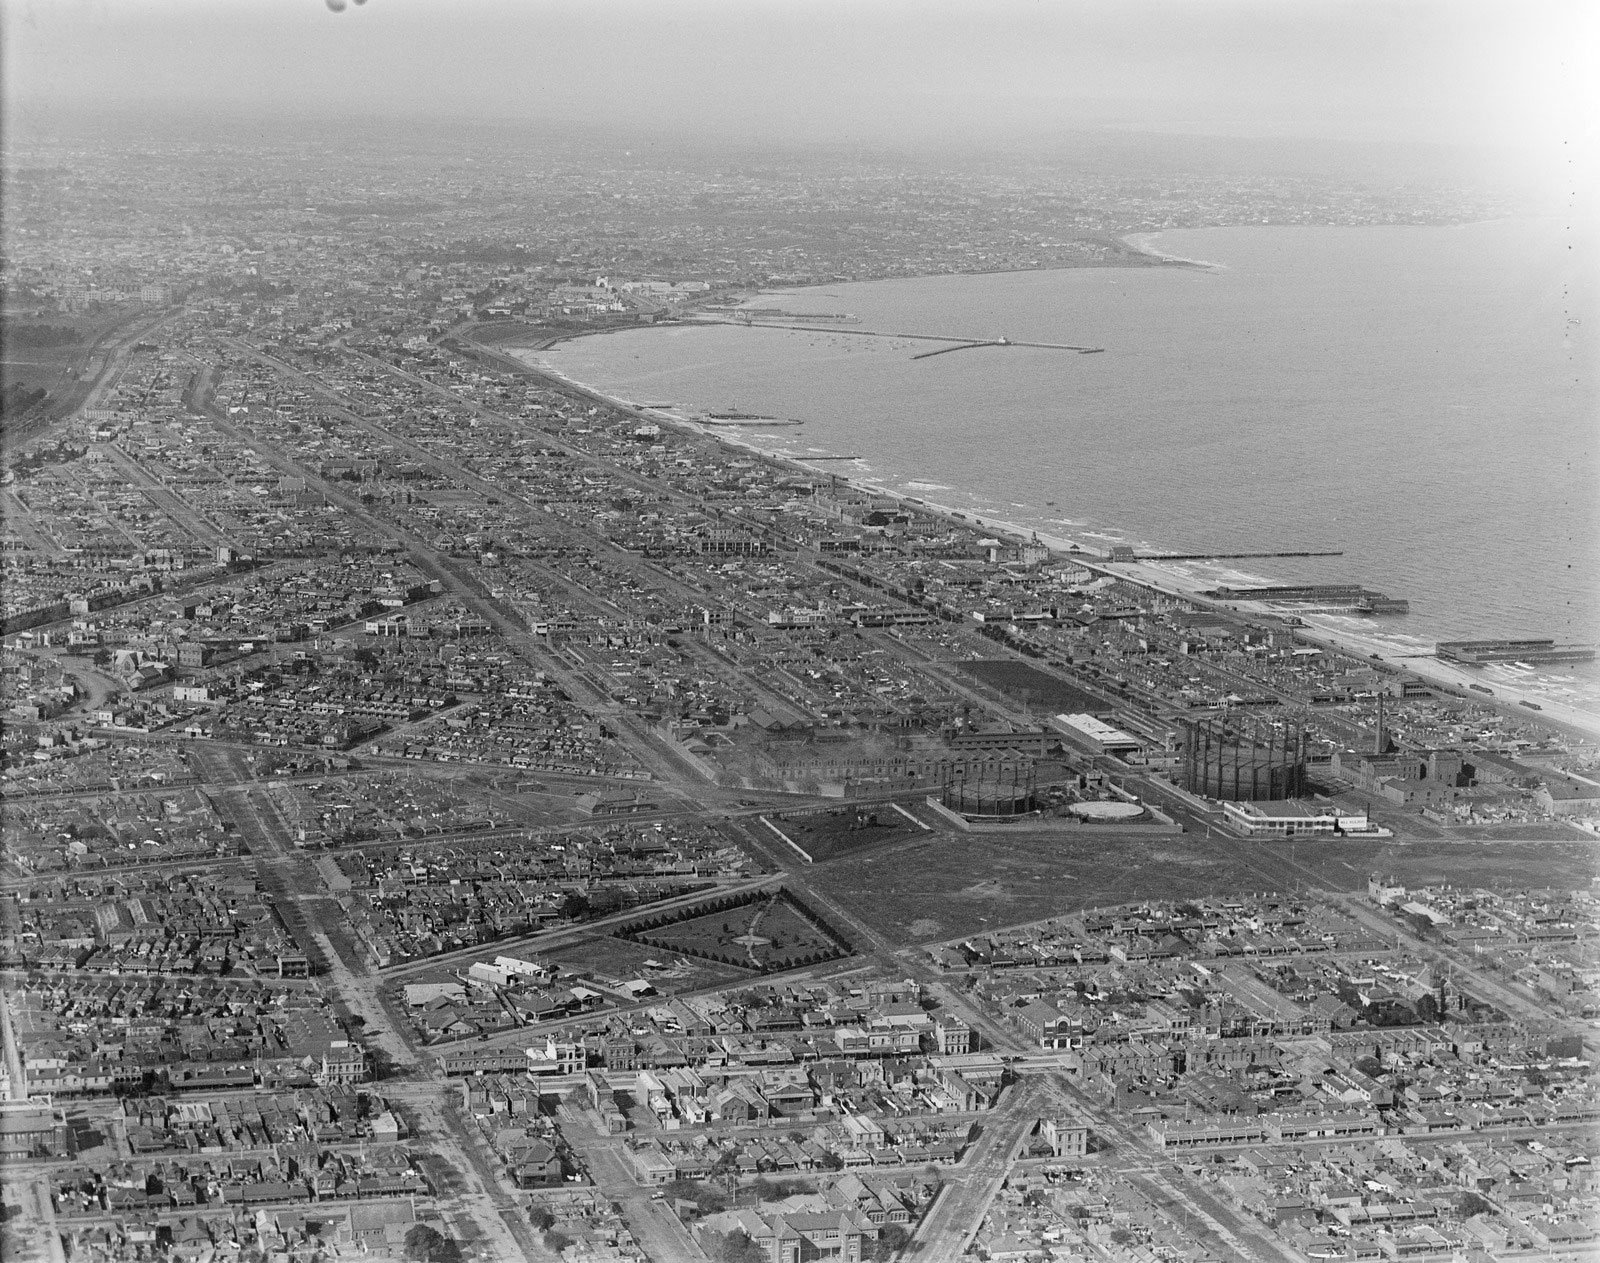
Aerial view over Port Melbourne, looking south towards St. Kilda 1937

Art - Hobson's Bay Railway Pier at Sandridge Near Melbourne 1859
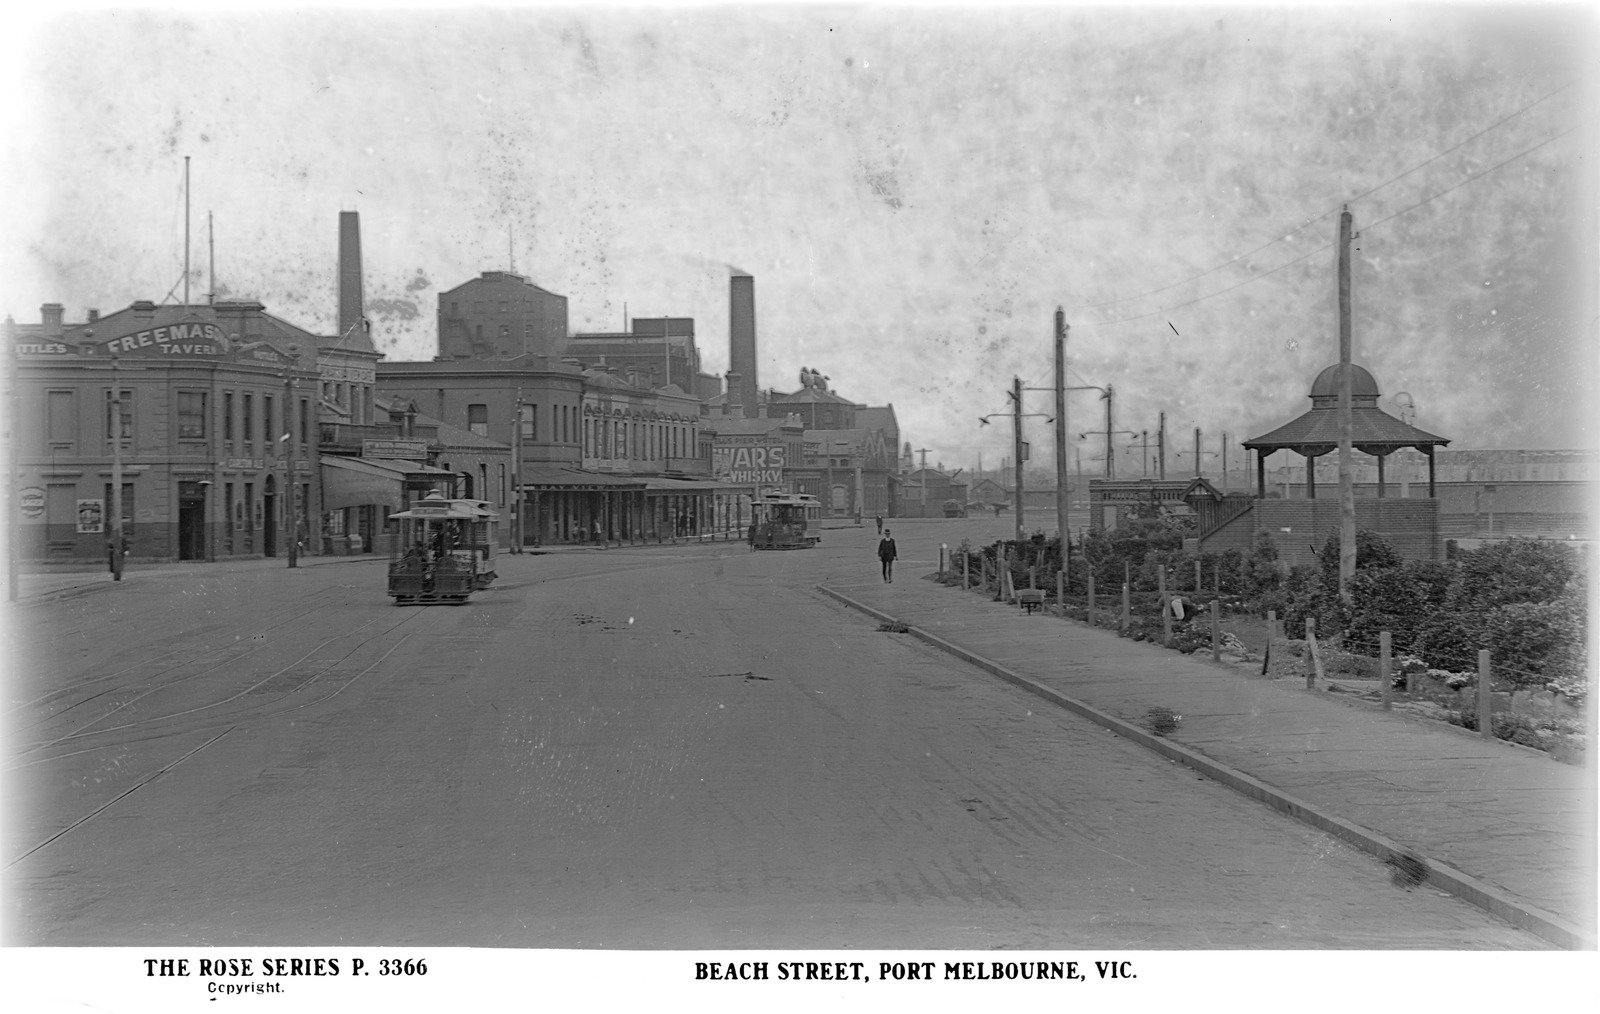
Beach Street, Port Melbourne 1920-54
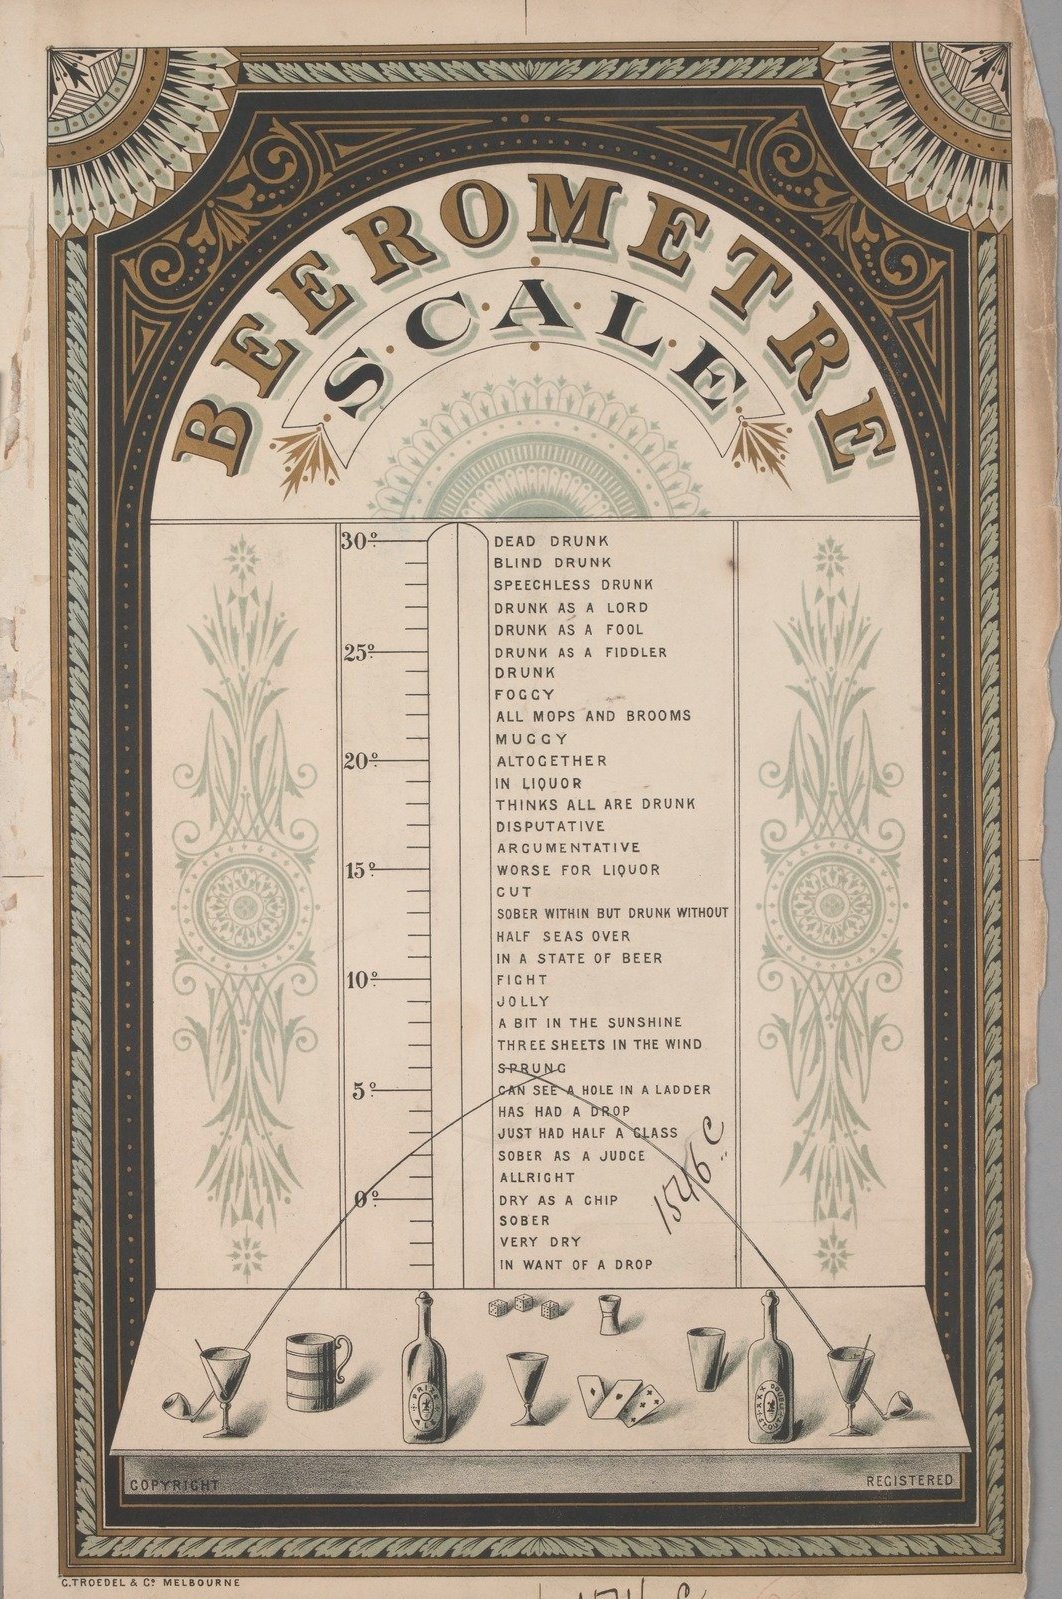
Beerometre scale 1881 Sheet showing a comical scale of intoxication from Dead Drunk at top to In Want of a Drop at the bottom
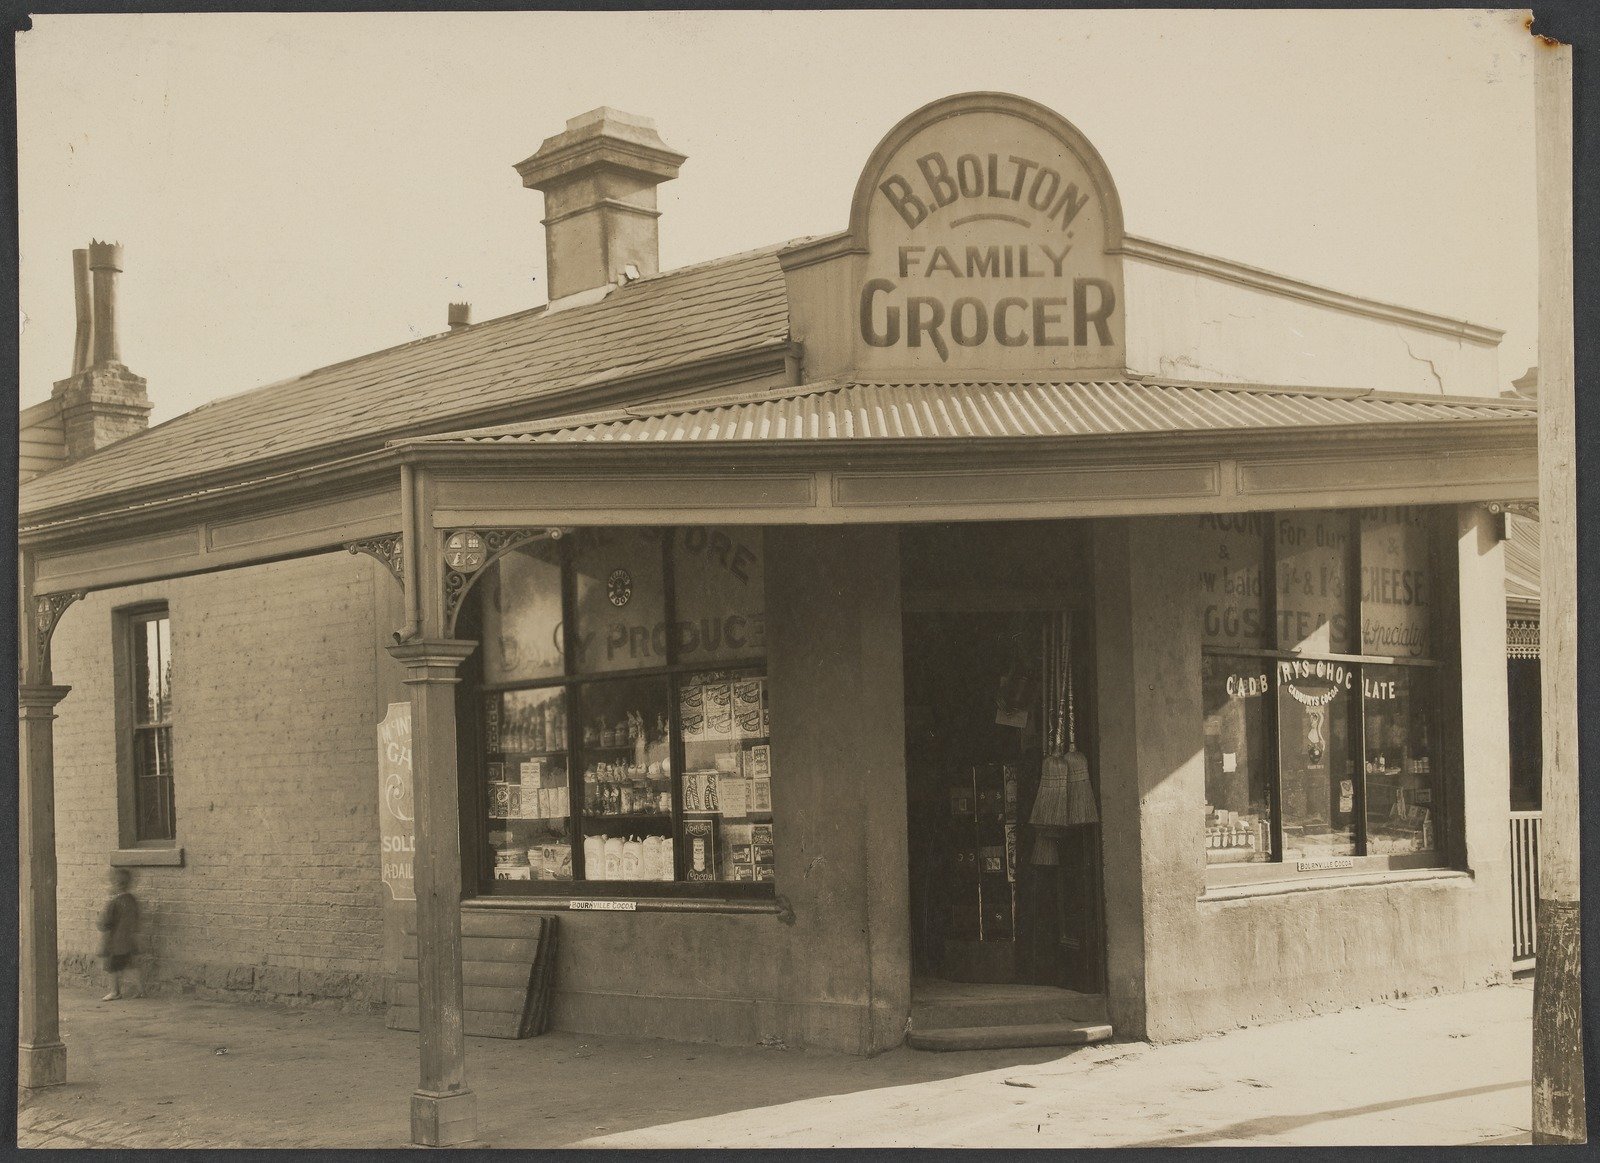
Exterior, Benjamin Bolton, Family Grocer, Port Melbourne 1913
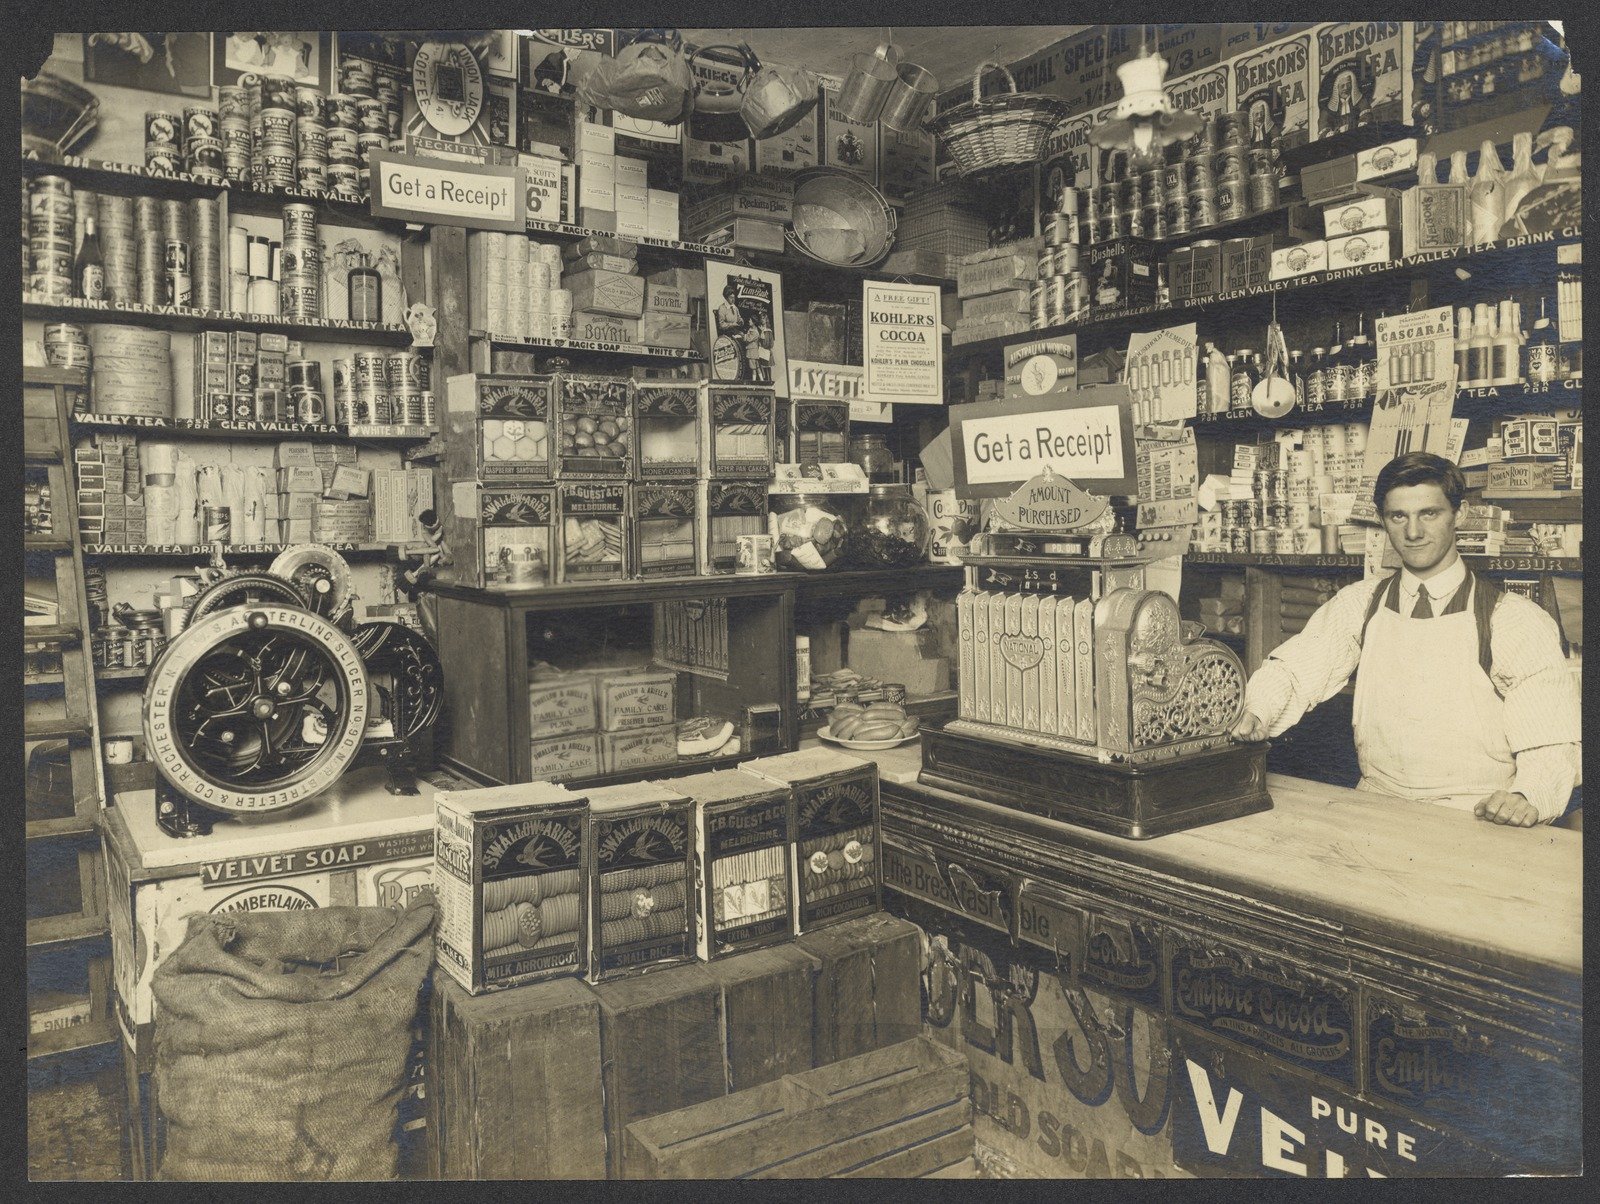
Interior Benjamin Bolton, Family Grocer, Port Melbourne 1913
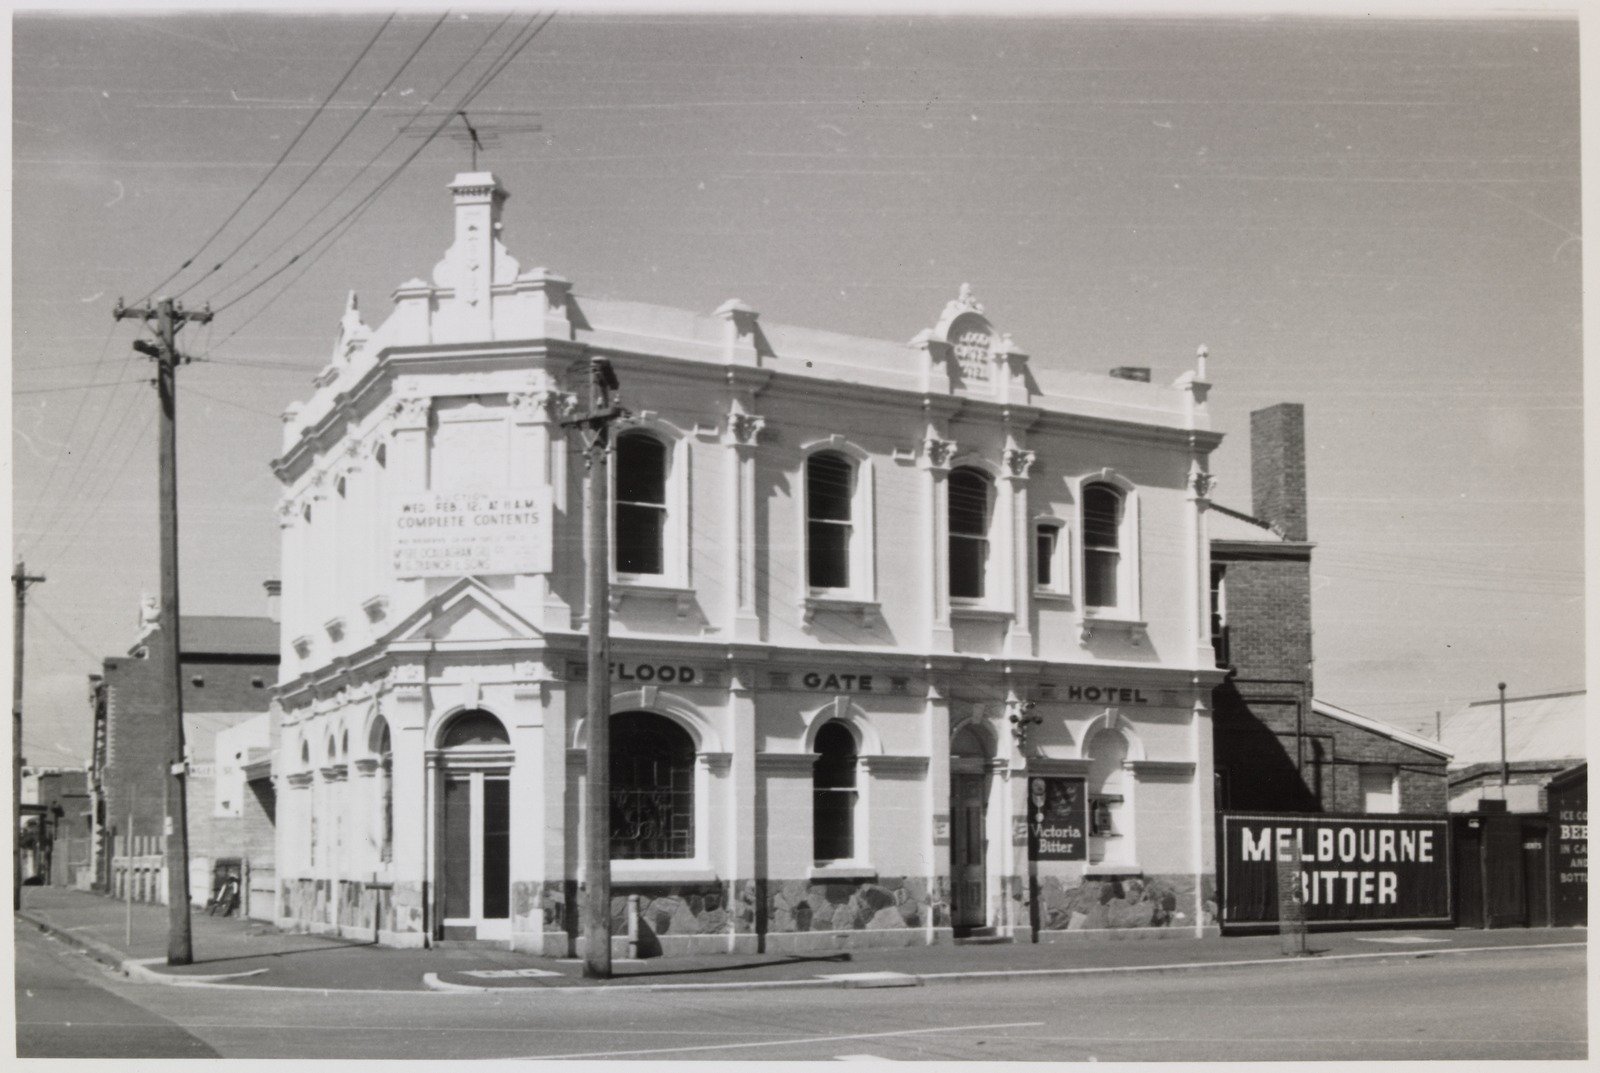
Flood Gate Hotel Crockford St 1969
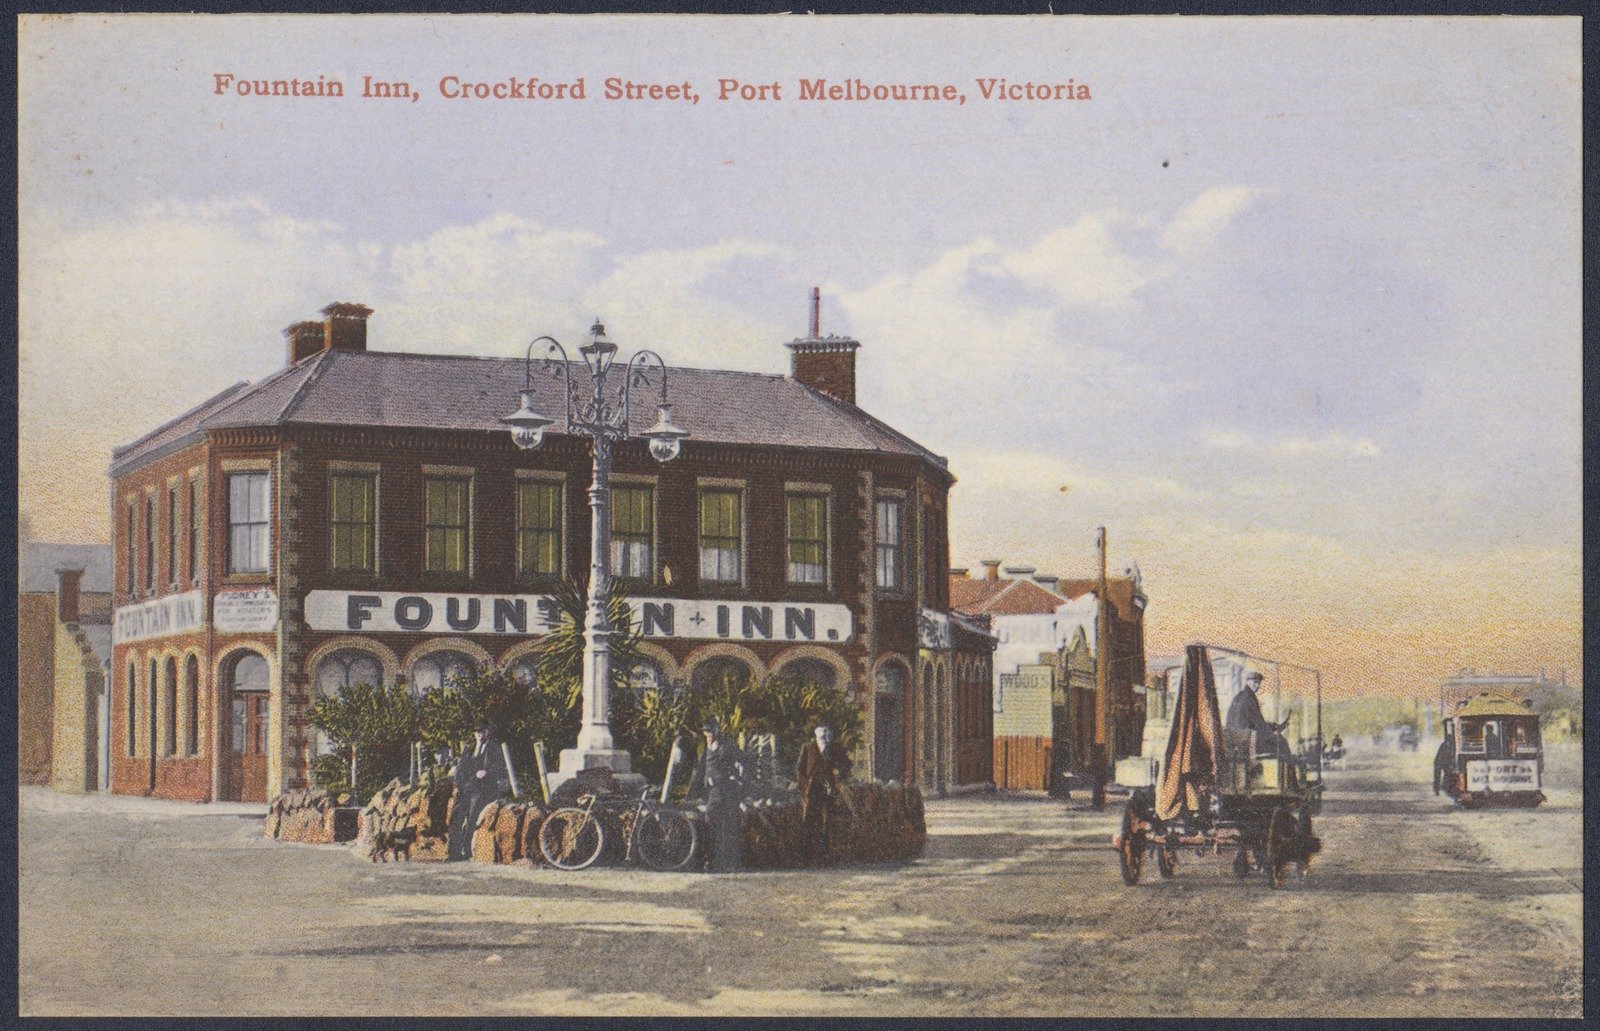
Fountain Inn, Crockford Street, Port Melbourne 1900-09
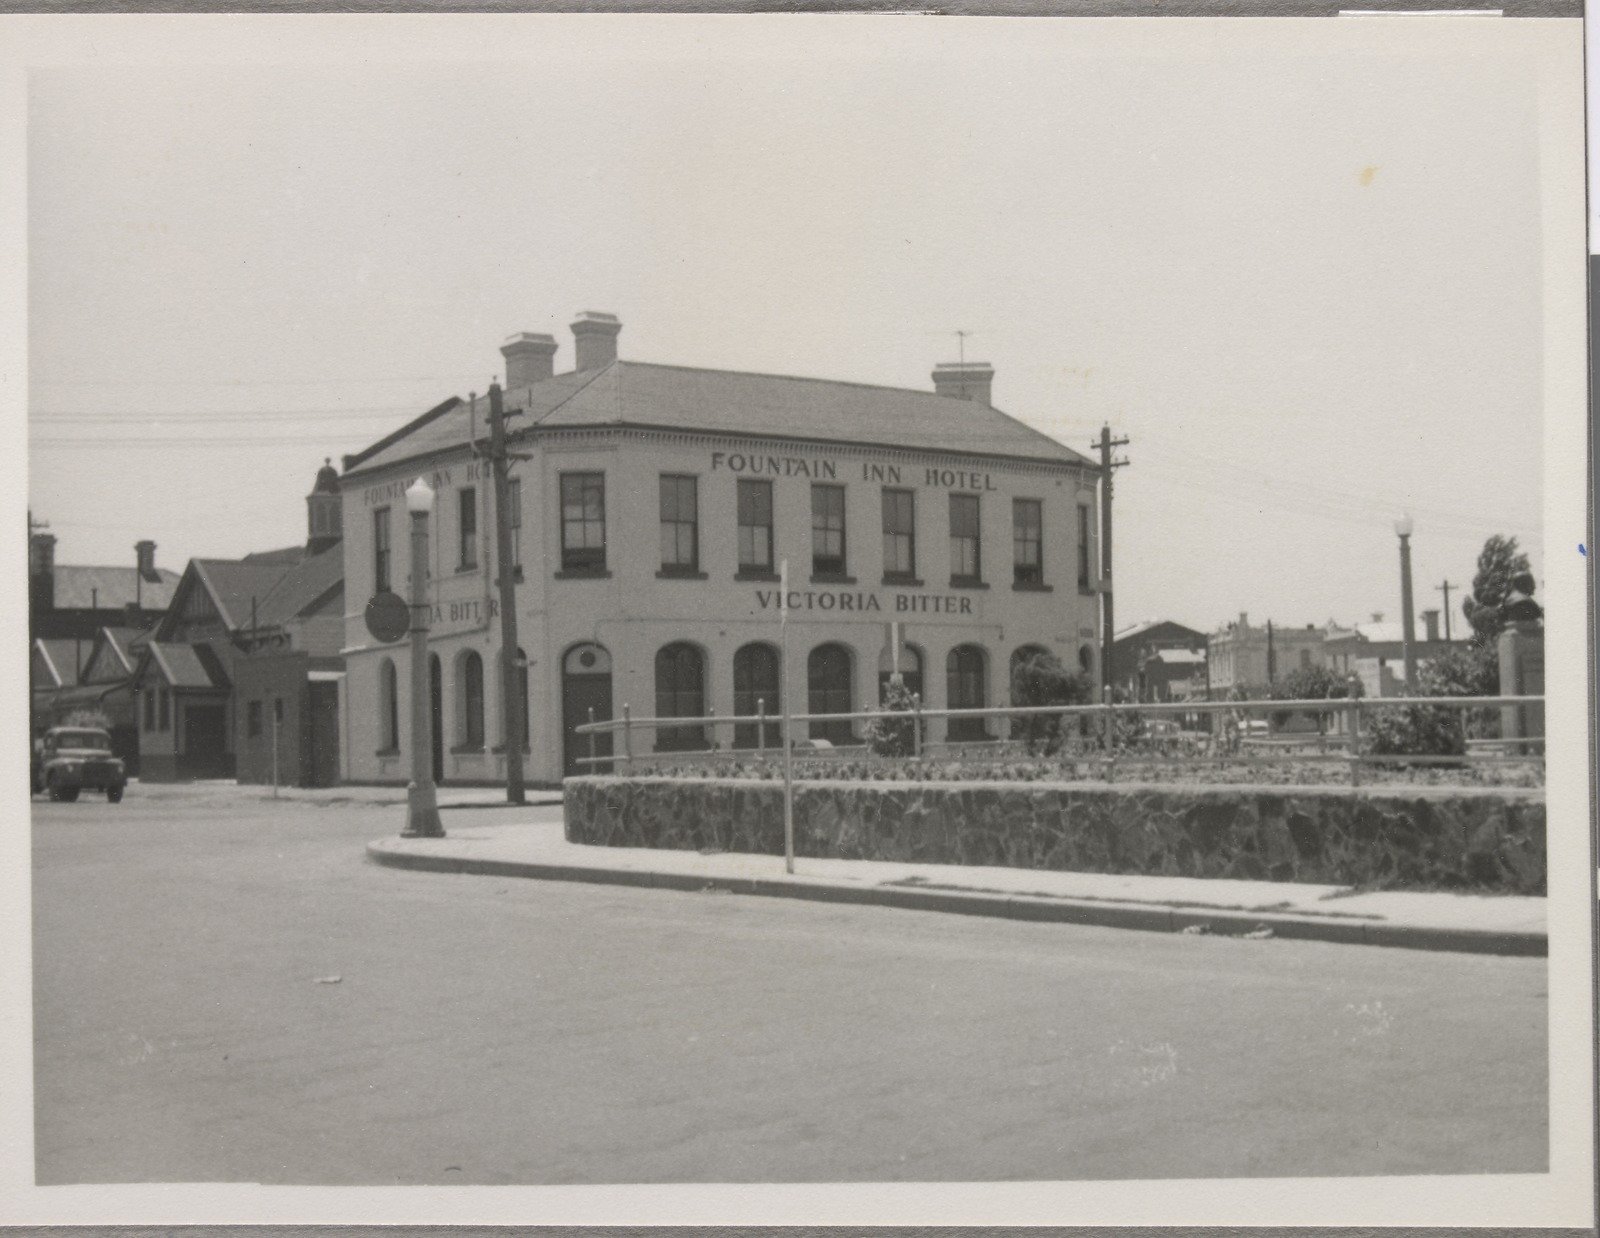
Fountain Inn, Port Melbourne 1959
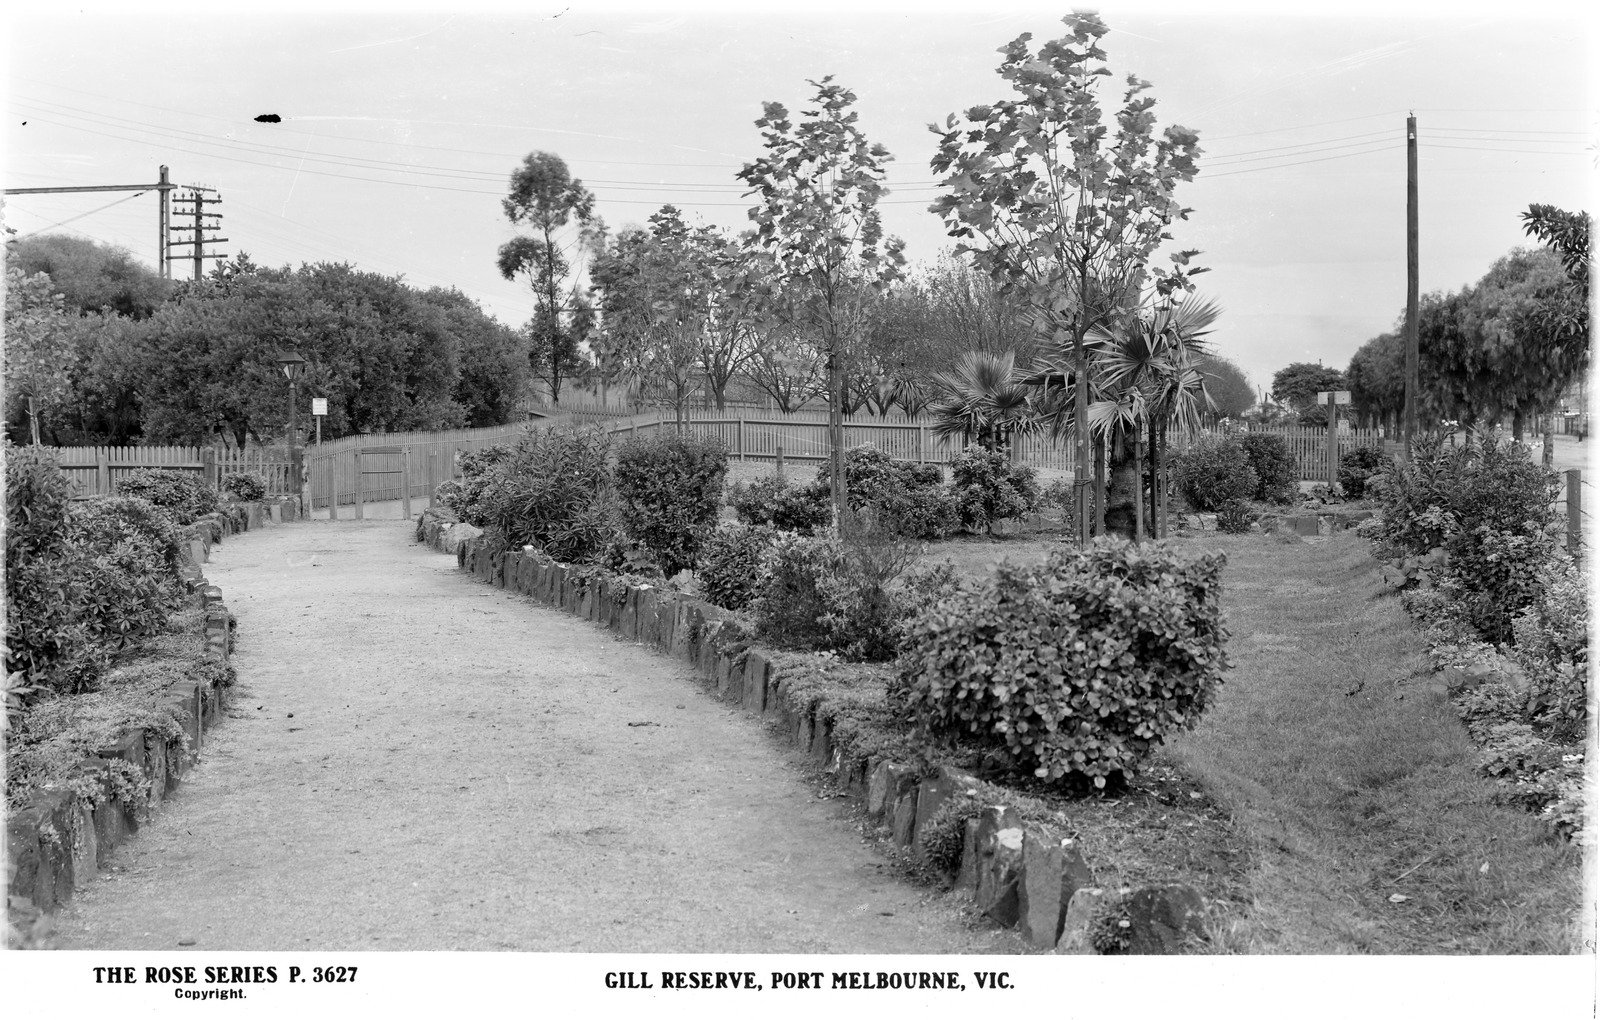
Gill Reserve, Port Melbourne 1920-50

Horse drawn wagon owned by Port Melbourne City Council 1910

Imperial contingent - view in Bay St. Port Melbourne 1901

Panorama - Melbourne 1853 - views of Melbourne through to Sandridge from Flagstaff Observitory

Hoyts Eclipse Theatre, 88 Crockford Street, Port Melbourne 1940
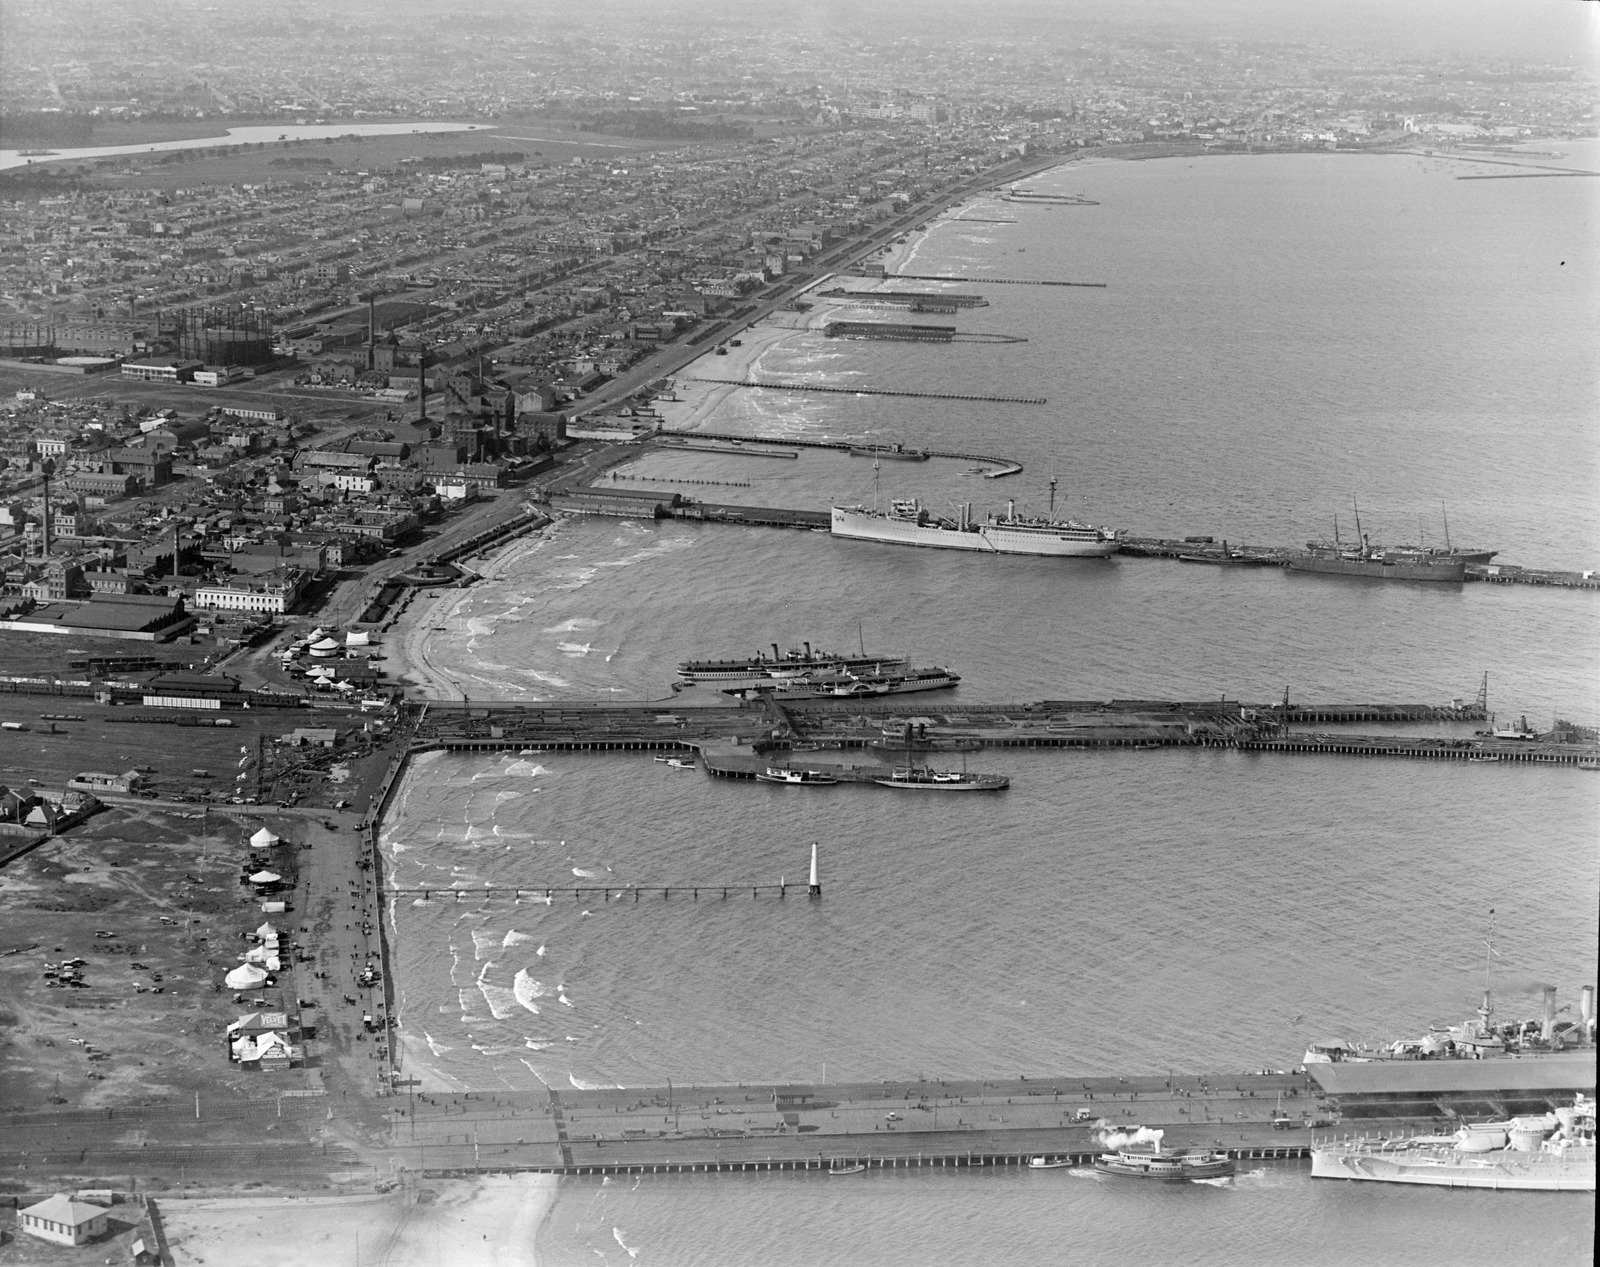
Piers at Port Melbourne aerial 1920-1940

Port Melbourne - Church St facing wall of Methodist church 1935 (just around the corner)

Smith Reserve, Port Melbourne 1920-50
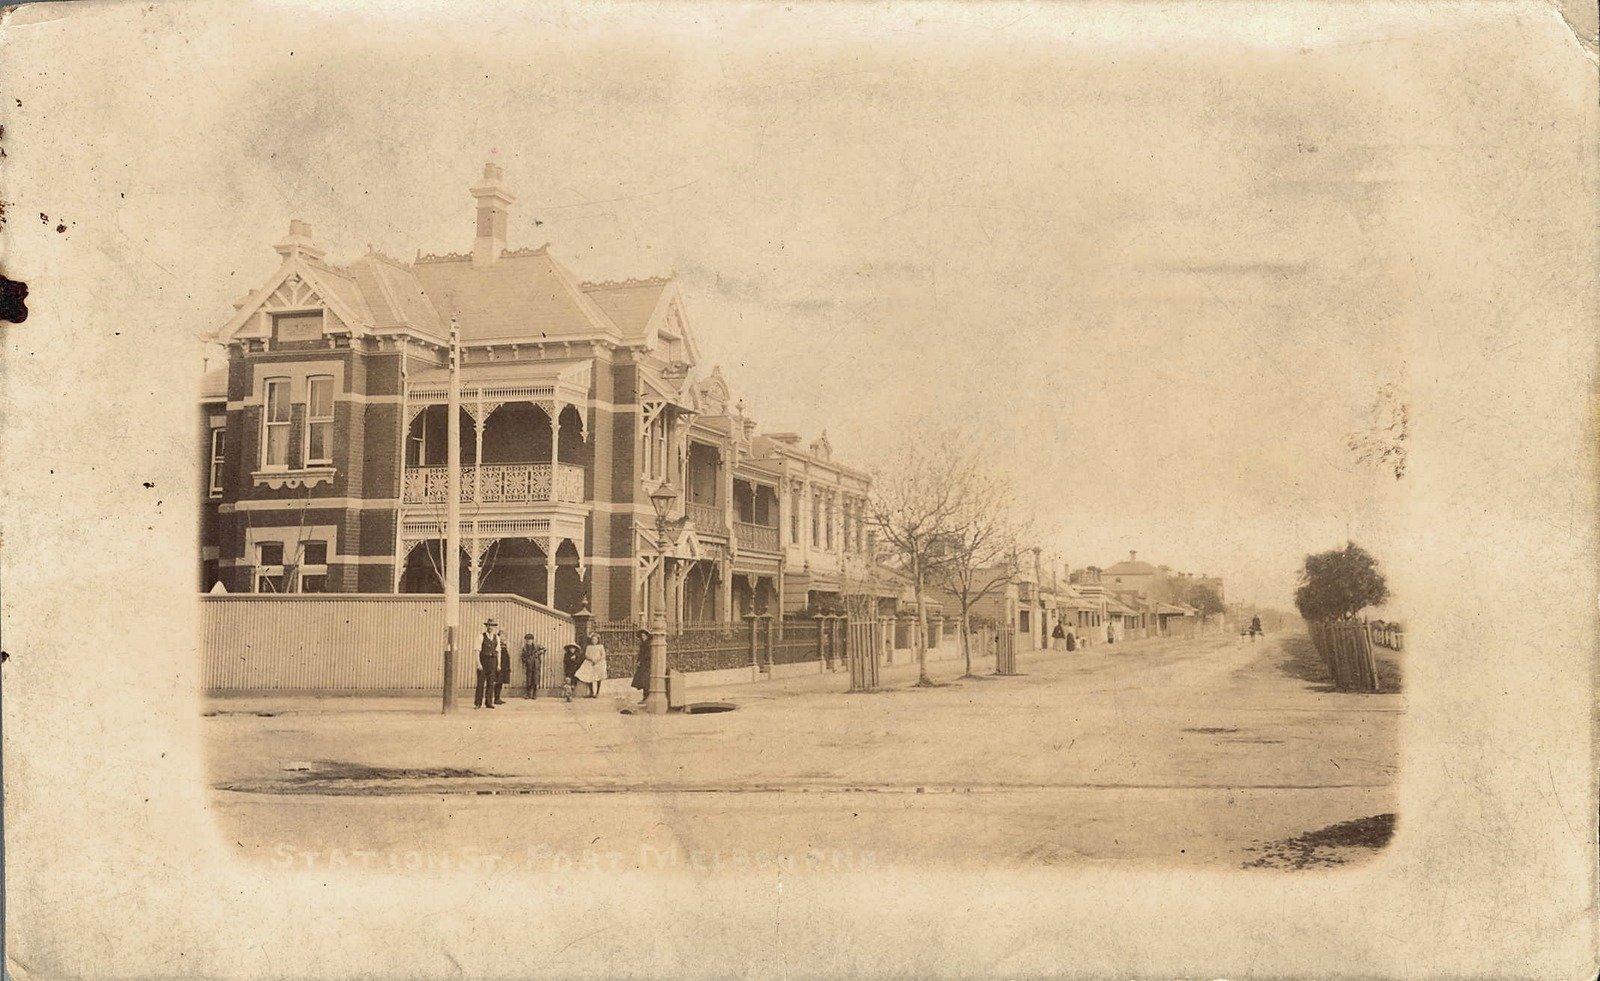
Station St. Port Melbourne 1907
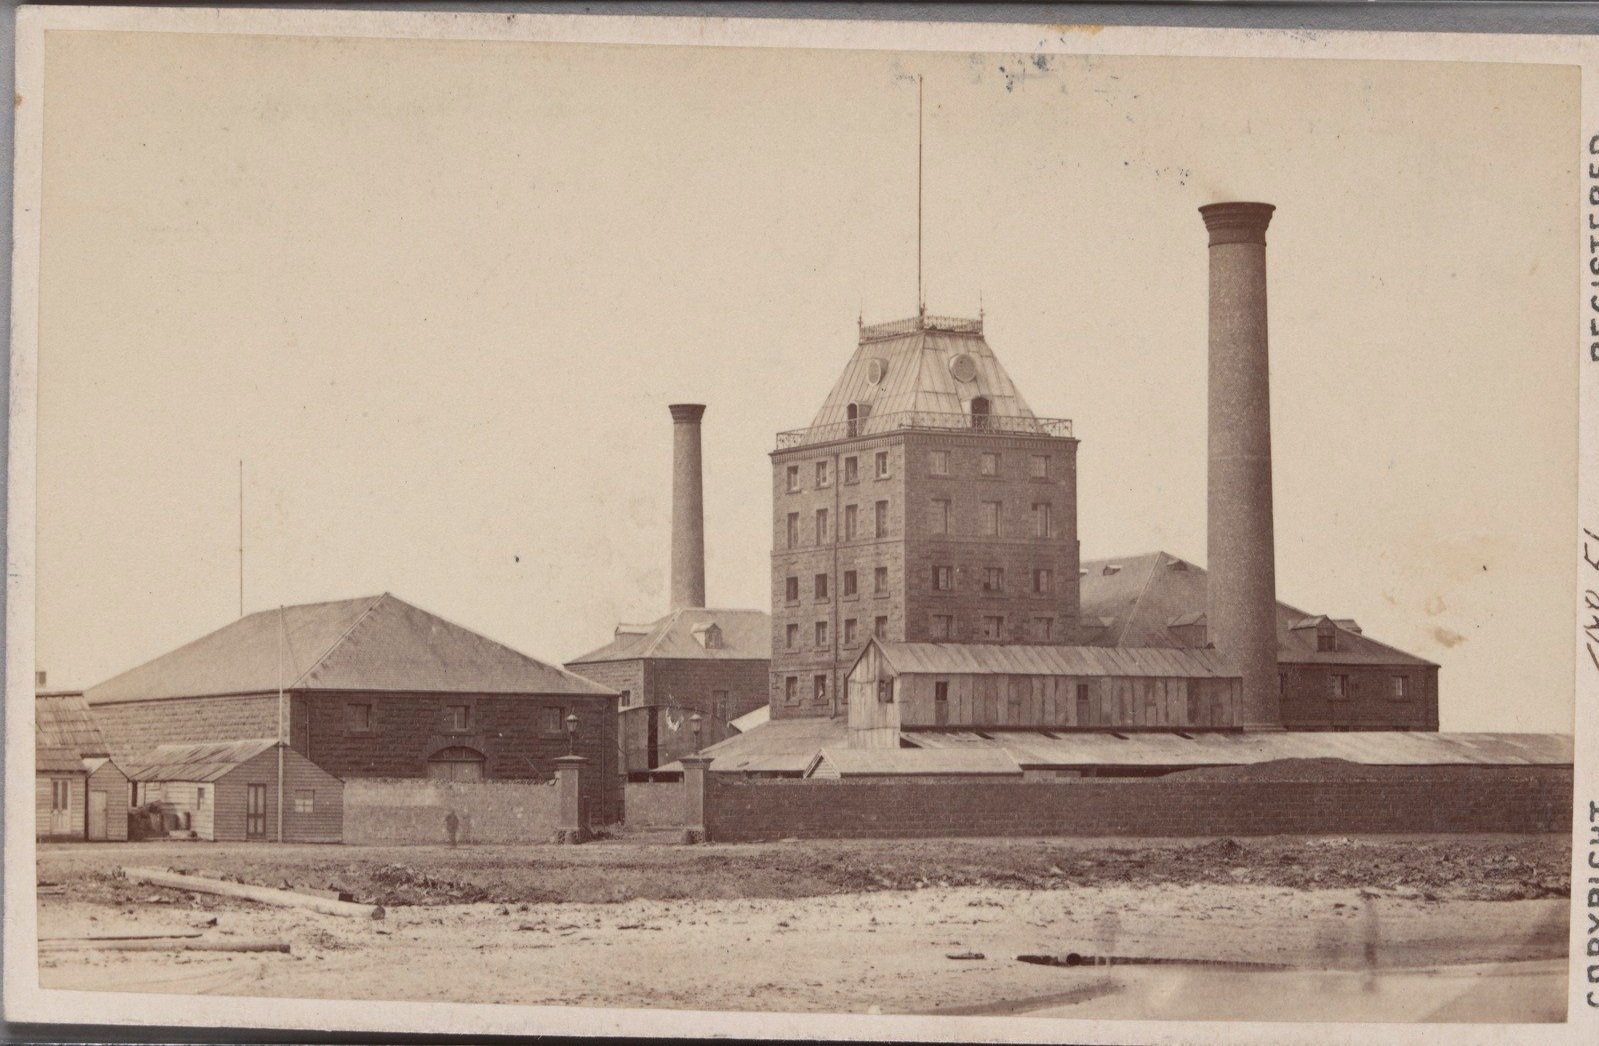
Sugar works, Sandridge 1870 prior to burning down
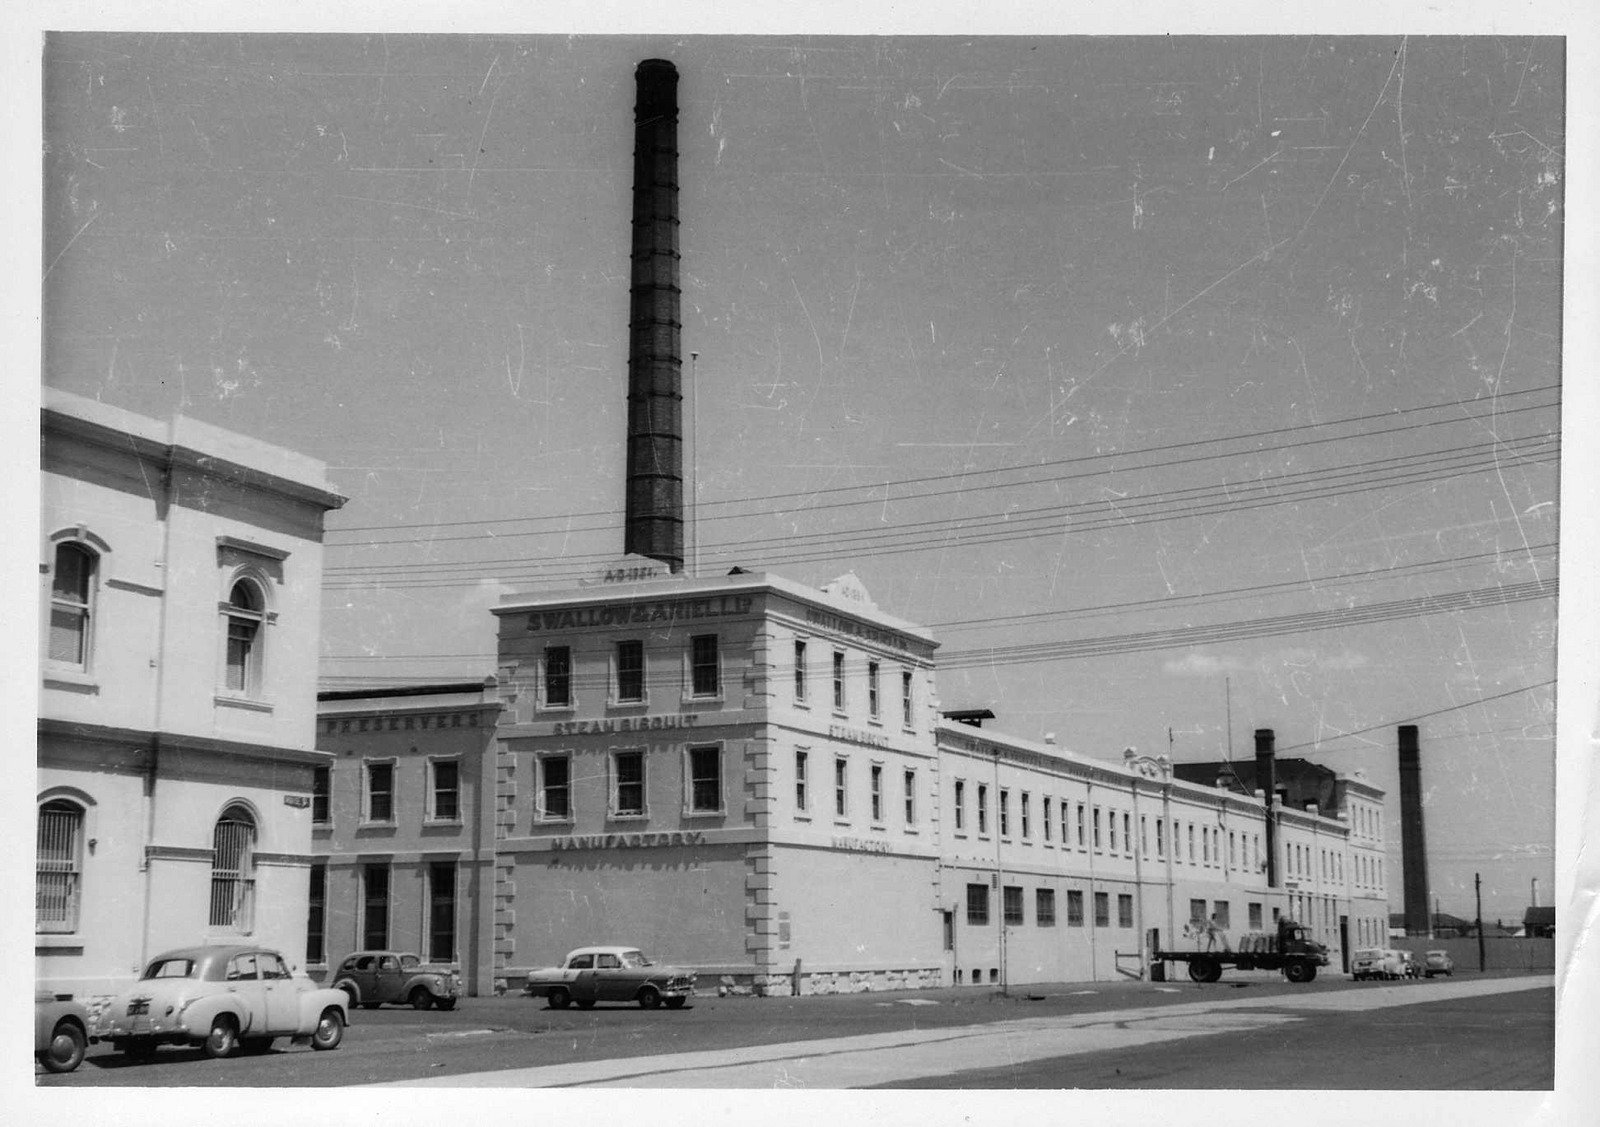
Swallow & Ariel's Factory, Port Melbourne 1963

Swallow & Ariell's biscuits & cakes poster 1920s - factory was in sandridge

Swallow Street, Port Melbourne - On route to Princes Pier, Port Melbourne 1928

The New Pier, Port Melbourne 1920-50
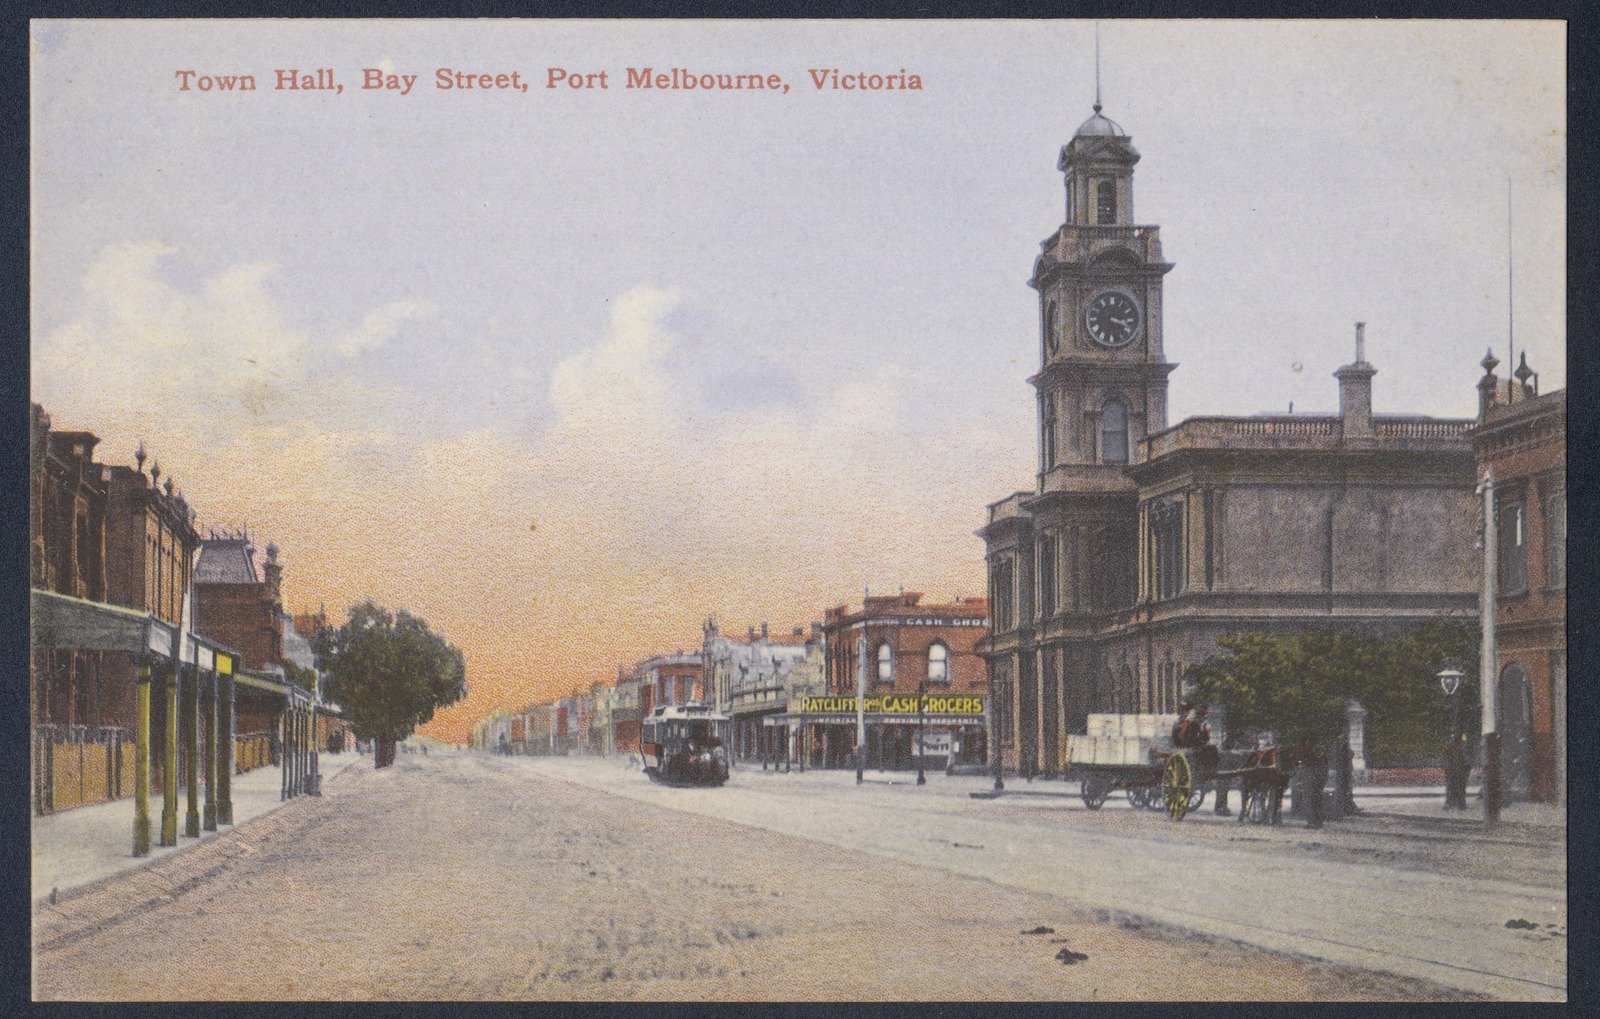
Town Hall, Bay Street, Port Melbourne 1900-09
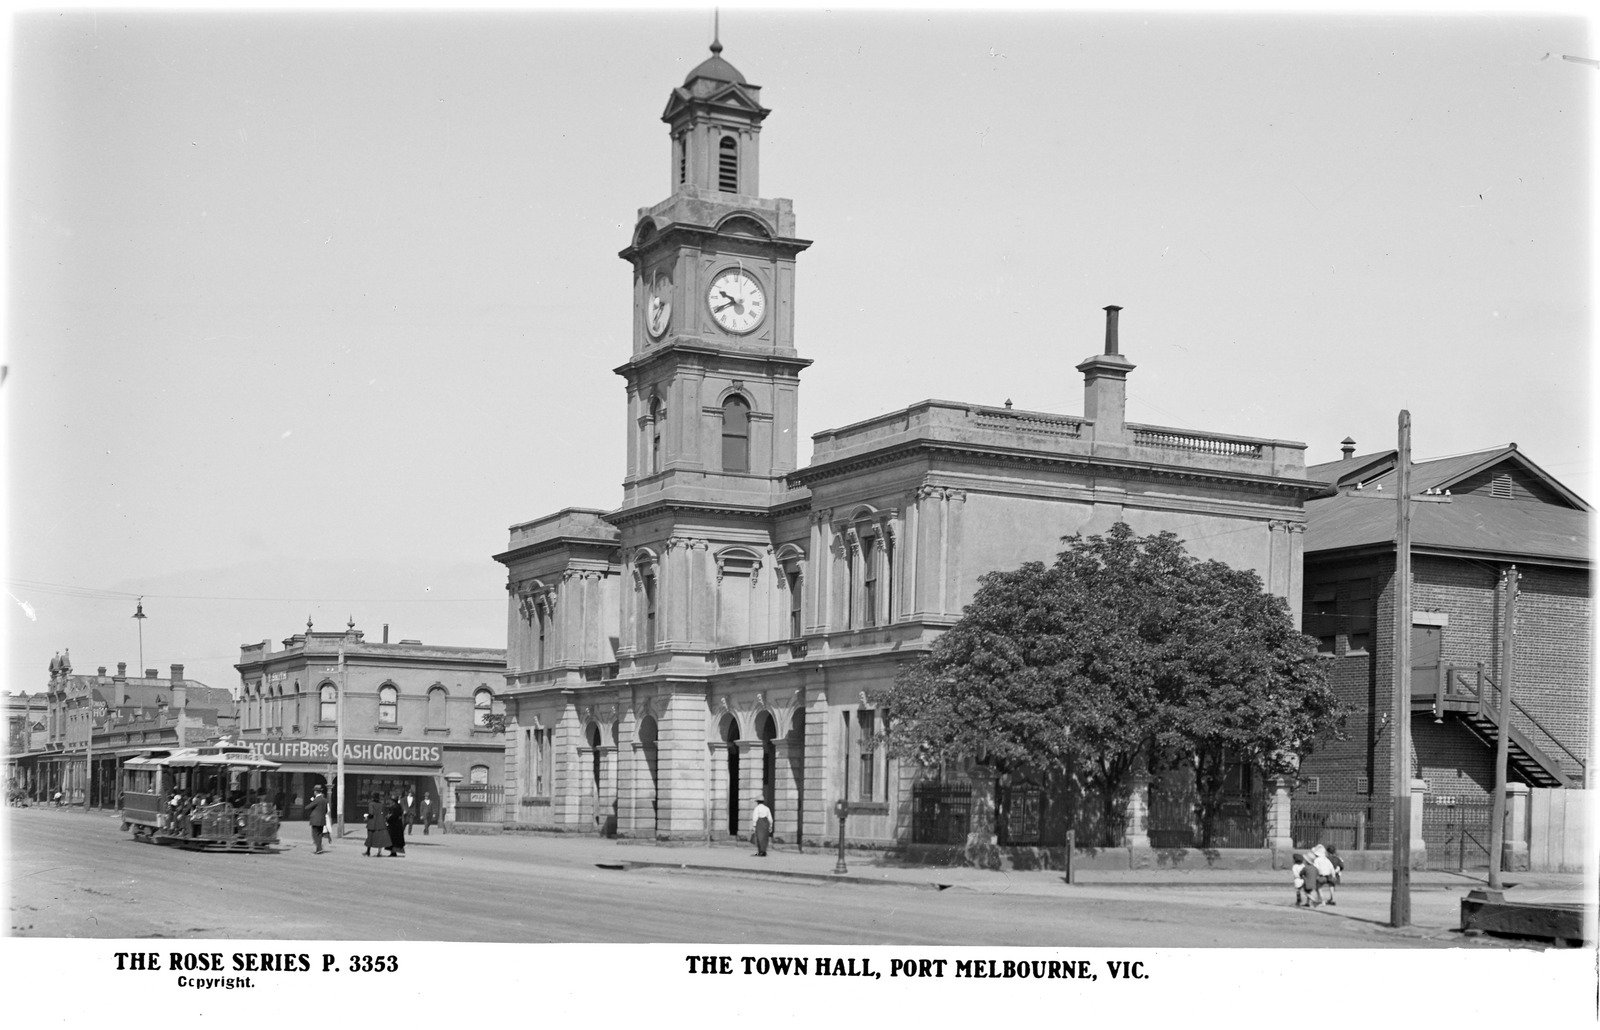
Town Hall, Port Melbourne 1920-50
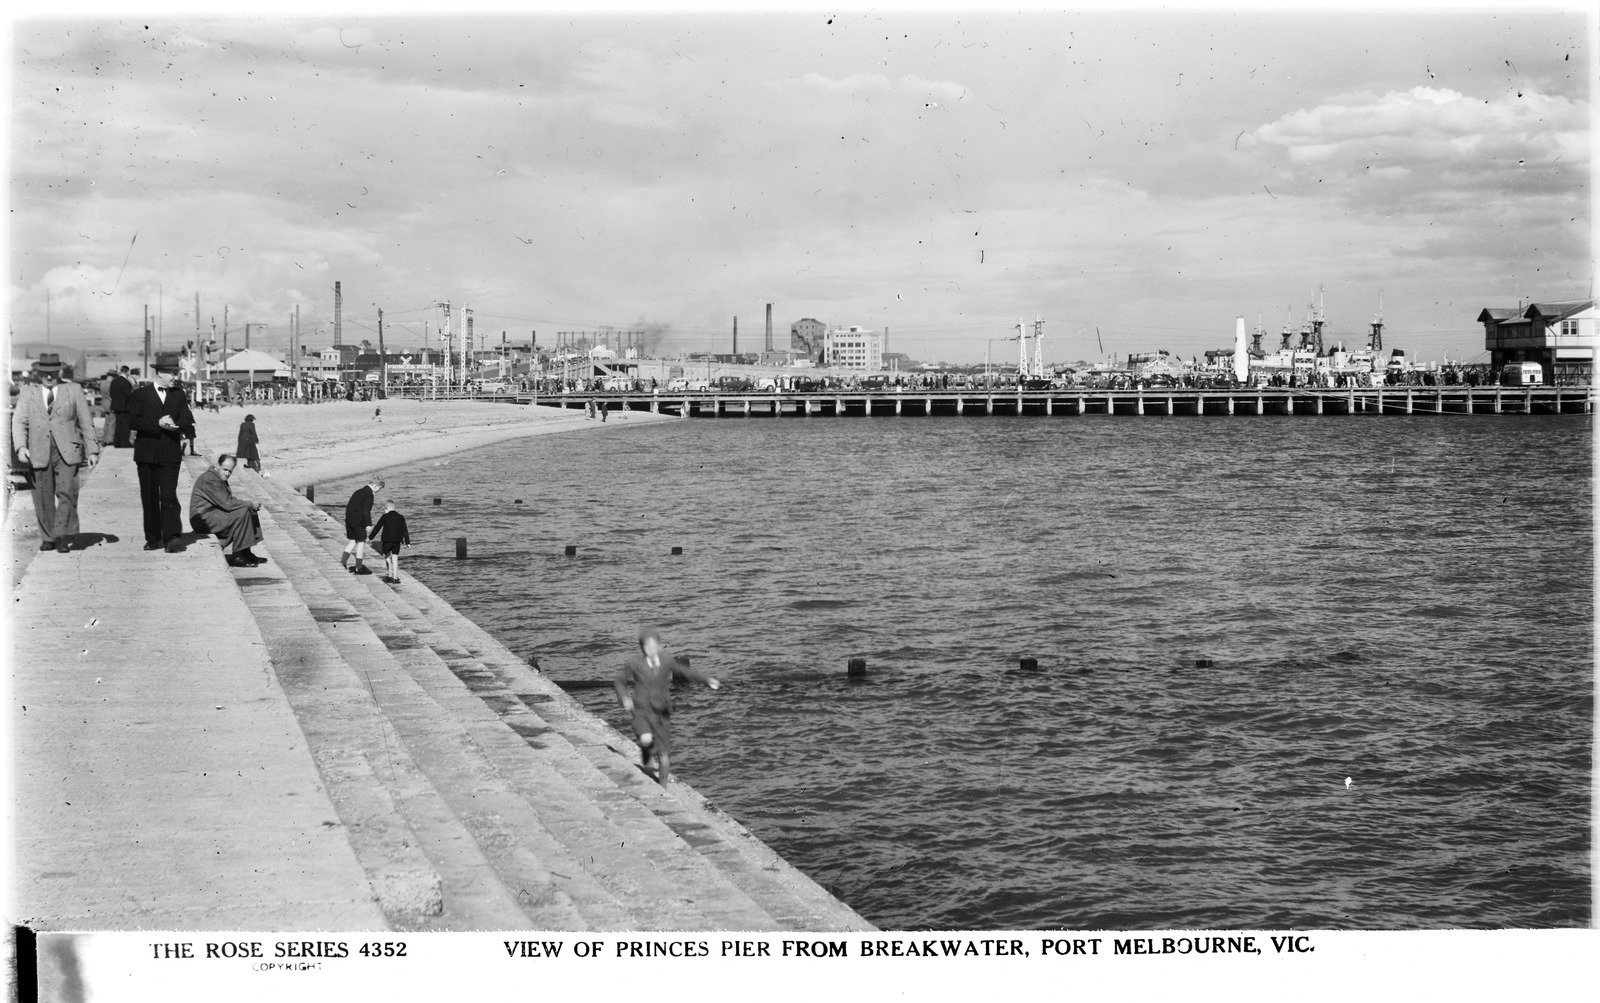
VIEW OF PRINCES PIER FROM BREAKWATER, PORT MELBOURNE, VIC 1920-54
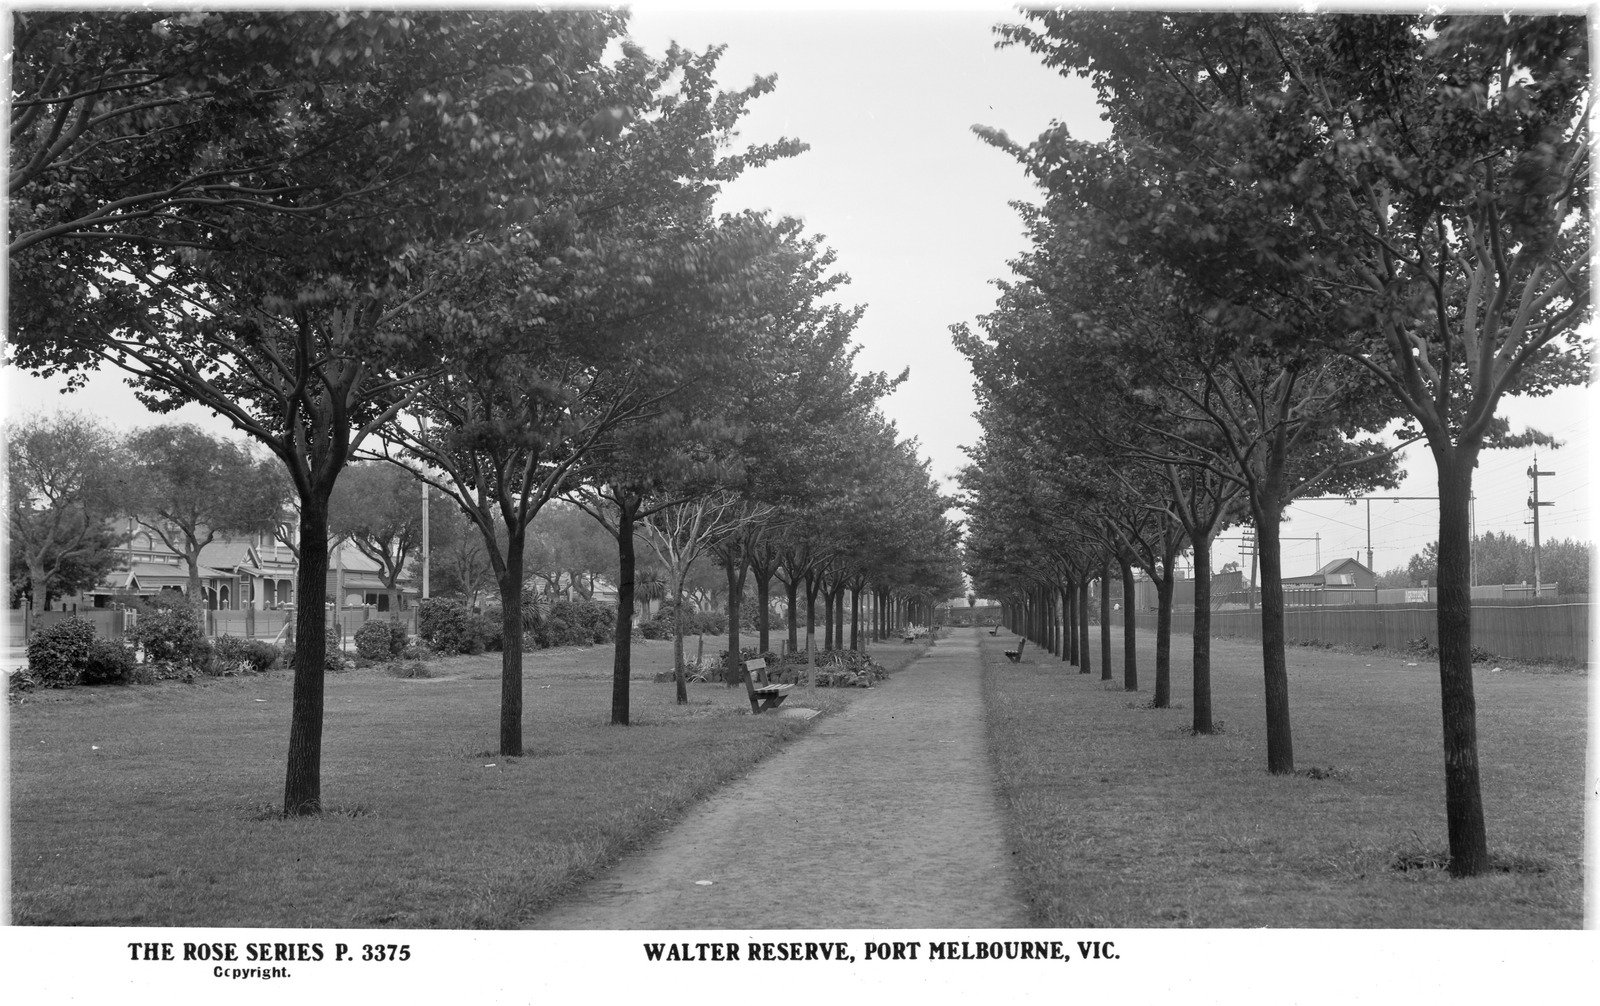
Walter Reserve, Port Melbourne 1920-50
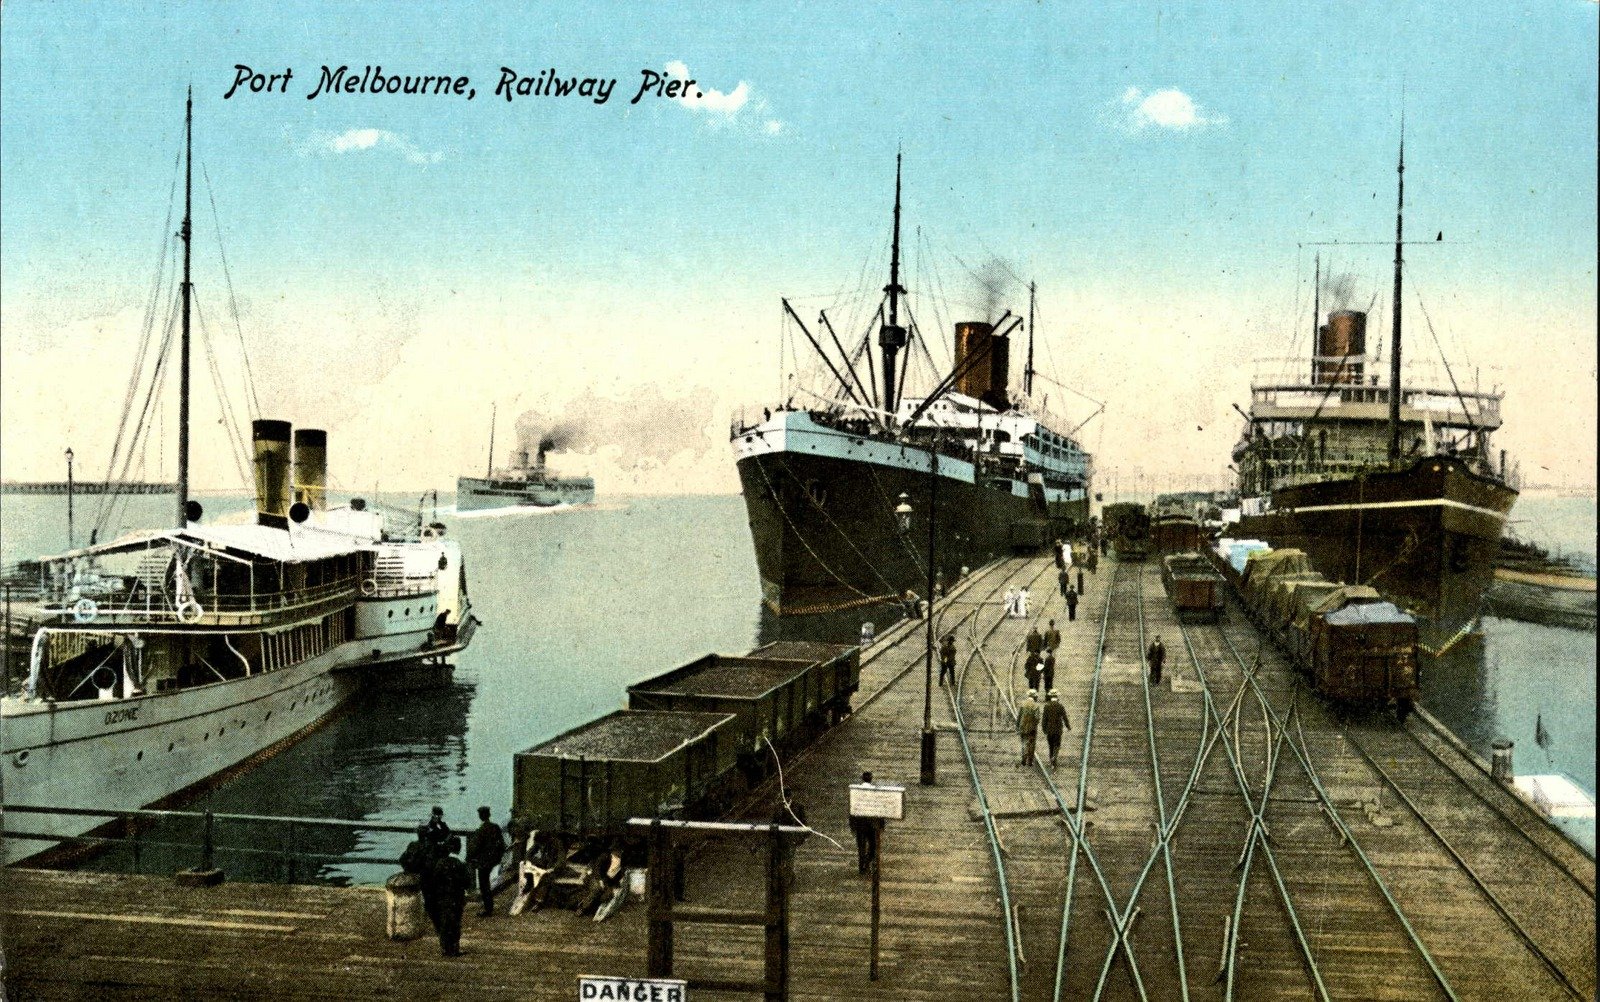
Port Melbourne, Railway Pier 1907
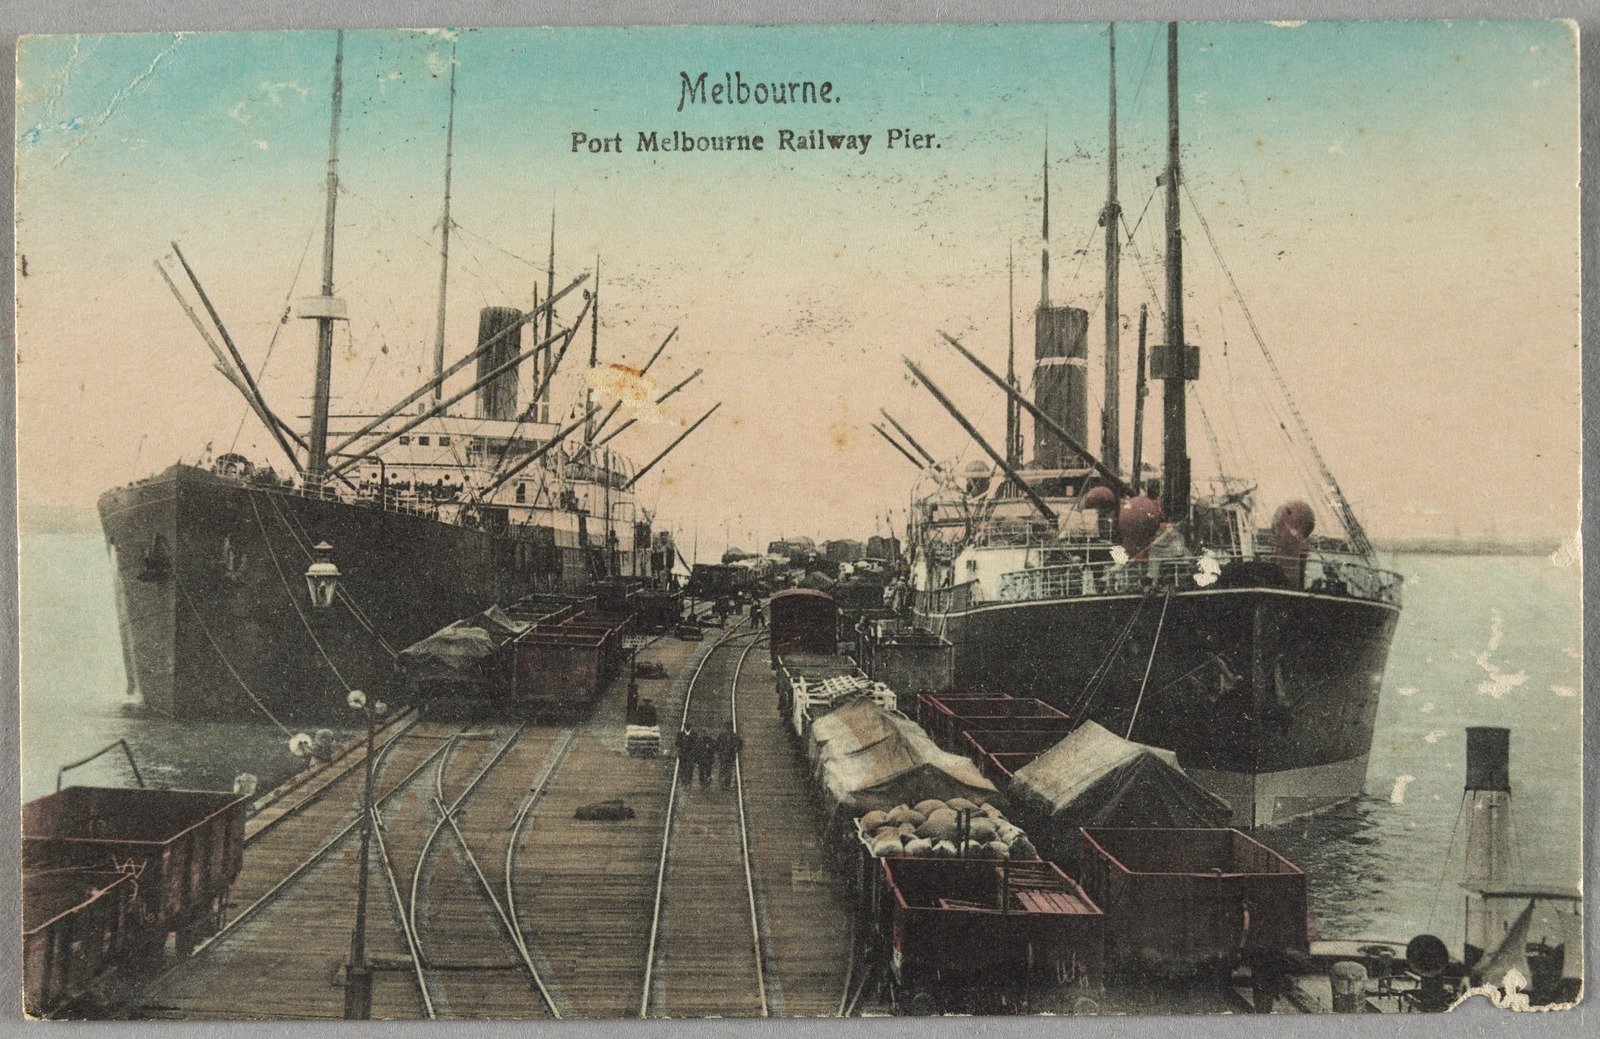
Port Melbourne, Railway Pier 1912
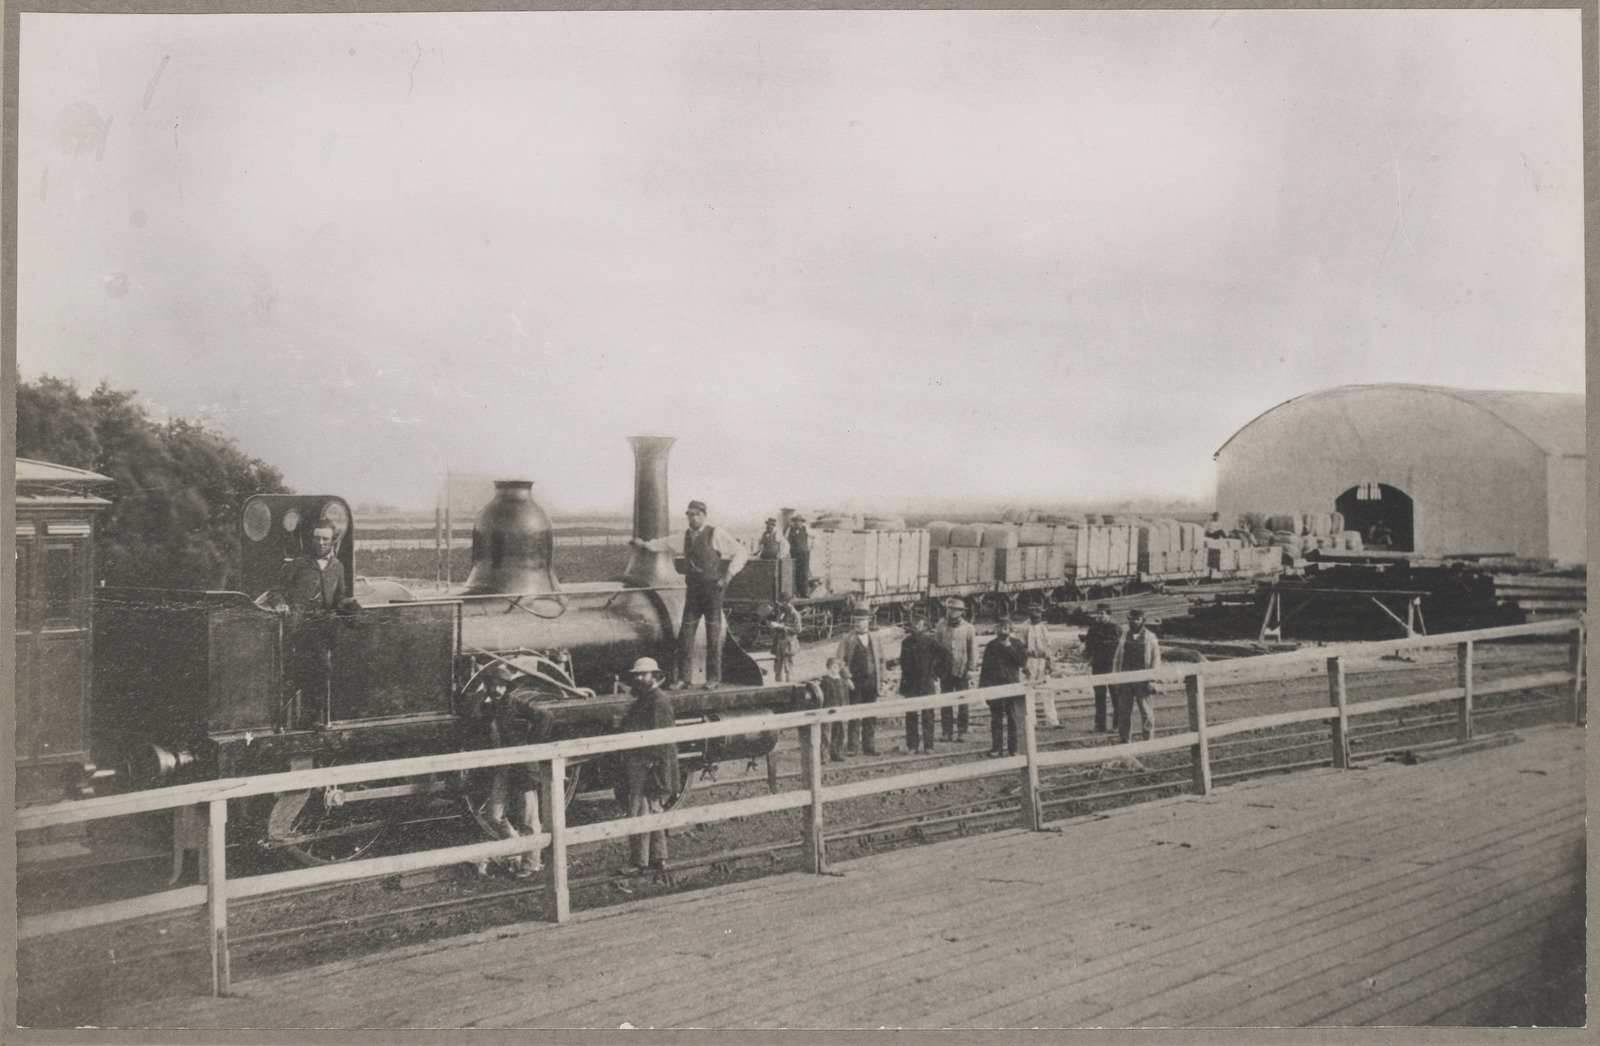
Sandridge (Port Melbourne) Station in January, 1862
Railway Pier, Port Melbourne 1908

Railway Reserve, Port Melbourne 1900
Railway Pier, Port Melbourne 1904
Port Melbourne, Railway Pier 1914


Lever & Kitchen factory at Port Melbourne 1939 1

Lever & Kitchen factory at Port Melbourne 1939 2
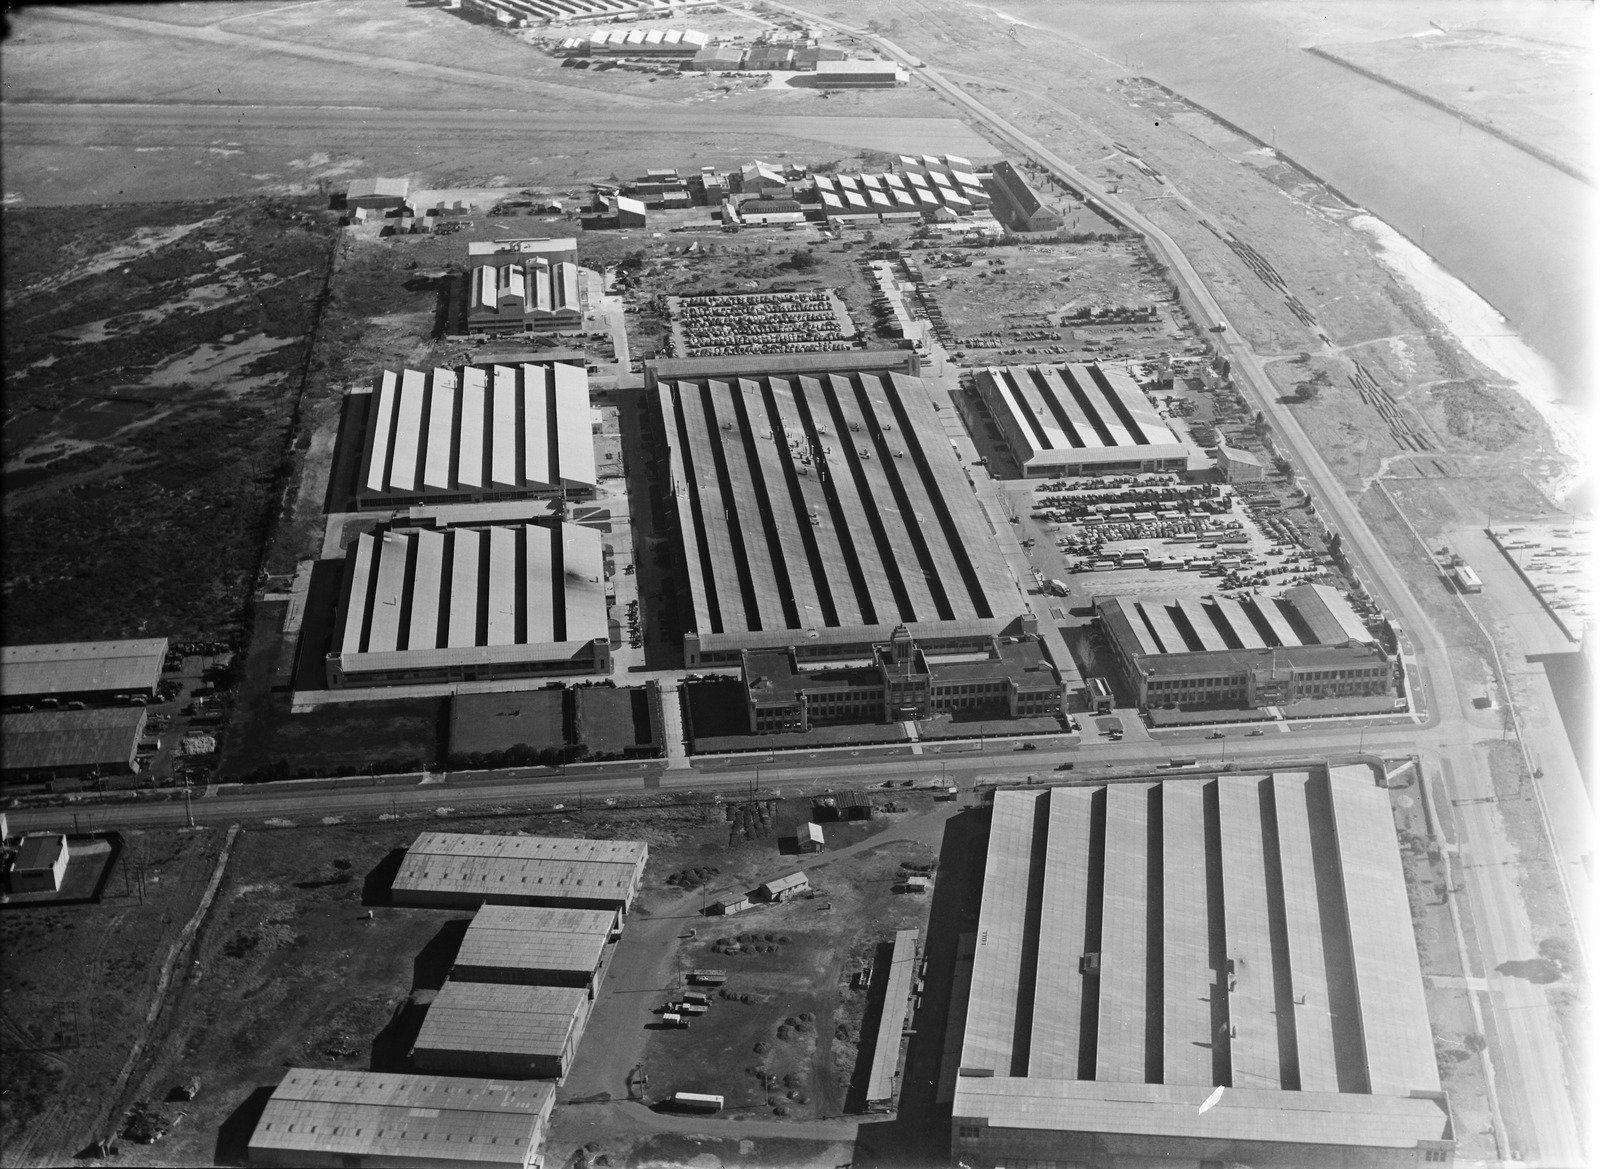
General Motors Holden factory at Port Melbourne 1

General Motors Holden factory at Port Melbourne 2
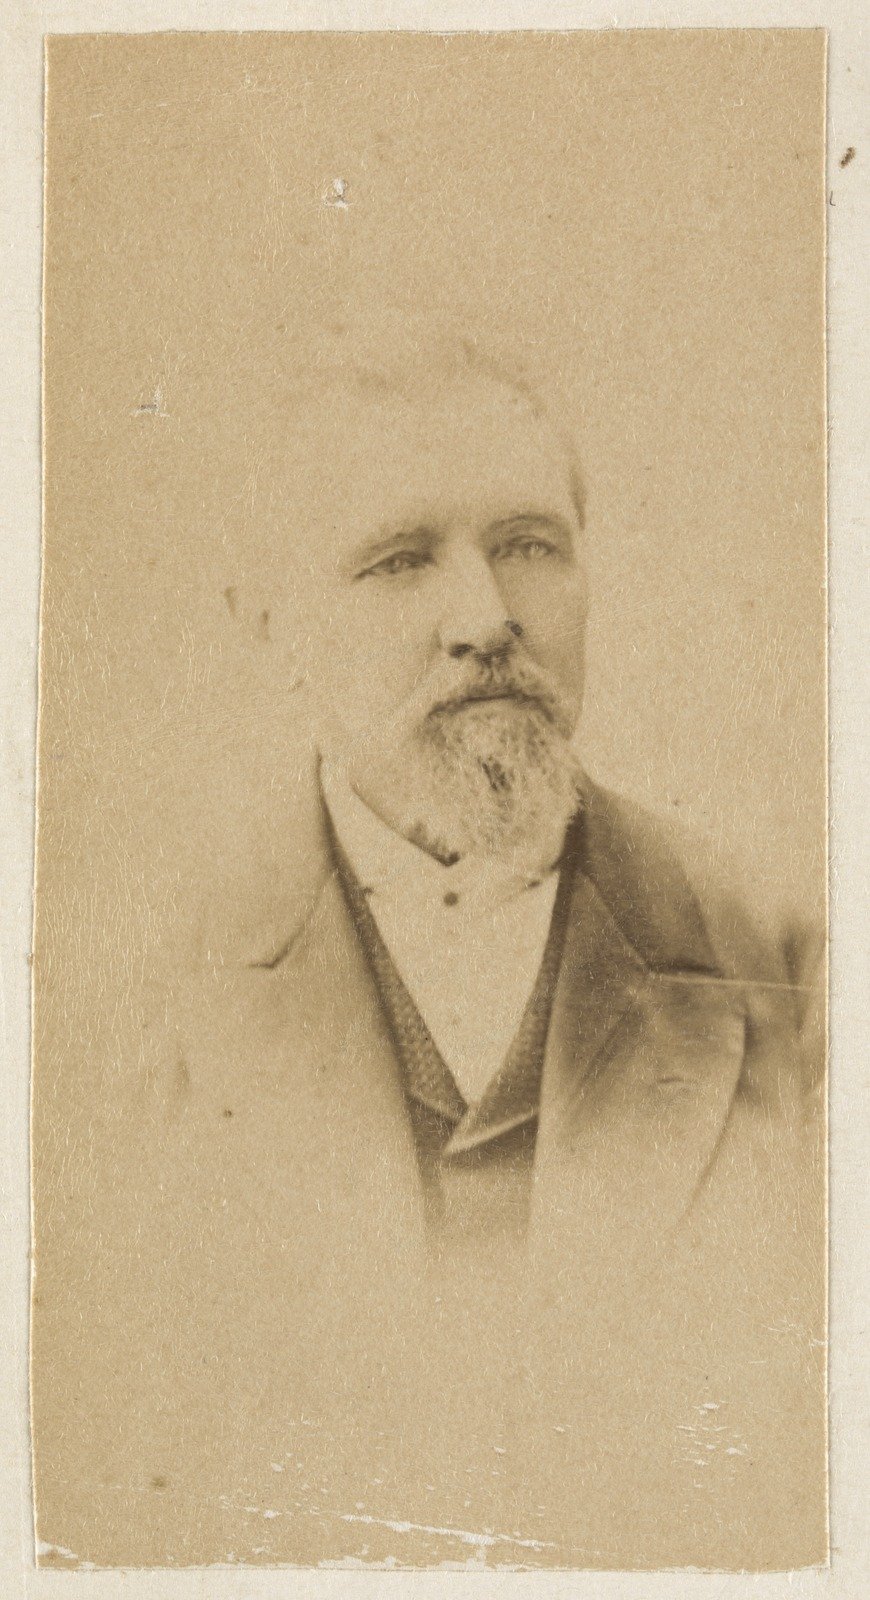
Mr. Swallow of Swallow & Ariell Port Melbourne 1870s